If you’ve ever felt like rubbing your eyes after scrolling on your iPhone for a while, you may need to change a few simple settings that will make your screen much easier to look at.
Beyond adjusting your brightness levels and using Dark Mode, your iPhone has so many settings that help you reduce eye strain. They come in handy if you’re still in the process of reducing your doomscrolling habits, so here’s what you need to know.
1
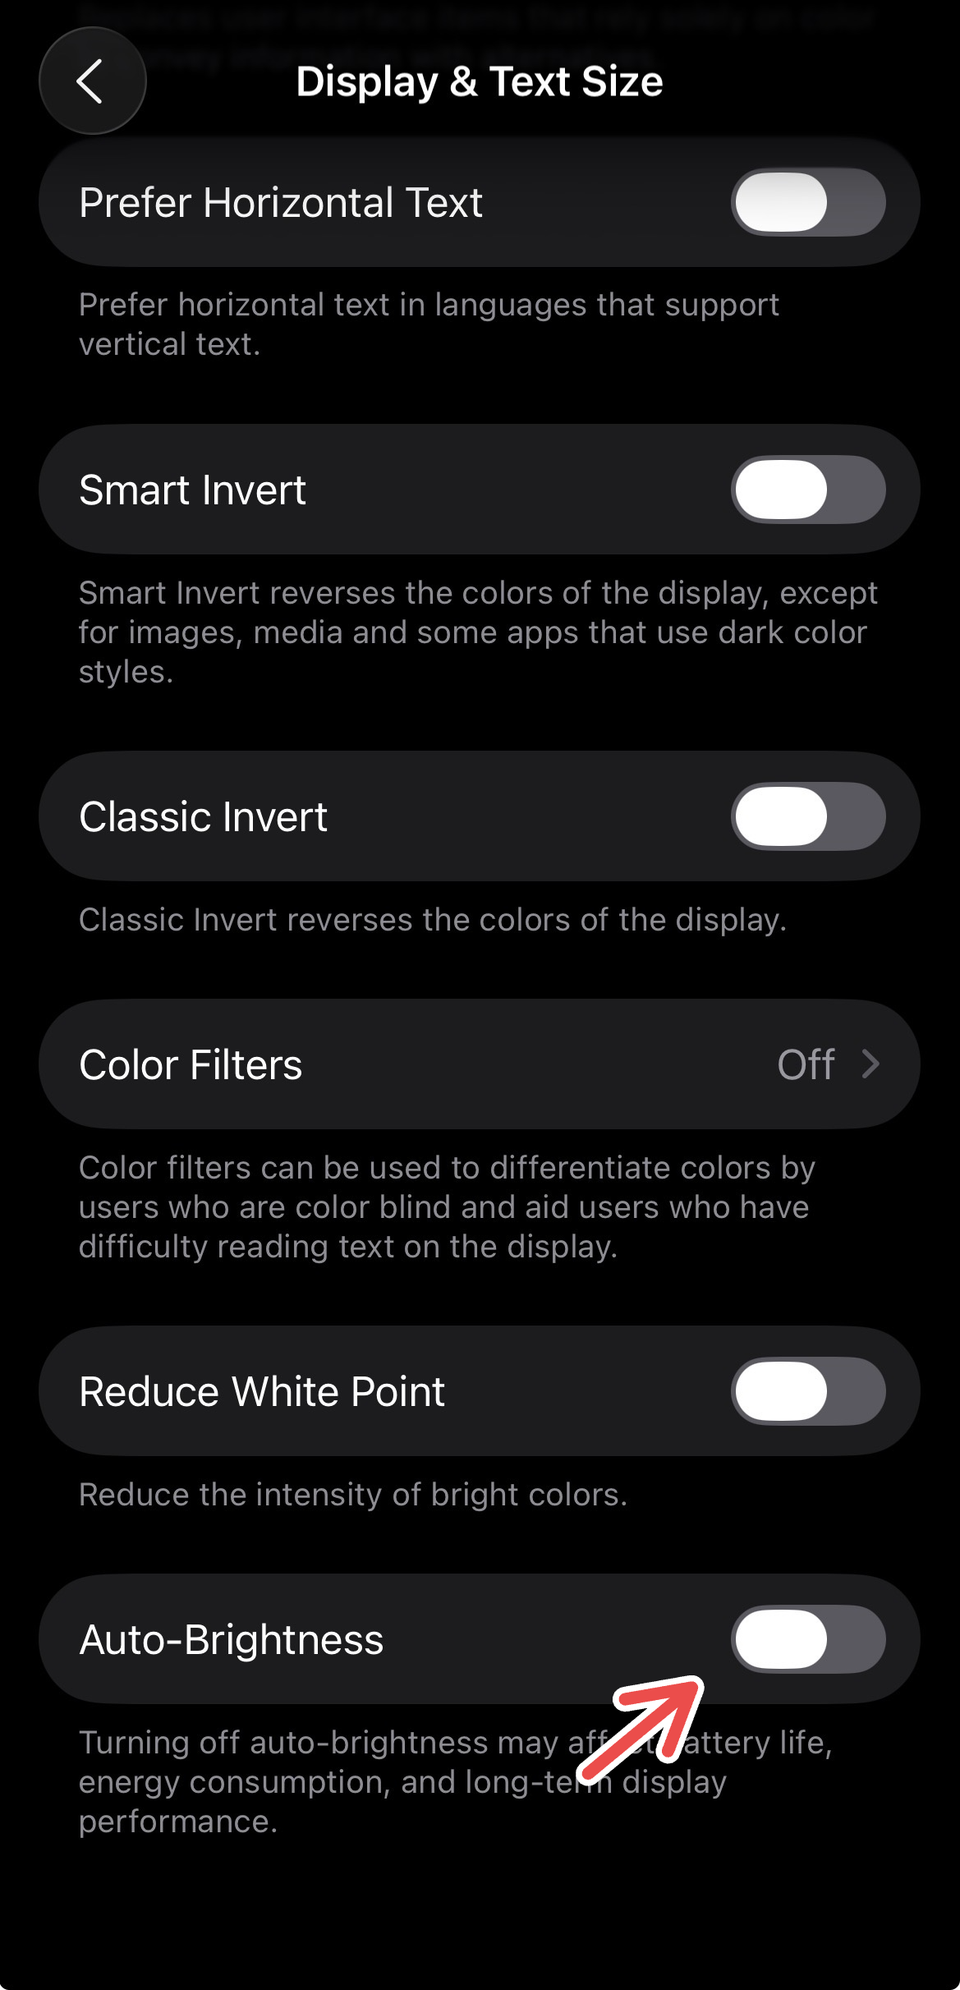
Switch off Auto-Brightness
A default display feature that is meant to help your screen and your eyes adjust better to your environment’s light is Auto-Brightness, which uses sensors to adjust the brightness to ensure you’re not straining your eyes to see what’s on your phone. While it’s great to have this feature on normally, it can also be annoying since it leads to your phone being dimmed when you’re in the sun, making it difficult to read your screen. This also means your brightness level goes up in the dark, and I’ve always had to constantly adjust my brightness levels to use my screen anyway.
To disable Auto-Brightness, go to Settings > Accessibility > Vision > Display & Text Size. Scroll to “Auto-Brightness” and toggle it off. Keep in mind that disabling this setting can affect your iPhone’s battery life and energy consumption in the long run, so it’s better to use it sparingly in special situations, like if you’re going out for a long period of time.
2
Enable Screen Distance
iPhone has a lot of underrated features that aren’t always utilized fully, but one of its most useful productivity features that is often underutilized is Screen Time. This communication and focus feature hosts many settings that help control how long you spend on your phone and other Apple devices.
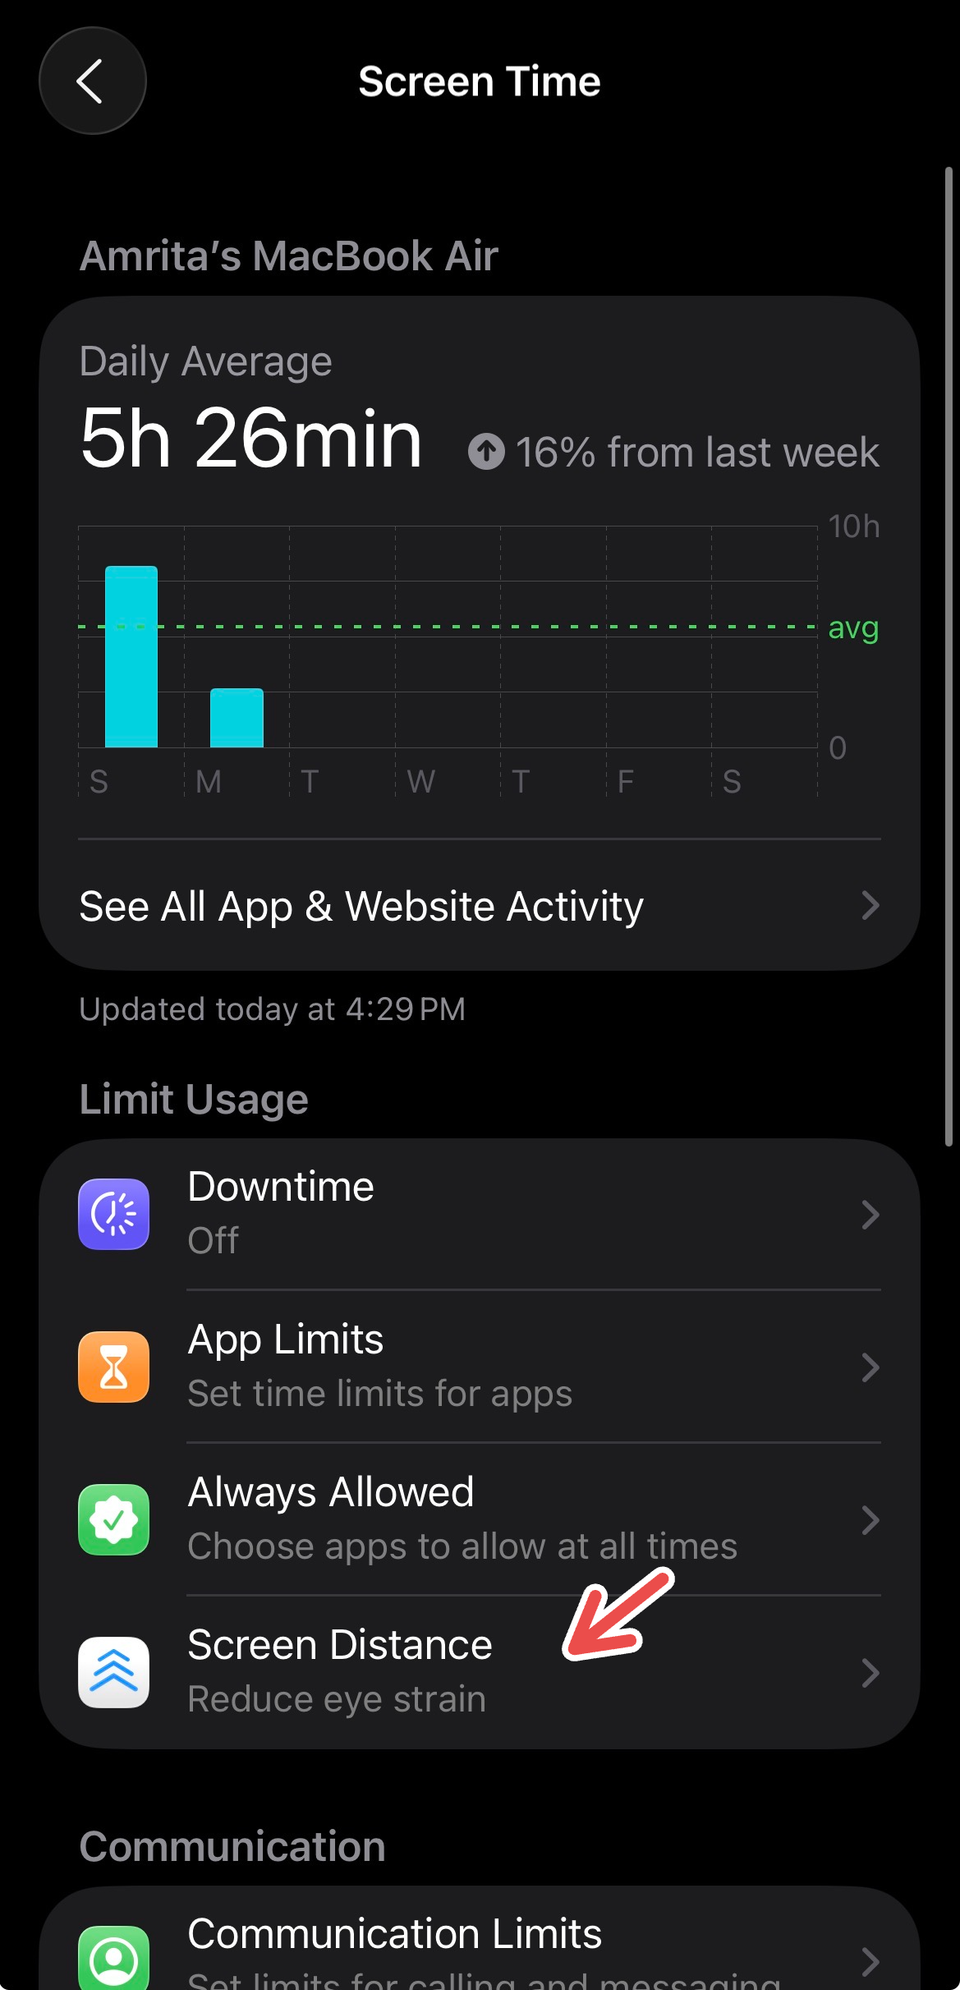
Screen Time also has a feature that can be critical to how you use your iPhone. This is Screen Distance, which, when enabled, alerts you when your iPhone is closer to your eyes than the recommended distance of 12 inches. Screen Distance is available for iPhone models that support Face ID.
To enable Screen Distance, go to Settings > Screen Time > Limit Usage > Screen Distance. You can then set it up using the instructions on the screen.
When you keep your iPhone closer than the recommended distance for a continuous period, you will get a Screen Distance alert prompting you to move your screen back. Once you reach the 12-inch mark, a check mark will appear, and you can tap “Continue” to go back to your screen.
I’ve been using Screen Distance for months now, and it may be one of my top iPhone features to date. Although it can be a little annoying to be reminded to keep your iPhone at a safe distance, the Screen Distance has saved me many times when I’m scrolling through my iPhone on my bed and unconsciously bringing it too close to my eyes.
3
Keep True Tone on
If you want to make the images on your iPhone appear more natural and less intense, you can enable True Tone. This display setting uses advanced sensors to automatically adjust the display’s color and intensity to match the surrounding ambient light. Disabling it will keep your screen display’s color and intensity constant, which can strain your eyes, especially in the dark.
Go to Settings > Display & Brightness > Brightness > True Tone and toggle it on. This setting is switched on by default, but if you accidentally disabled it before, you can always find it in Settings.
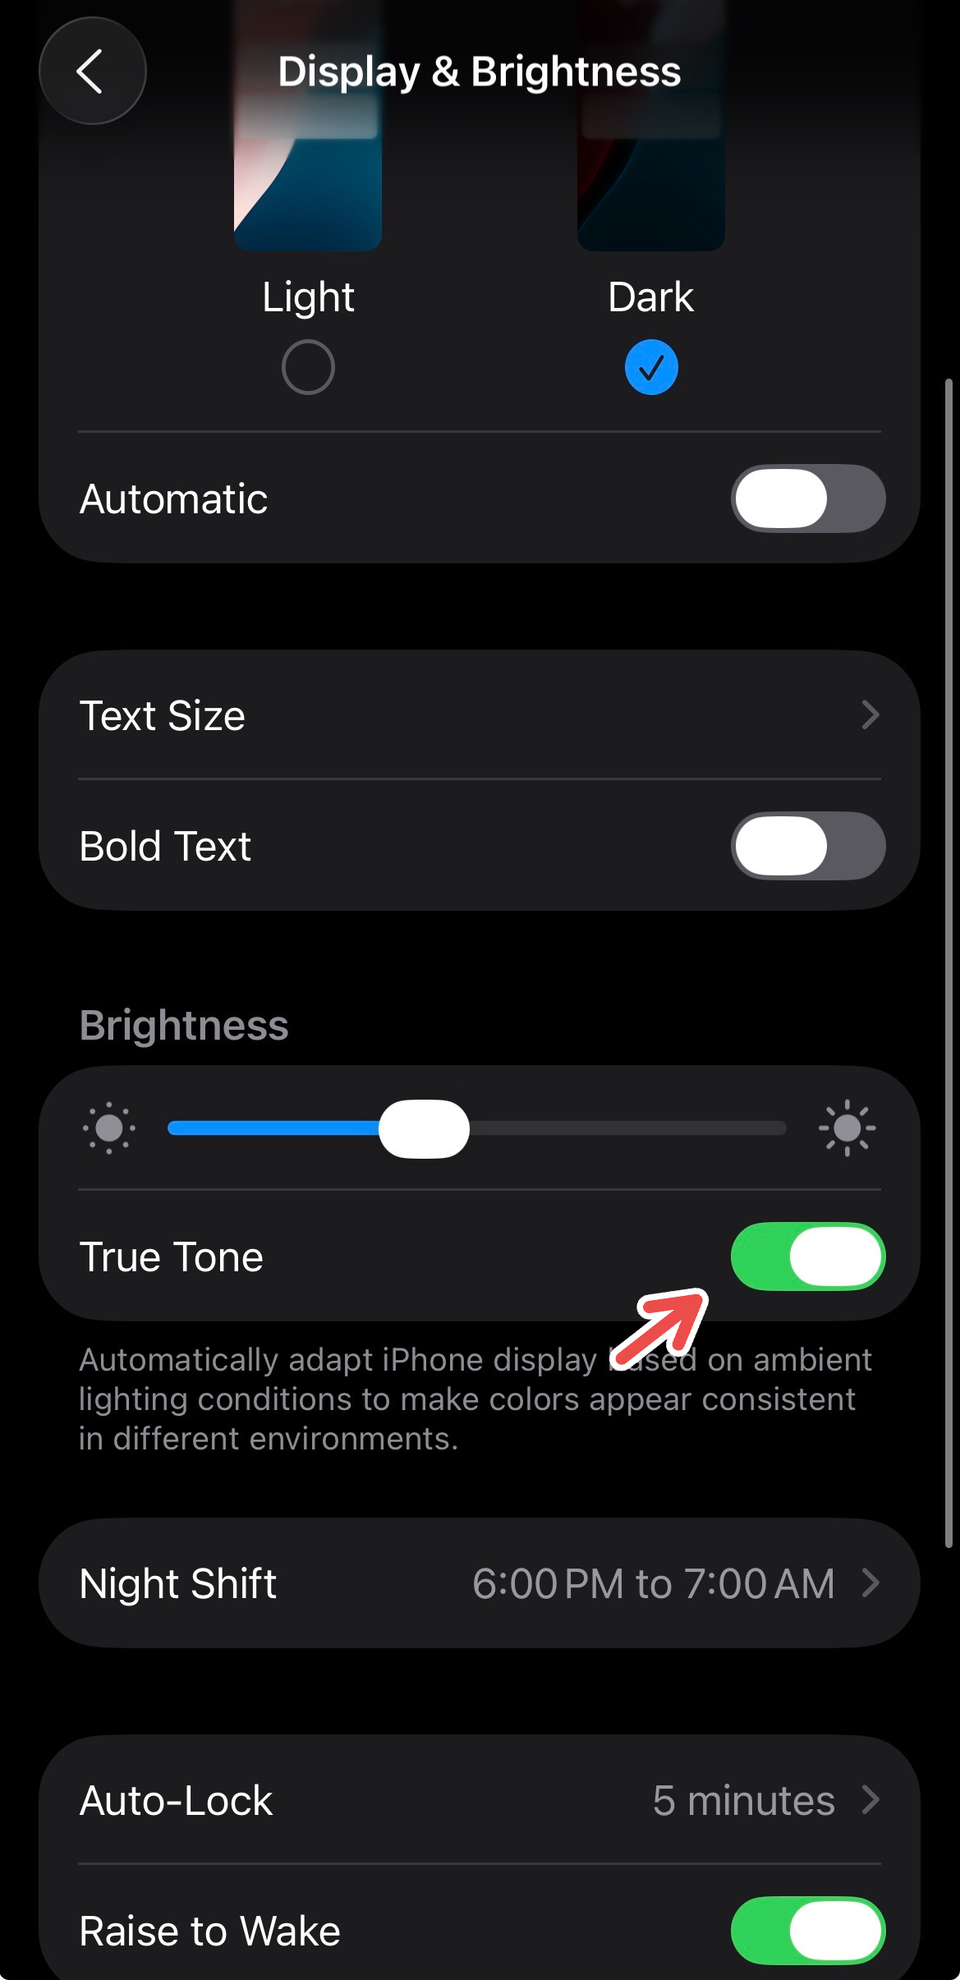
Under “Display & Brightness,” also make sure to tap on “Night Shift” to schedule it for better nighttime scrolling on your iPhone.
4
Increase font size for everything
Another way to reduce eye strain from continued screen usage is to increase your display text size. This changes the size of your font in Mail, Contacts, Calendar, Phone, Notes, and other apps that support Dynamic Type.
Dynamic Type is a system-level feature in Apple devices that allows users to adjust the size of visible text on their device to ensure readability and comfort.
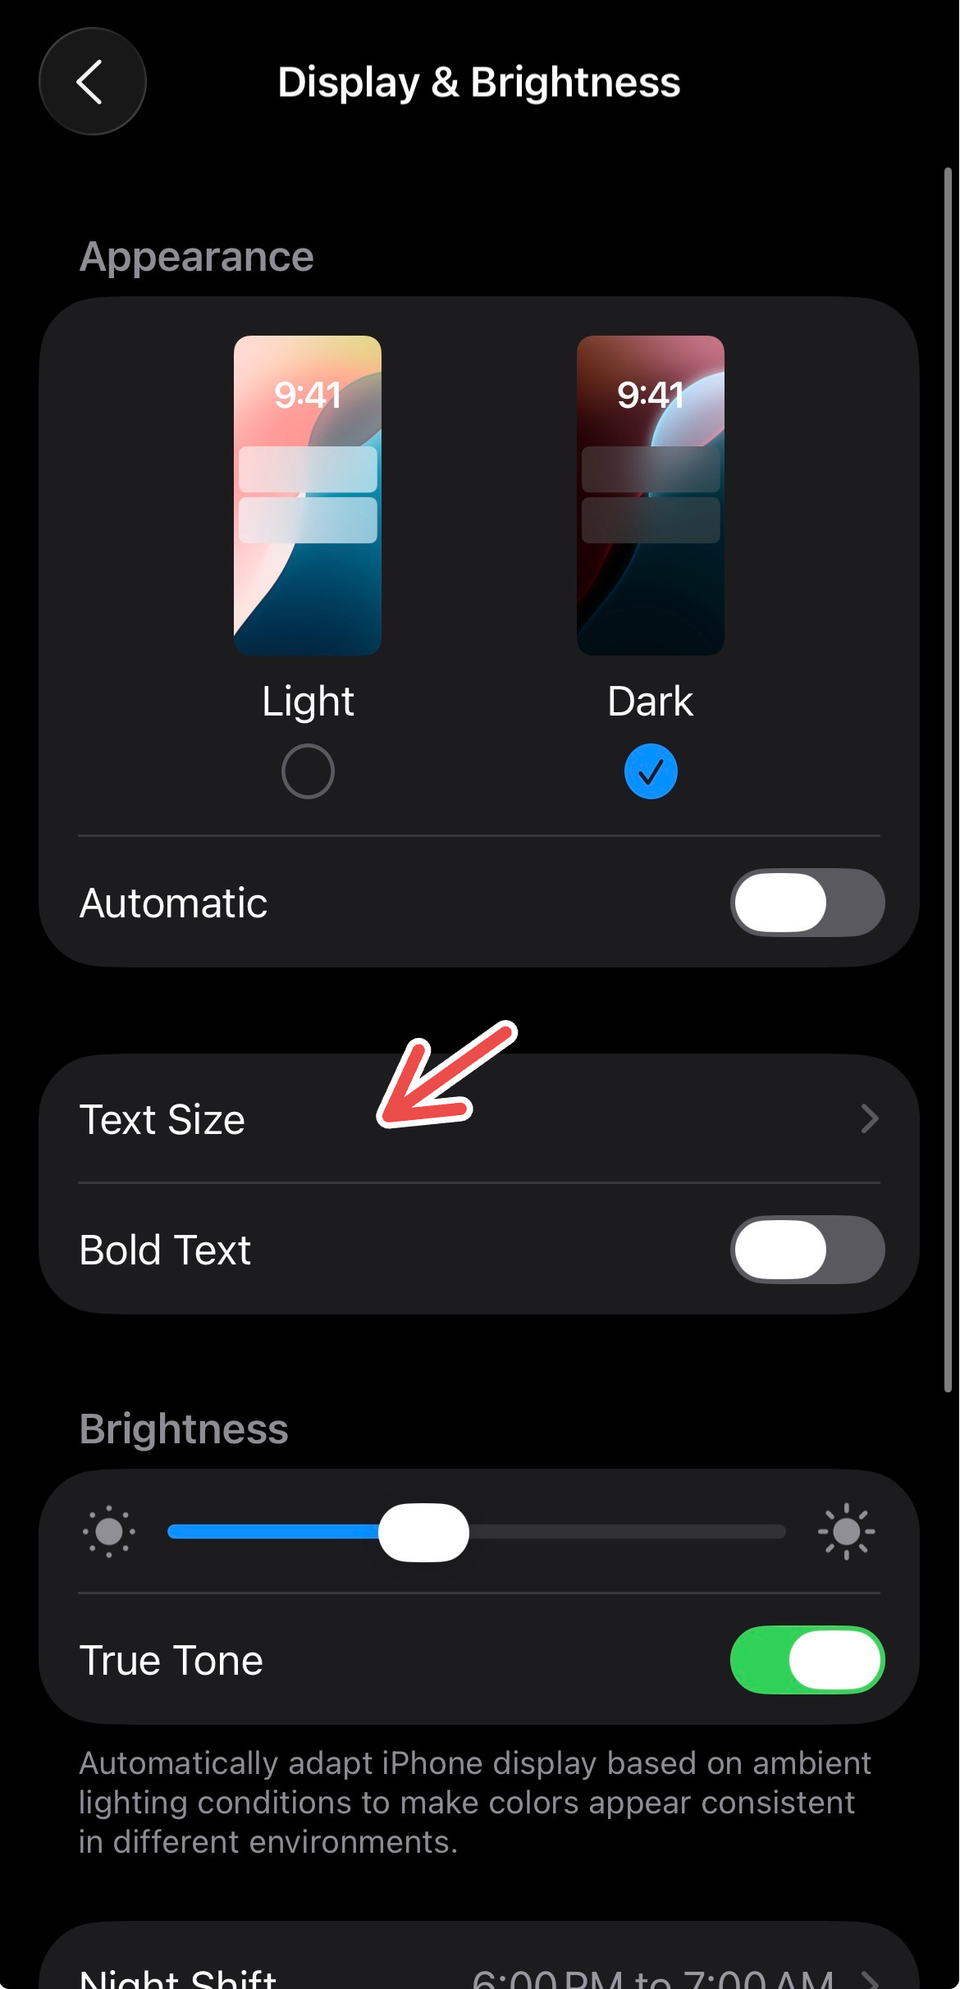
To adjust the font size for your device, go to Settings > Display & Brightness > Text Size. Using the scroll bar at the bottom of the screen, increase the font size until you find the ideal text size for your needs.
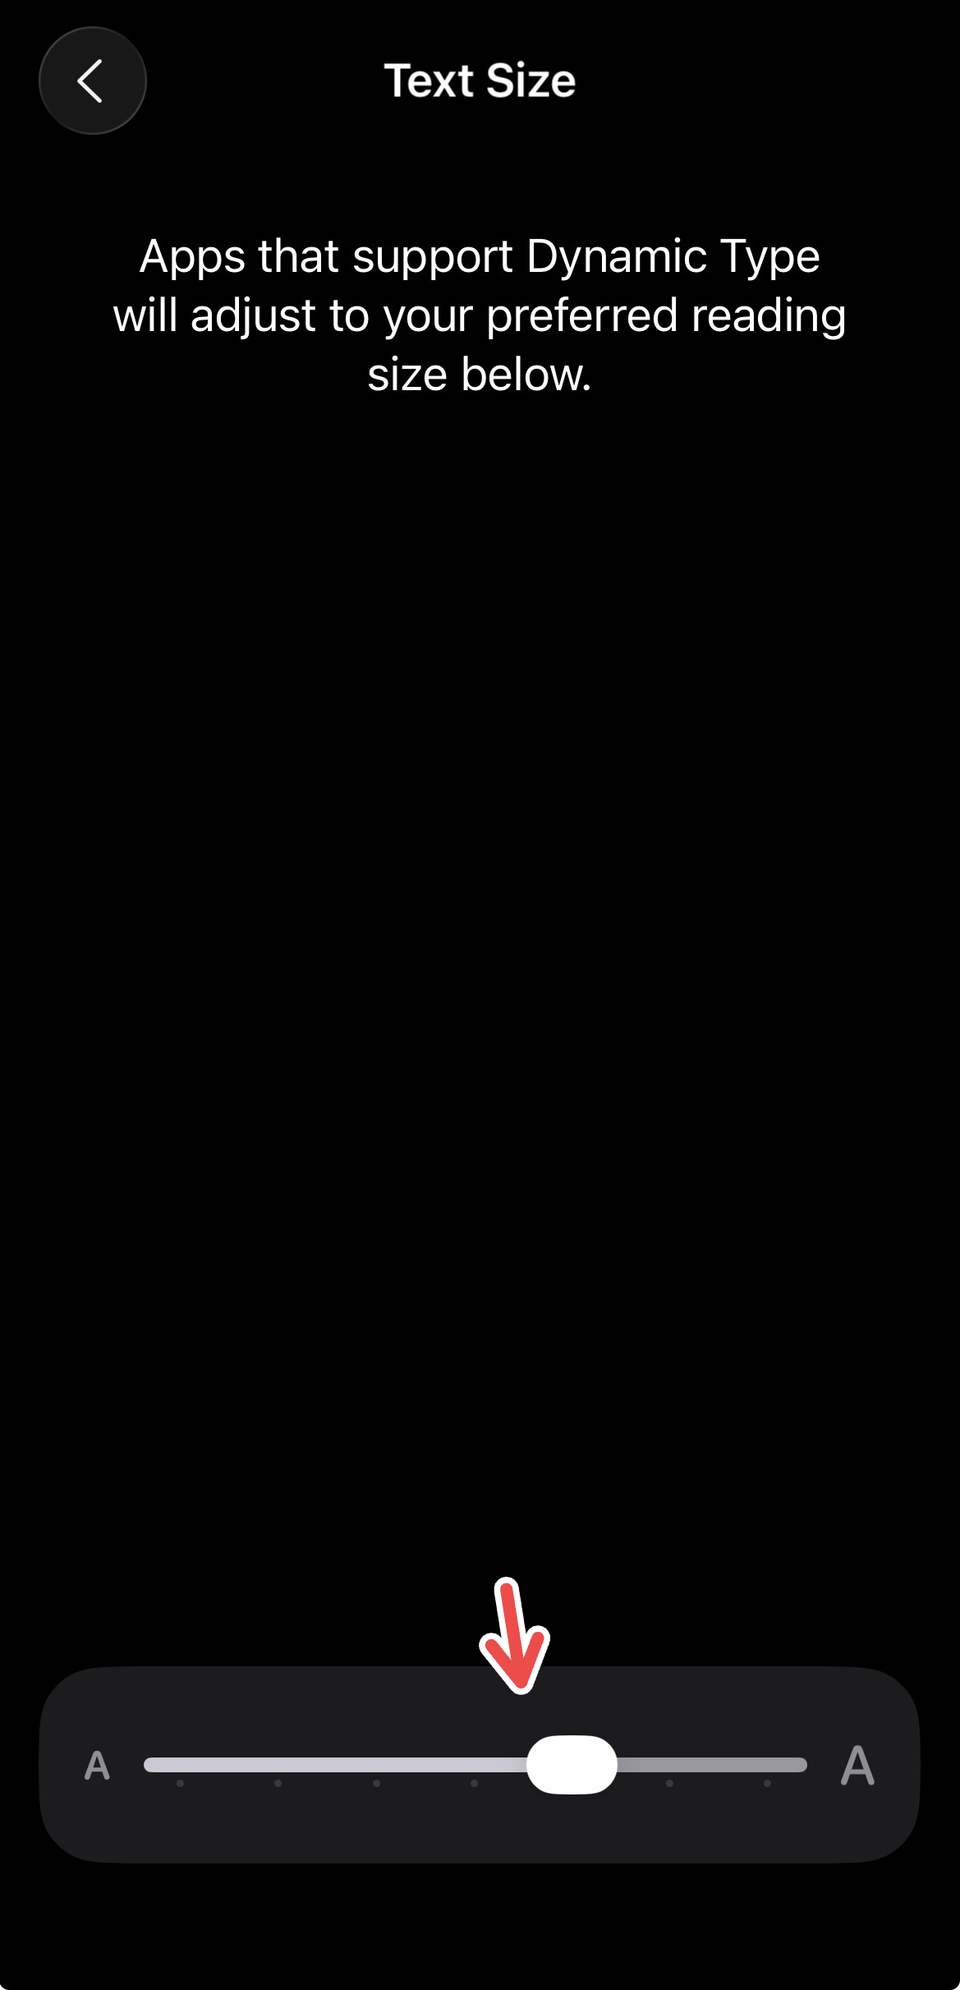
You can also add this setting to your iPhone’s Control Center to quickly adjust it depending on the time of day or app. To do so, swipe down on your home screen from the upper right corner. Long-press outside the Control Center to go to editing mode, then tap “Add a Control.” Search for “Text Size” and add it. Exit editing mode by tapping your screen. Now, you can use the Text Size bar to quickly adjust the font of supported apps without navigating to Settings every time.
5
Reduce White Point
If you find that your iPhone’s display colors seem too intense to look at sometimes, there’s a fix for that. Reducing the White Point on your phone can tone down the intensity of bright colors and make it easier to look at your screen. This feature is a game-changer, especially if you use your phone in the dark for a long time.
To adjust White Point, go to Settings > Accessibility > Vision > Display & Text Size > Reduce White Point and toggle it on. You can adjust the intensity of the setting using the scroll bar shown once you enable the setting.
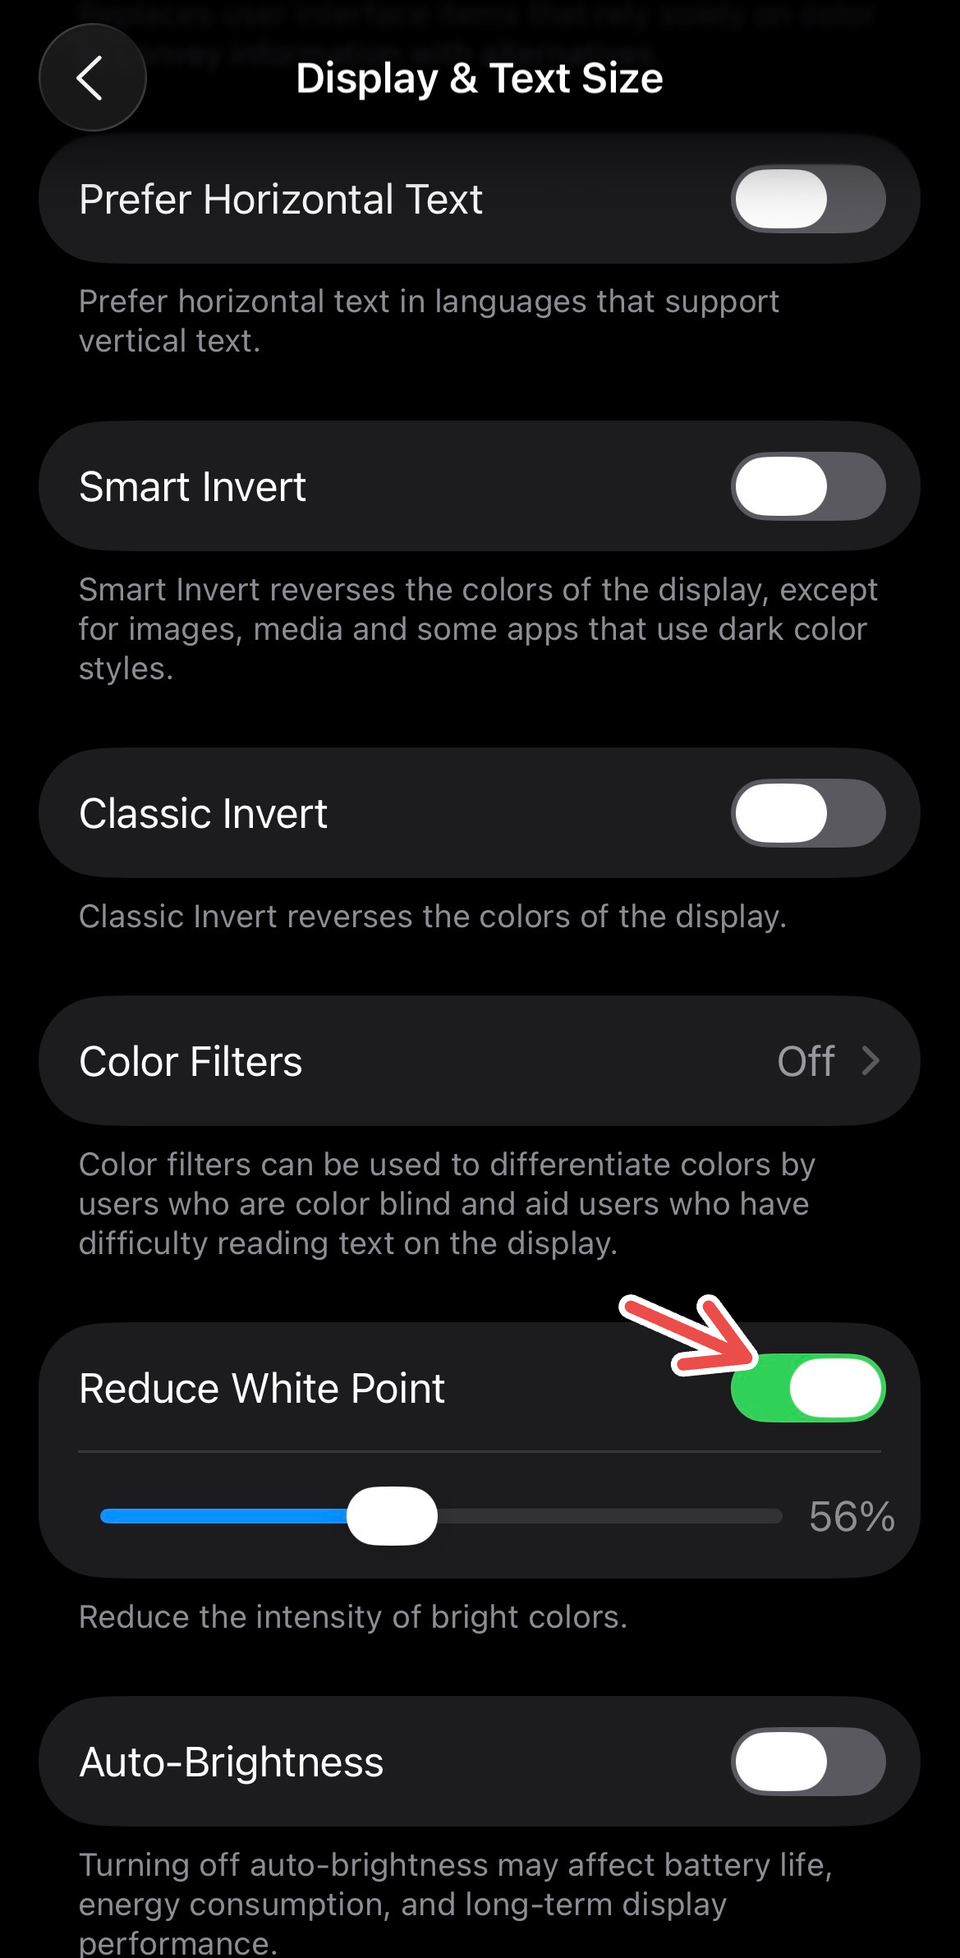
If you’re ready to commit to it, you can also play around with your iPhone’s Color Filters to transform your display game. It also helps to set up and take scheduled screen breaks (Screen Time and app blockers can come in clutch here) to prevent eye strain.