When you think of accessibility settings, you might assume they’re only meant for specific needs, but that’s far from the truth. Windows offers several useful accessibility options that are ideal for customizing your PC’s appearance, improving comfort, and even operating everything completely hands-free.
You’ve probably experienced typing an entire password in the wrong case and wondering why it keeps showing as incorrect. The same issue can happen when entering numbers on the numeric keypad, only to realize Num Lock has been off the whole time.
Windows has a simple feature that can save you from such frustrations. You can enable alerts for the Caps Lock, Num Lock, and Scroll Lock keys, so the system plays a tone each time one of them is toggled. That way, you’ll immediately know if you accidentally switch one on or off while typing.
To enable this, head to Settings > Accessibility > Keyboard and turn on the Toggle keys option. Windows will then make an alert sound every time you press one of the Lock keys.

7
Increase Text Size for Easier Reading
If you often find yourself leaning closer to the screen or squinting to read small text, it may be time to adjust your settings for better visibility.
Windows includes a built-in option to increase text size across the system and make it much easier on your eyes. This feature enlarges text in menus, dialog boxes, and documents while keeping everything else in proportion.
To make the change, head to Settings > Accessibility > Text Size. Move the slider to your preferred level and check the live preview in the Text size preview box. Once the text looks comfortable, click Apply. Windows will instantly update the text across the system, and you’ll be able to work for long periods without straining your eyes.

6
Turn on Visual Notifications for Alerts
Staying on top of alerts that show in the notification center is usually easy, but what about the system sounds that play without any visual cue? For example, Windows plays an alert when you connect or eject a USB drive, and similar chimes signal error messages or low‑battery warnings.
If you prefer to keep your PC muted or often work in noisy environments, it’s easy to miss these alerts. To avoid that, Windows can display visual cues alongside sound alerts. This setting doesn’t affect the regular notifications you receive from apps, so you don’t have to worry about being overwhelmed by frequent flashes.
Head to Settings > Accessibility > Audio, then use the dropdown menu next to Flash my screen during audio notifications to choose your preferred option. You will see three options: Flash the title bar of the active window, Flash the active window, and Flash the entire screen.

5
Enable Live Captions for Any Audio or Video
Most streaming apps, such as Netflix, Prime Video, and YouTube, include built-in caption options. But many videos embedded on websites or clips shared through messaging apps don’t include captions. That’s where Windows’ Live Captions feature can fill the gap.
Live captions are automatically generated subtitles for any audio or video playing on your PC—be it a movie, a voice message, or even a video call. The captions appear in real time, and you can customize their color, size, and text style.
To enable the Live Captions feature, go to Settings > Accessibility > Captions, and turn on the toggle. Then, choose your preferred caption style or edit the existing one.
From there, select a caption style or customize the existing one, with a live preview showing how it will look. Once set up, use the Windows + Ctrl + L shortcut to turn Live Captions on or off anytime.

Live captions on Windows are especially helpful when watching content in noisy environments or when the audio isn’t clear. They also support multiple languages, including English, Spanish, French, and German.
4
Enter Text Hands-Free With Voice Typing
Typing long emails or reports for hours can get exhausting. If you’ve ever wanted a break from your keyboard, Windows’ Voice Typing feature is a great alternative. It lets you dictate text instead of typing manually, which can make the process faster and much less tiring.
Unlike many accessibility tools, Voice Typing requires no additional setup. Simply press Windows + H to activate it and start speaking. If you need to pause and make corrections with the keyboard, feel free, then press the same shortcut to resume voice typing.
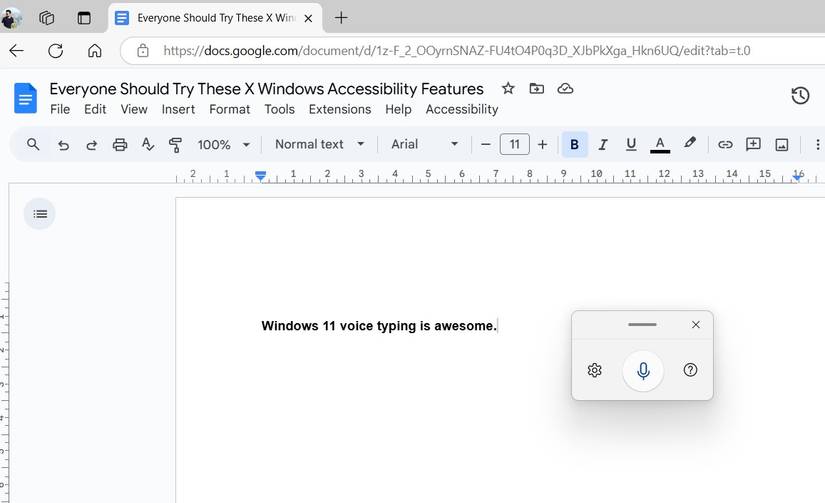
By default, Windows won’t add any punctuation, but you can enable it by clicking the gear icon in the Voice Typing pop‑up and turning on Automatic punctuation. It’s especially useful when you’re brainstorming or trying to take notes while reading something.
3
Control Your PC With Voice Commands
Voice Typing is handy, but Windows lets you take it a step further by controlling your entire PC with your voice. You’ll be able to navigate apps, open files, and perform repetitive actions much faster—without ever touching your keyboard or mouse.
To enable this feature, go to Settings > Accessibility > Speech and toggle on Voice Access. The first time you turn it on, Windows will prompt you to download a speech model for offline recognition. After the setup, use Windows + Ctrl + S to switch Voice Access on or off as needed.

Once enabled, issue commands such as “Open Start,” “Open File Explorer,” or “Open Chrome” to launch apps instantly. For mouse control, say “show grid,” and a numbered overlay will appear. Then, simply call out the number where you want to click, and Windows will move the pointer for you.
Once you get the hang of all the voice commands to navigate and control your PC, it’s hard to go back. It’s ideal for when you want to operate your laptop from a distance, for example.
2
Customize the Mouse Pointer
If you love customizing your Windows PC, the Accessibility menu hides a few useful options for changing the look of your mouse pointer. Go to Settings > Accessibility > Mouse pointer and touch to see all available choices.

You can increase the pointer size, which is helpful on large or high‑resolution monitors where the default cursor can be easy to lose. The Inverted option is another useful setting—it automatically switches the pointer to a high‑contrast color that stands out against any background. Try choosing a custom color to match your theme or make the pointer more visible.
1
Apply High Contrast Themes for Better Visual Accessibility
Windows 11 includes the familiar dark and light themes, but if you spend long hours on your PC or work in bright environments, switching to a high‑contrast theme can make everything easier to read. These themes enhance the distinction between text, backgrounds, and interface elements, improving overall clarity.
To enable one, navigate to Settings > Accessibility > Contrast themes. You’ll find options like Aquatic, Desert, Dusk, and Night sky. Select a theme from the dropdown menu and click Apply to see it in action. For more control, use the Edit option to customize colors for text, backgrounds, hyperlinks, and other elements.

Windows is full of accessibility features that everyone can find a use for. From customizing text size and mouse pointers to typing emails using your voice, you’ll find plenty of Windows features that save time and make your computer more enjoyable to use.