Windows mostly crash due to faulty RAM or some other hardware issue, but what if I tell you that a simple file of just a few KB can also crash your system and leave you with a BSOD screen? I’m talking about the OSDATA file. Here’s everything you need to know about it.
What’s the OSDATA File?
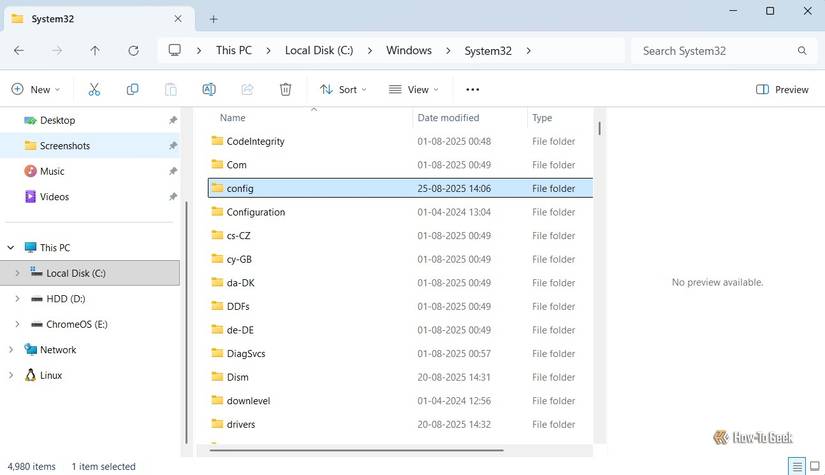
The Windows OS you use is the result of millions of files working in the background. All of these files are categorized into different types and stored in different folders on your Windows installation drive. One of these is the config folder, which you can find by navigating to “C:\Windows\System32.”
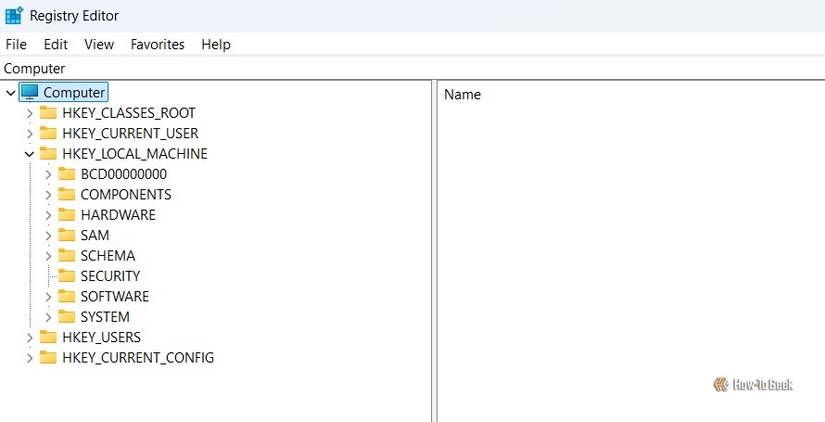
The config folder on Windows contains all the Windows registry hives, which are responsible for the proper functioning of Windows. If any of these files become corrupted or go missing, Windows will fail to boot, and you may experience issues such as a BSOD. I’d recommend that you open the Registry Editor and expand the HKEY_LOCAL_MACHINE key. Here, you will find all the keys that are stored in the config folder.
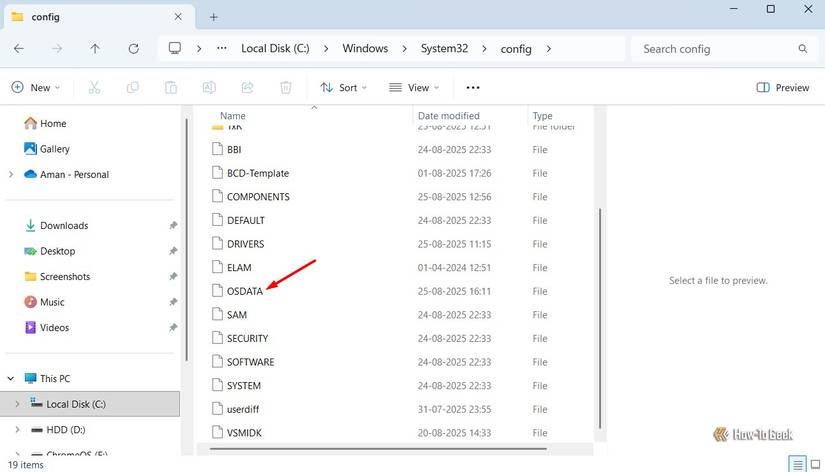
Anyway, the OSDATA file is also part of the Windows registry hive, but it isn’t available in the config folder by default. It’s essentially an additional registry hive that is used to store data related to Xbox components.
While I’m going to show you how to recover from the BSOD caused by OSDATA, I would still recommend you take the necessary measures to ensure your data is safe in case Windows fails to boot even after applying the recovery fix. Make sure to create a backup of your computer and a restore point to easily recover your data.
So, when you open the config folder, right-click on an empty space, choose “New,” select “Text Document,” and name that file OSDATA, Windows starts considering this file as a registry hive. You will see it as a new folder inside the HKEY_LOCAL_MACHINE key, though it will be completely empty.
However, when you open the file using Notepad, add any random data inside it, and save the file, Windows will fail to read that data and will think that the file has been corrupted. Since the OSDATA file is part of the Windows registry hive and contains some data that Windows is unable to read, your computer will fail to boot and will show the BSOD.
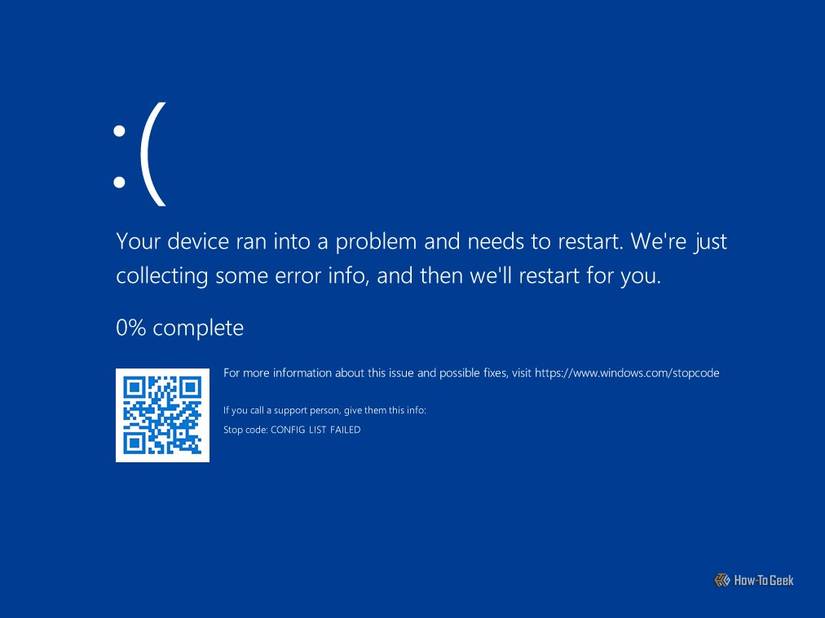
The stop code that appears on the BSOD screen will vary depending on whether you have created a folder or a file. If you have created a file named OSDATA, the stop code will be BAD SYSTEM CONFIG INFO. If you have created a folder named OSDATA, you will see a BSOD with the stop code CONFIG LIST FAILED. Unlike the OSDATA file, the OSDATA folder doesn’t need to contain any data to trigger the BSOD.
Windows will continue to restart your computer, but with every restart, you will see the BSOD. You’ll have to delete the OSDATA file or folder you created to get rid of the BSOD. However, you may wonder how you’re going to do this since you aren’t able to boot into Windows.
How to Fix the BSOD
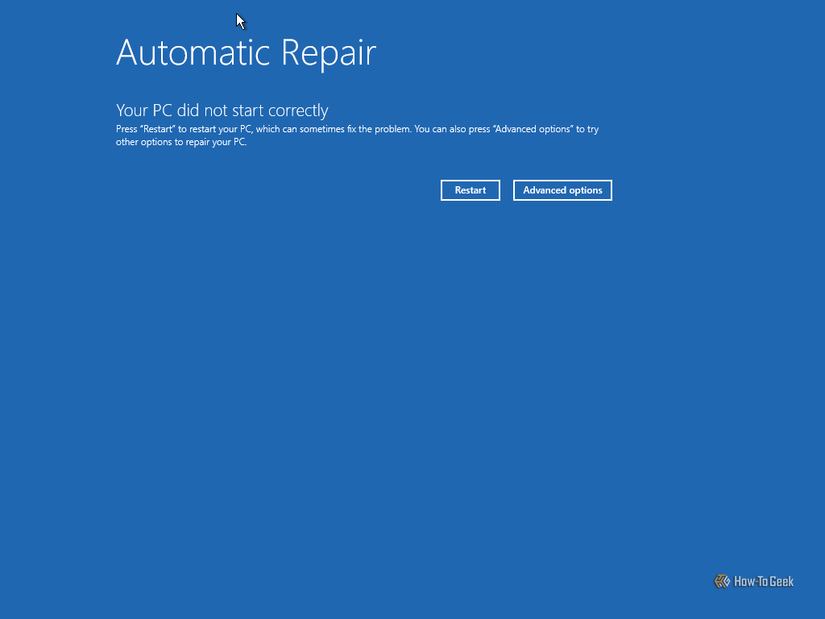
After a few failed attempts to properly boot into Windows, your computer will boot into the Automatic Repair window. Here, you need to click the “Advanced Options” button.
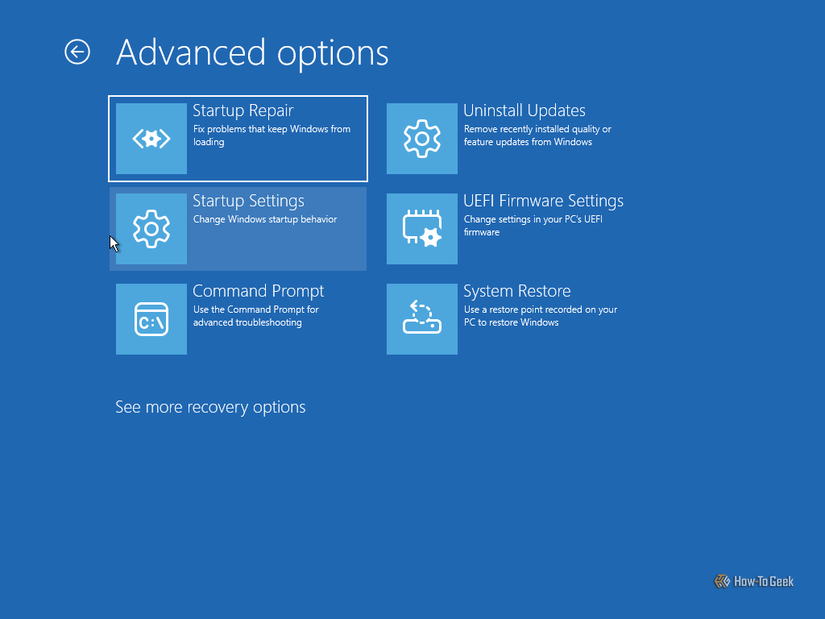
Then, choose Troubleshoot > Advanced Options > Command Prompt.
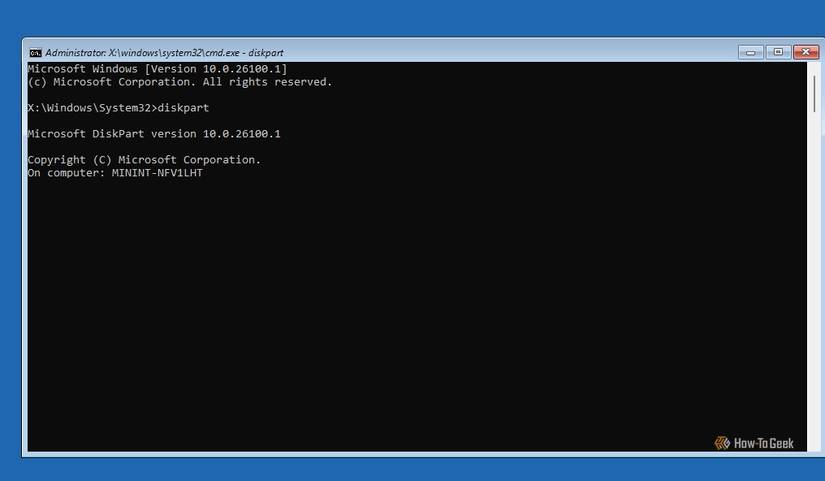
In the Command Prompt window, type the diskpart command and press Enter.
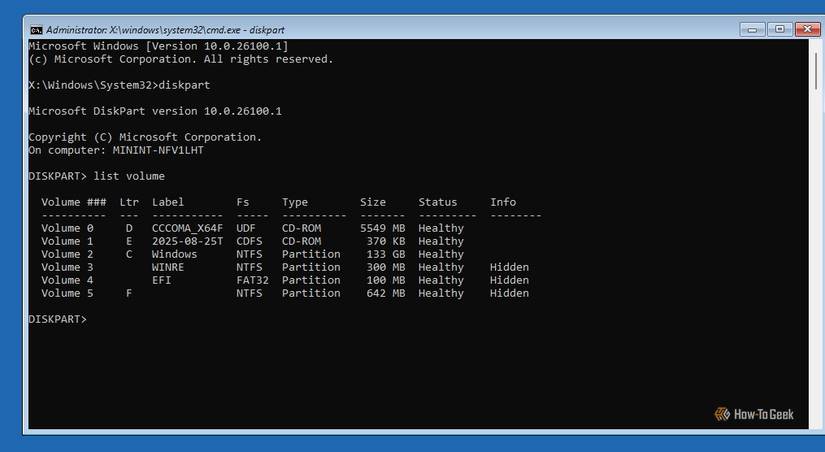
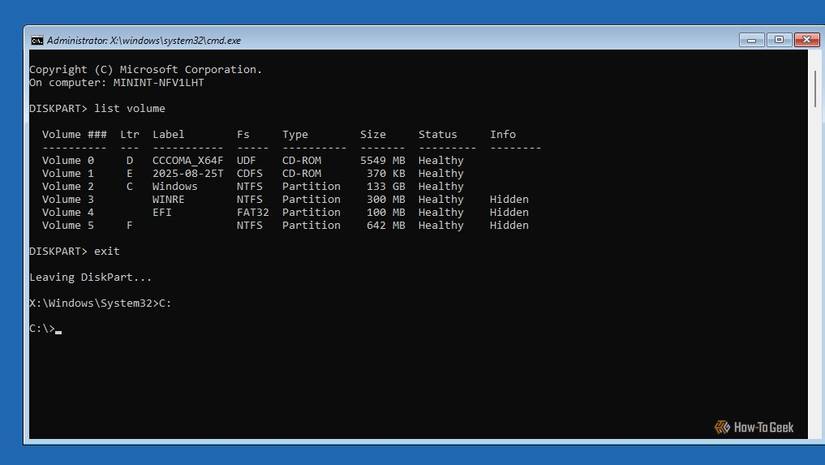
Type list volume and press Enter. This will display all the volumes installed on your computer. Take note of the partition letter where you have installed Windows. In my case, it’s the C drive.
Execute the exit command to get out of the Diskpart window. Then type the Windows partition name followed by a colon. For me, the command looks like this:
C:
Use the cd command to navigate to the config folder. Here’s how the command looks for me:
cd C:\Windows\System32\config
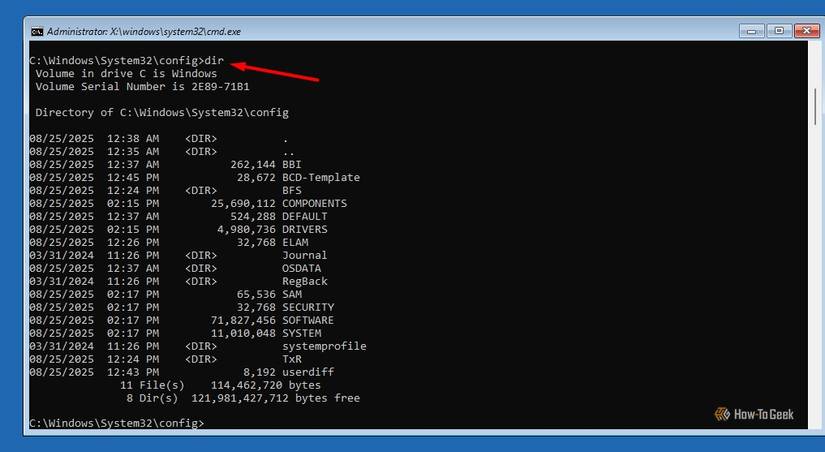
Once you’re inside the config folder, type dir and press Enter to view all the contents of the config folder.
Finally, type del OSDATA and press Enter. Type Y to confirm your decision. If you created a folder named OSDATA, then type rmdir /s OSDATA and press Enter. Type Y to confirm.
The OSDATA file should not be deleted. Still, to confirm, execute the dir command again and check the contents of the config folder. The OSDATA file will not be present.
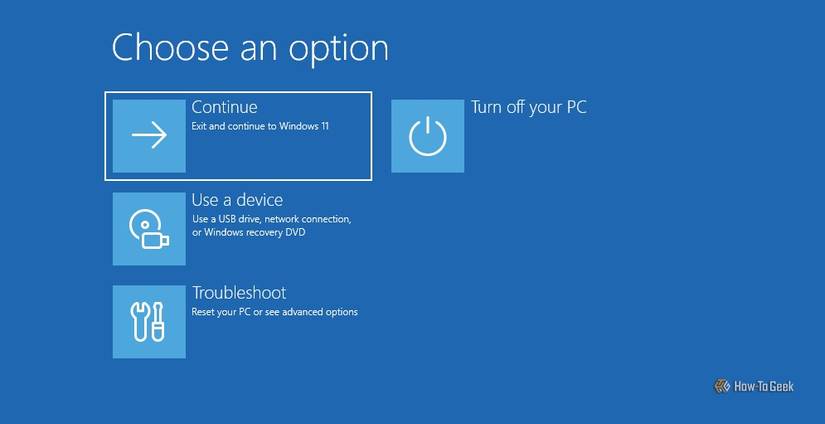
Type exit and press Enter to close the Command Prompt window. Then select the “Continue” option to boot into Windows 11.
This was everything you needed to know about the OSDATA file, how to cause a BSOD using it, and how to recover from the resulting BSOD. There could be various situations when you might want to force a BSOD. For instance, I triggered a BSOD on my computer to test Microsoft’s new Quick Machine Recovery feature.
This can also be used for fun purposes, like pranking your friends. Whatever the reason you use the trick for, I would highly recommend you take the necessary measures mentioned above.
