One of the coolest new features on the iPhone 17 series is the ability to capture video from both front and back cameras at the same time. Apple has technically offered something called multi-capture since iOS 13, but only in third-party camera apps. Dual Capture brings that same functionality to the iPhone’s official camera app.
Those of you with an iPhone 17 may be wondering how you actually use this feature, and the truth is that it’s actually quite simple. So if you want to be able to capture your own reactions while you film, here’s how you turn on iPhone 17’s Dual Capture video setting.
1. Open the iPhone Camera app

(Image: © Tom’s Guide)
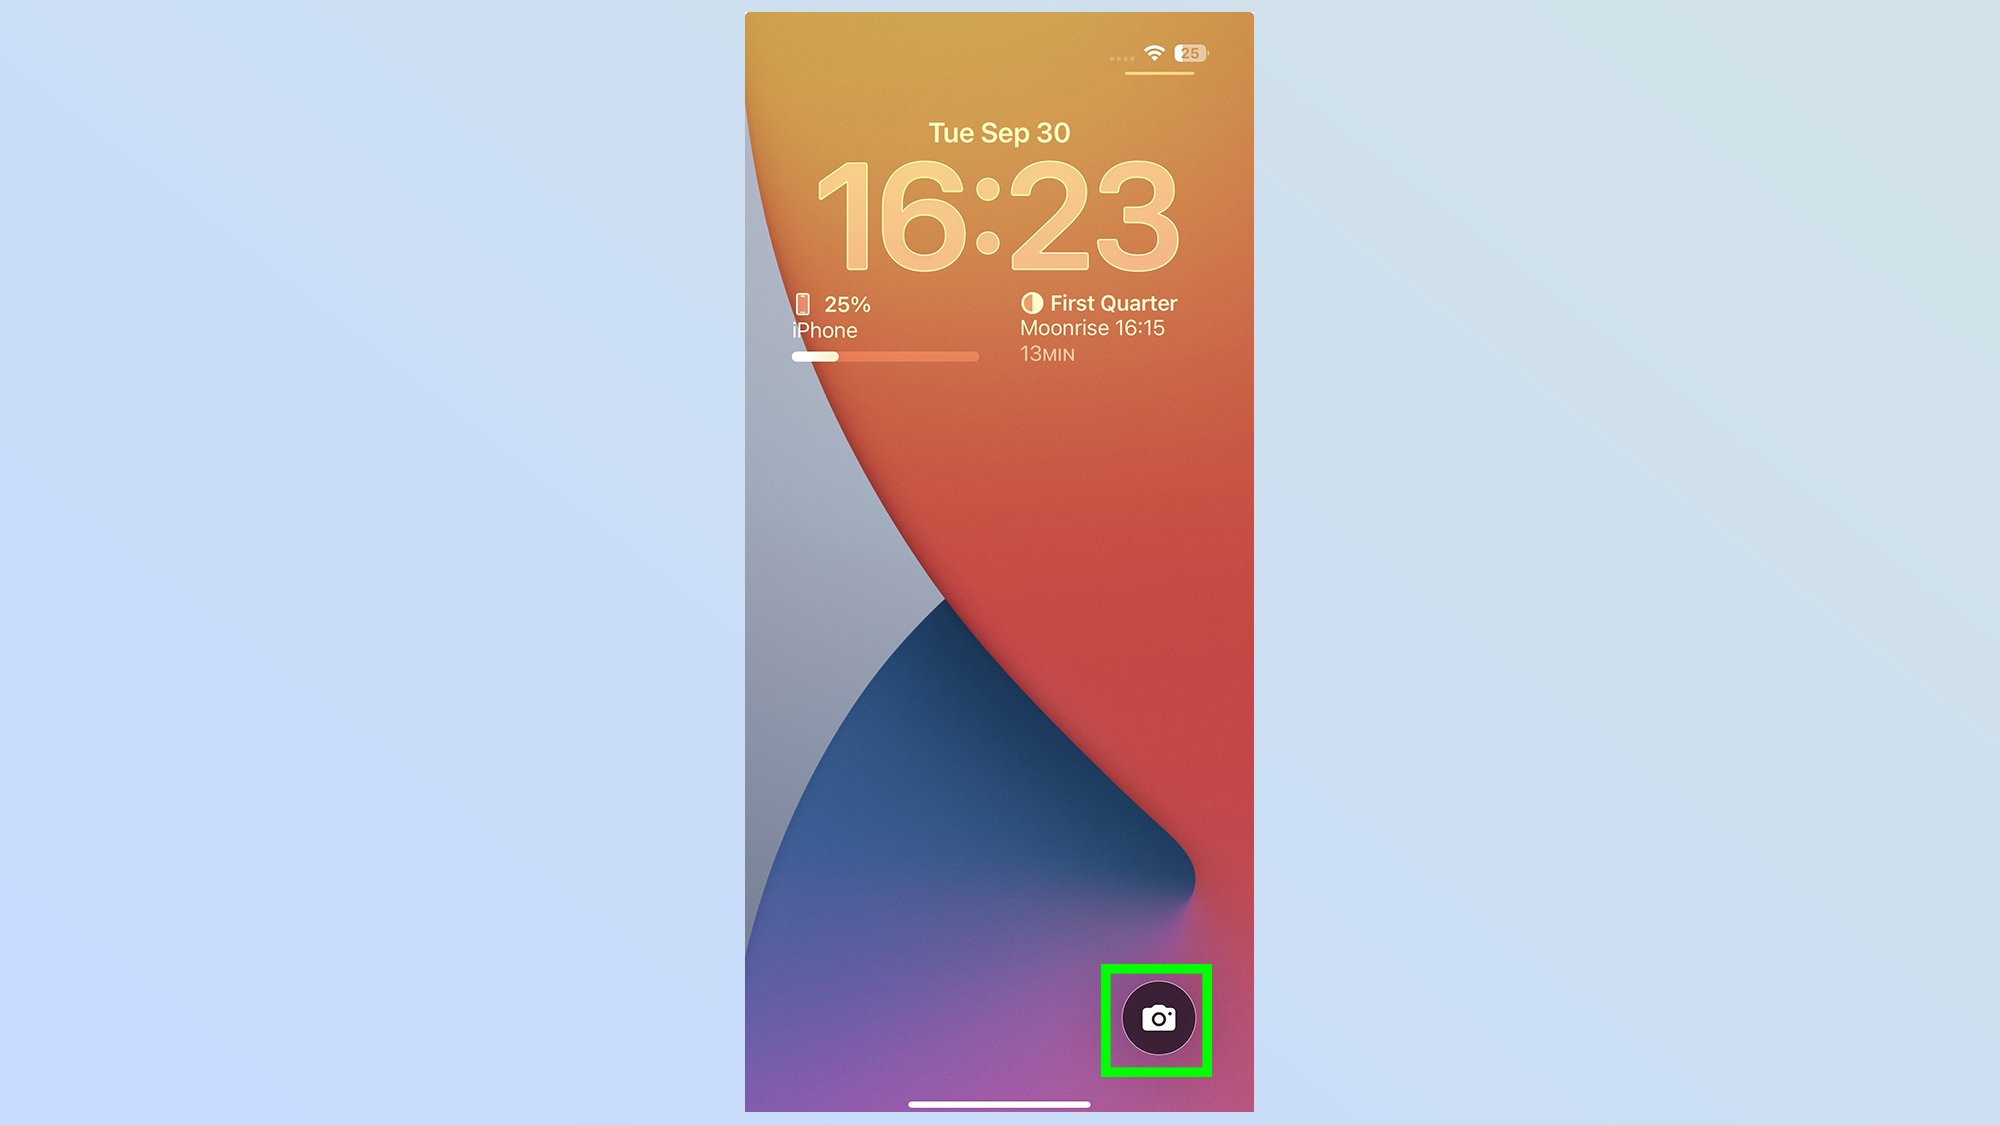
The first job is to open the iPhone camera app however you prefer to. Either via the app icon, Camera Control button, or using the lock screen shortcut. They’re all equally valid.
2. Switch the setting to Video

(Image: © Future)
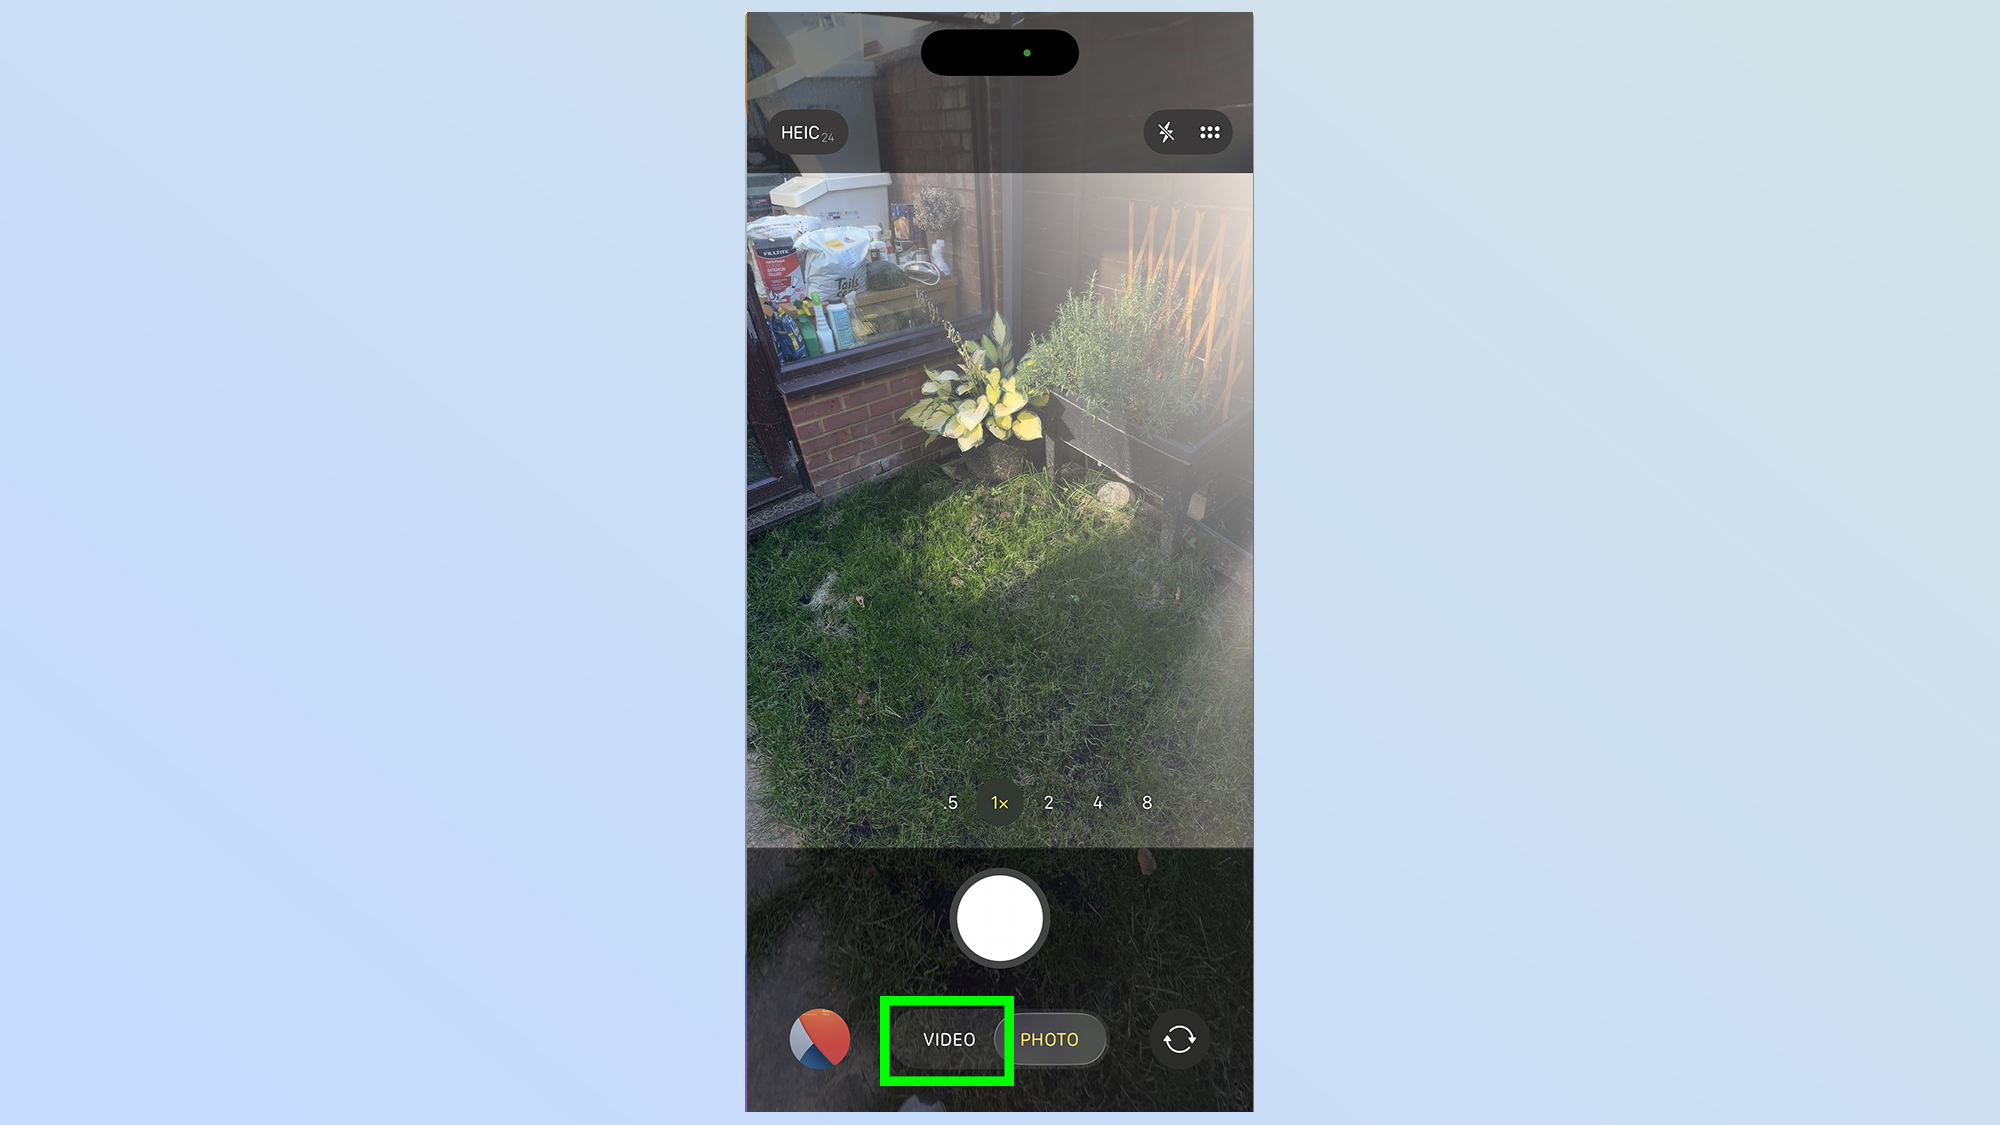
The camera app opens up to the Photo setting by default, which doesn’t support dual capture. So tap the Video toggle at the bottom of your screen
3. Tap Dual Capture

(Image: © Tom’s Guide)
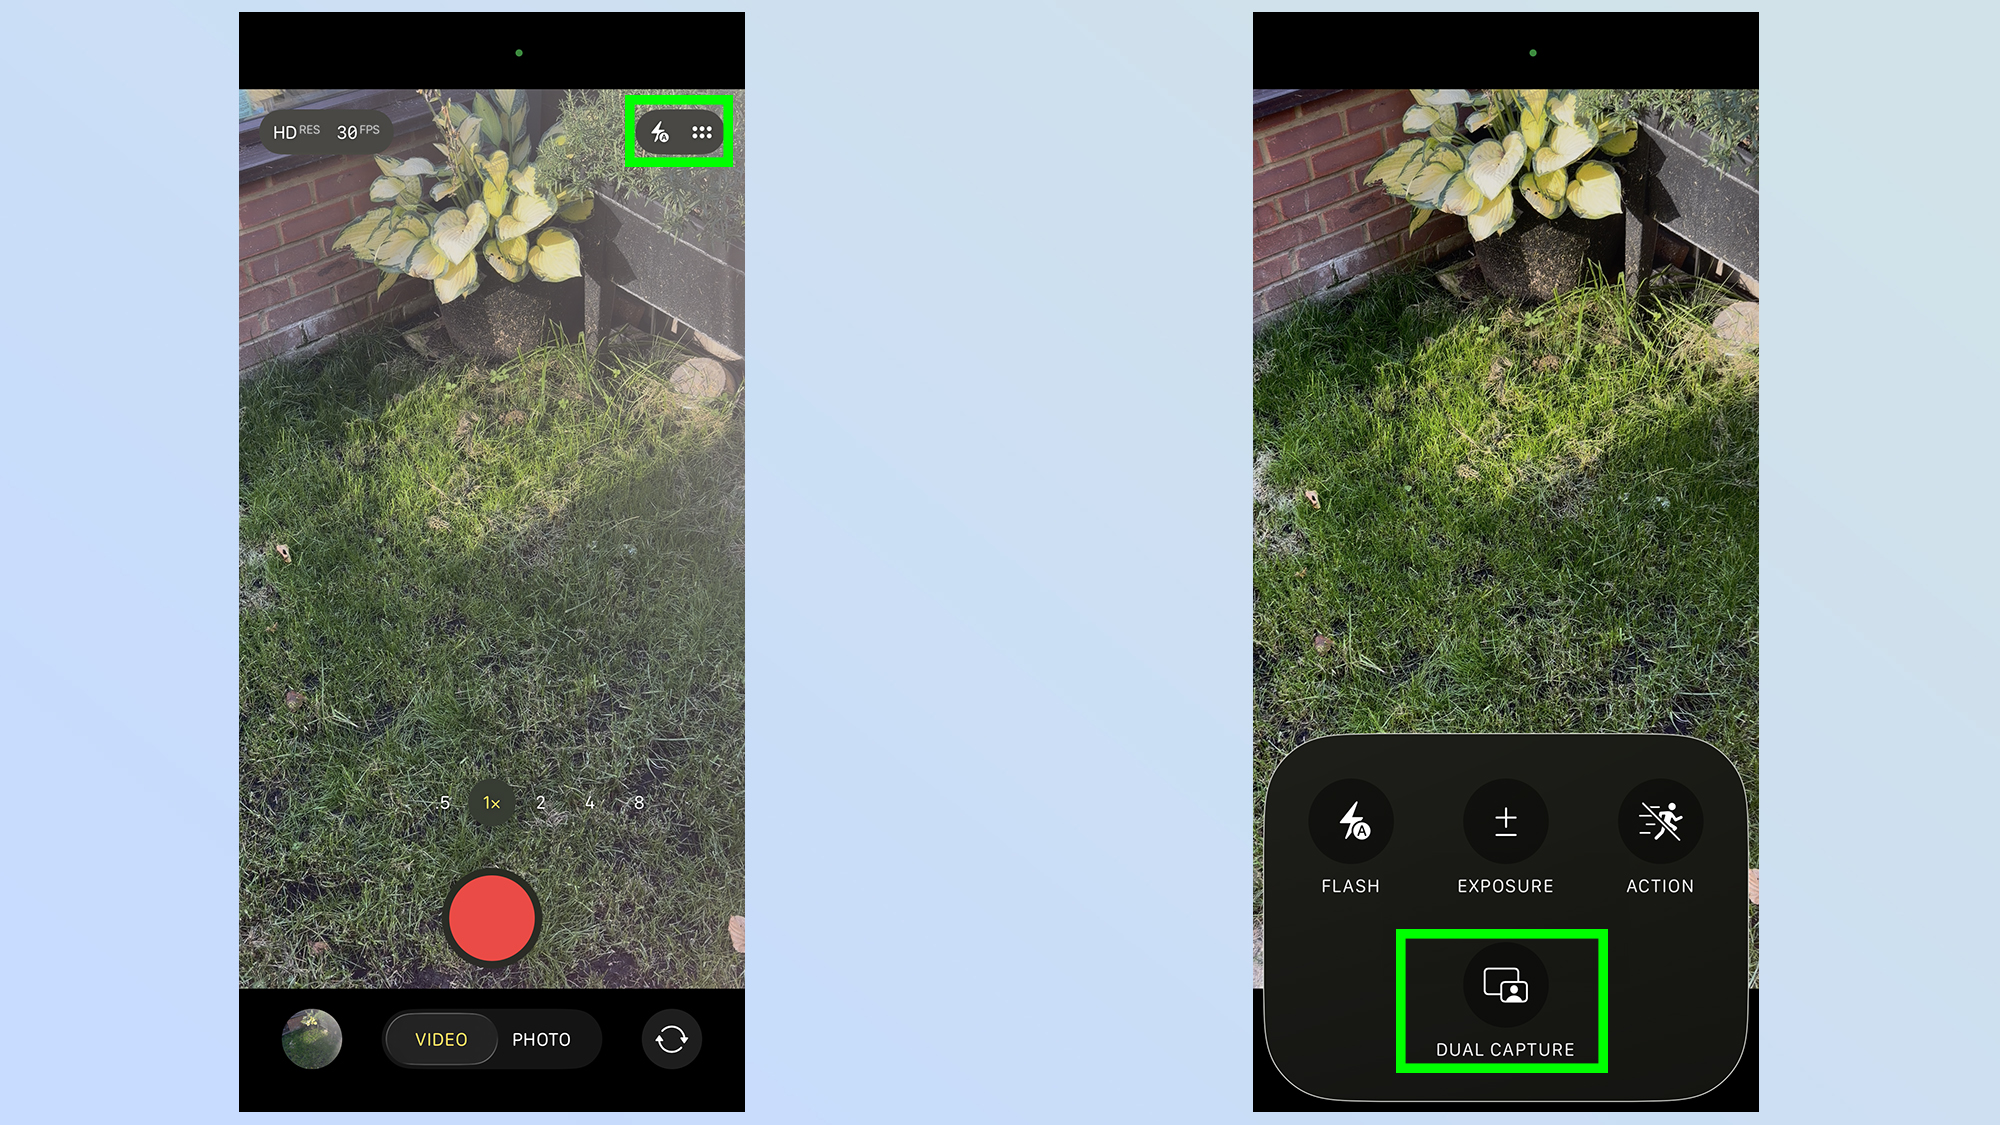
Next you’ll need to open up the quick settings menu. That’s the six dot icon in the top right corner of your screen. Then you need to select the Dual Capture option to switch it on.
You’ll know it’s worked correctly when you see your face in the top right corner. This method also adds the Dual Capture feature to the pop-up menu, which makes it easier to toggle on and off later.
4. Start recording

(Image: © Tom’s Guide)
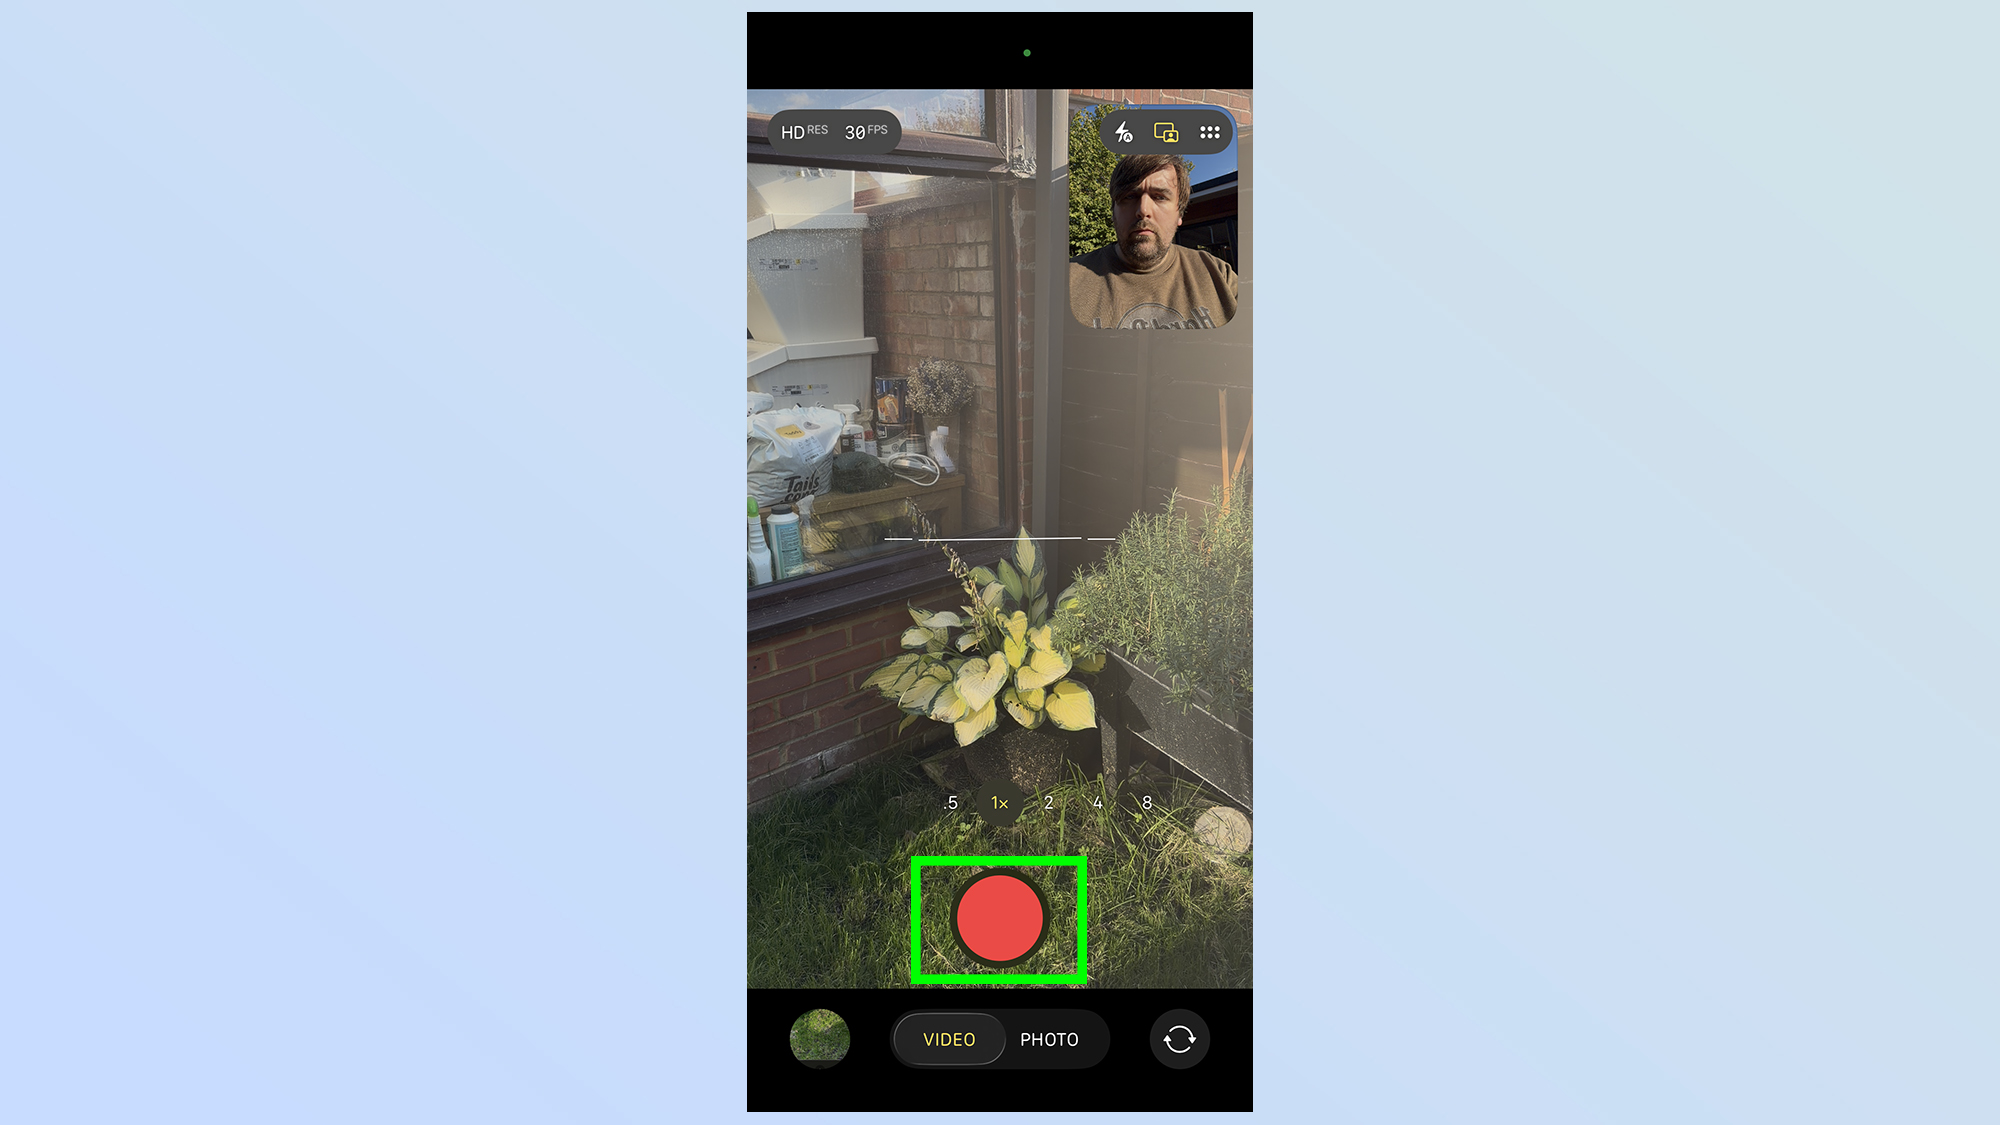
Once Dual Capture is switched on, all you need to do is tap the big red Record button at the bottom of your screen. Alternatively, you can tap the Camera Control button, which does the exact same thing.
Limitations of Dual Capture
The one thing you should know about Dual Capture video is that you don’t have a lot of freedom to customize how it’s all recorded. You still have control over video settings like resolution and frame rate — though the latter is restricted to 30 frames per second.
But when it comes to the actual dual-recording, your options are limited. While the front camera view can be moved to different corners of the screen, that’s about the only option you have. There’s no option to enlarge the front view, while shrinking the rear camera feed, nor can you opt for a split-screen display that gives equal attention to both.
Like a YouTube reaction video, your face is doomed to sit in the corner watching more interesting events unfold. Until Apple sees fit to update the feature, that is.
Follow Tom’s Guide on Google News and add us as a preferred source to get our up-to-date news, analysis, and reviews in your feeds. Make sure to click the Follow button!
More from Tom’s Guide
Back to Mobile Cell Phones