If your computer encounters a problem that prevents it from booting, such as a recurring Blue Screen of Death (BSoD), all hope is not lost. Grab a USB drive and I’ll show you how to fix it.
Before You Repair Windows
You will need a working Windows computer, a USB drive, and a solid internet connection. The flash drive must be at least 8GB; this process will erase everything on it, so make sure you’ve backed up any existing files. You’ll need a network connection to download the media creation tool and OS image, which together let you create the bootable USB drive.
Create a Bootable Windows USB Drive
The media creation tool is a wizard that will guide you through the process of creating a bootable USB drive. You can grab it from the Windows 11 download page on the working computer: go to the Create Windows 11 Installation Media section and click Download Now.
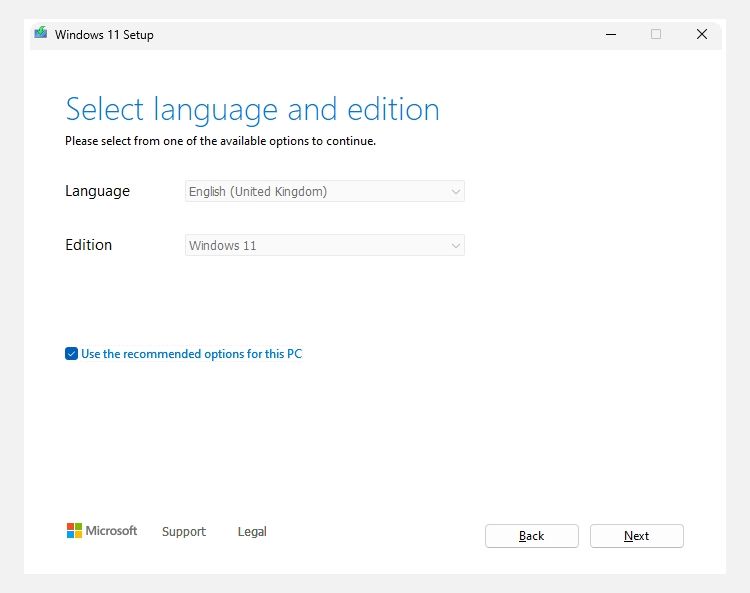
Now, insert your USB drive into the working computer. Run the media creation tool you just downloaded, and accept the terms and conditions. On the Select language and edition screen, make sure everything is in order (like English and Windows 11) and click Next.
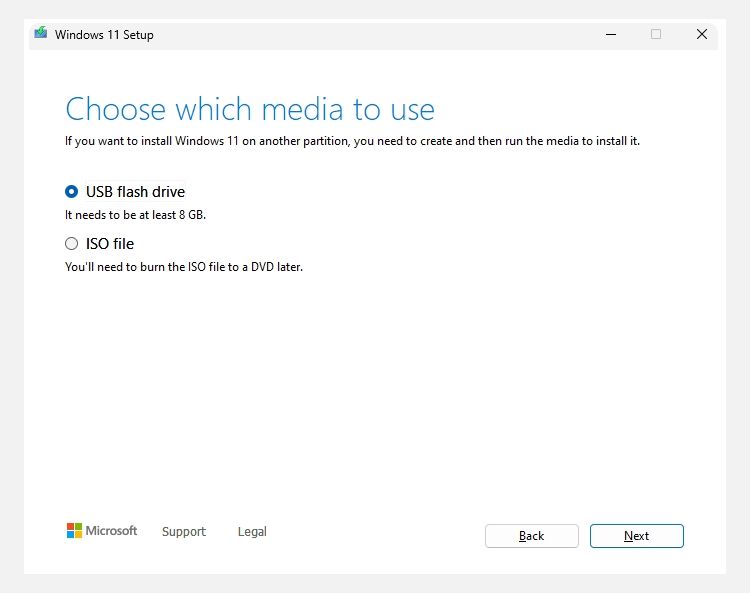
Select USB flash drive and click Next.
Afterward, select the USB drive you want to use (remembering that this process will erase the USB drive), and click Next again. Wait for the media creation tool to finish setting everything up.
Boot Windows From the USB Drive
Insert the USB drive into the computer that’s having problems, start it, and press the key that opens the BIOS/UEFI settings. For many computers, this is F10, but yours could be Esc, Del, F1, or F2. From there, select the USB stick as the temporary boot device.
On my HP computer, I had to press the ESC key when I saw the HP logo to enter Startup Settings. Then, I pressed F9 to open the Boot Menu screen and selected the USB drive from the list of boot options.
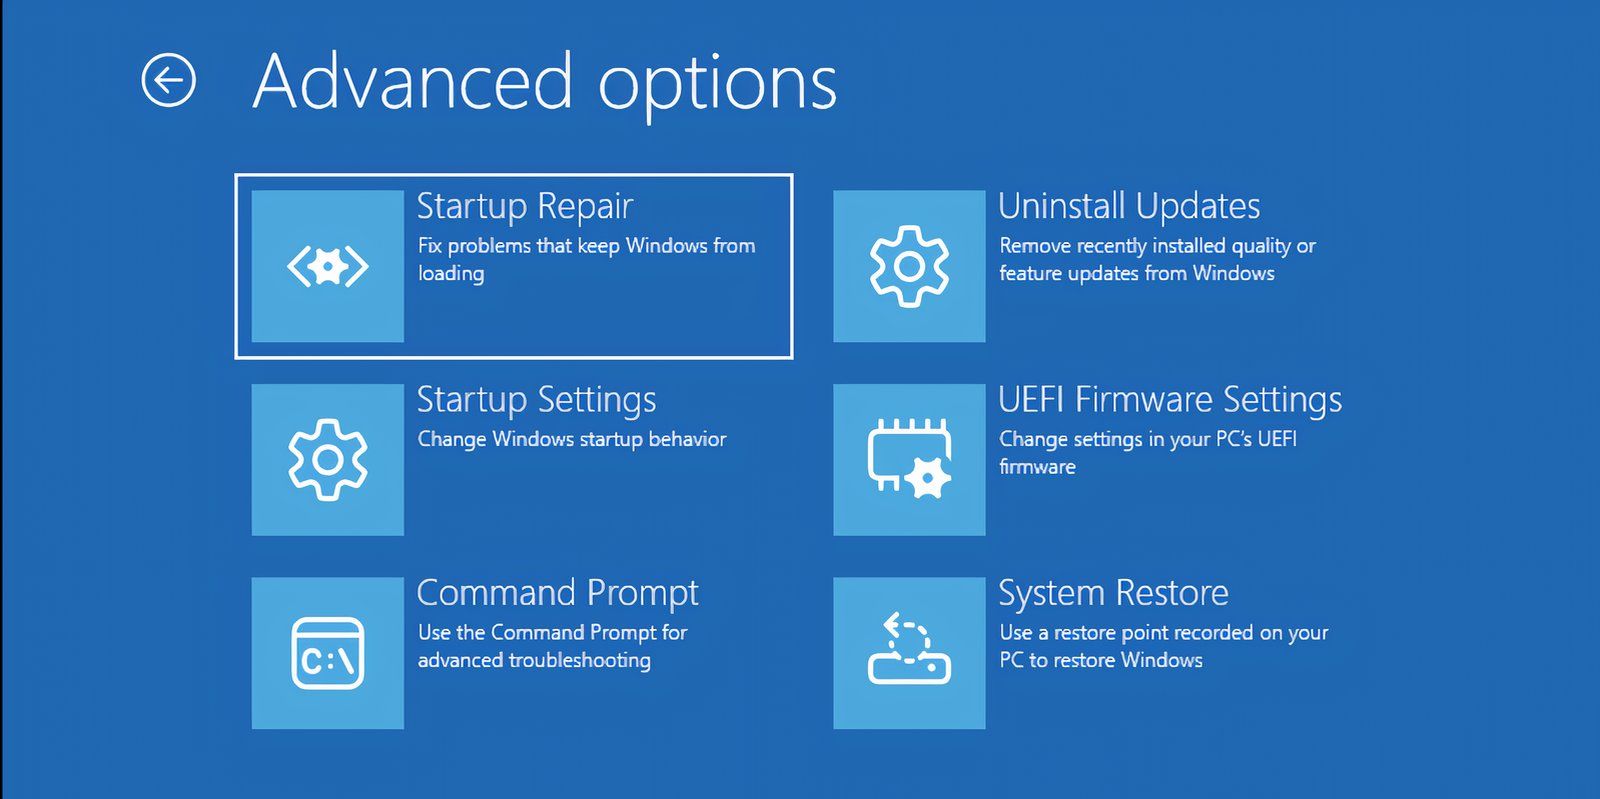
On the first two screens prompting you to select the language, currency, and keyboard, click Next until you get to the Select setup option screen. Select Repair my PC and click Next. Then, click Troubleshoot > Advanced options to access the Advanced Boot Options screen.
You only need the following to repair your computer: Startup Repair, System Restore, Command Prompt, and Uninstall Updates. Don’t be overwhelmed, as they’re quite easy to use.
Startup Repair
Startup Repair is the option most likely to fix startup-related issues. This tool scans your system for problems preventing it from booting correctly. It will then attempt to repair corrupt system files, boot records, and other critical components to get your computer running again.
To use it, click Startup Repair and select the operating system you want to repair—you will see more than one if you have a multi-boot setup.
The tool will start diagnosing your PC for problems. If it finds any, you’ll see a screen telling you it fixed something, and all you have to do is restart your computer to see if it worked. If Startup Repair fails, you might want to try the other options.
System Restore
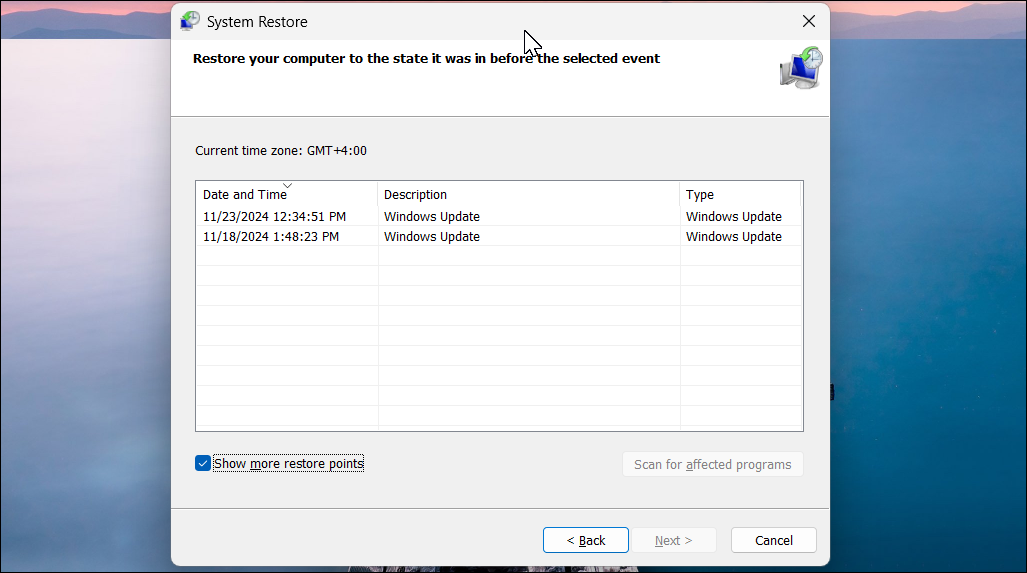
System Restore allows you to use system restore points, which are snapshots of your Windows computer that allow you to roll it back to a state when it was working. Windows creates them automatically before major system changes, such as when applying a Windows Update or installing certain types of software or drivers. You can even create system restore points manually.
To use a system restore point, click System Restore and follow the steps provided by the wizard to find and apply one. Hopefully, that will get your computer working again, especially if the problem happened recently after a particular change.
Command Prompt
The Command Prompt option, as the name suggests, opens Windows’ built-in command interface. The most helpful actions here when your PC won’t boot are to run the SFC and DISM commands. The former will scan for corrupted system files and replace any that it finds, while the latter repairs Windows’ system image.
Uninstall Updates
If your problems started happening after you installed a Windows Update, click Uninstall Update. Select either Uninstall latest quality update or Uninstall latest feature update. Quality updates are smaller, more frequent updates that address security issues and bugs, while feature updates are major releases (now pushed once a year for Windows 11) that introduce new features and changes.
Next, click Uninstall for Windows to remove the update. Afterward, restart your computer and check if the issue is resolved.
Related
The Main Windows Update Terms, Explained
Windows update uses a lot of tech lingo, and it can be confusing as to what each one means.
If you’ve exhausted all the repair options and the problems persist, you might be able to fix your issues by resetting your Windows PC. Thankfully, you can also do that without losing your data. But if that doesn’t work either, you might have to perform a clean install of Windows, which will erase all your data and applications. Starting fresh with a new Windows installation should fix your issue, but you’ll need a backup of your files handy to restore.
