Linux Mint is one of the most popular and most recommended Linux distributions for users new to Linux. We’re going to walk you through the installation process step by step so you’ll know exactly what to expect.
Getting Started
Before we get into the actual installation, you’ll need to check the specs of the machine where you want to install Linux Mint to make sure it meets the minimum requirements and download the official installation ISO image. You’ll also need a USB flash drive that you don’t mind erasing.
|
Best For |
|
|---|---|
|
Minimum Requirements |
|
|
Download Link |
Download Linux Mint |
Once you’ve downloaded the ISO, you’ll use it to create bootable installation media on your USB flash drive. If you’re not sure how to do this, we have an easy-to-follow guide that will show you how to create a bootable USB drive using Balena Etcher. The process should only take about five minutes.
Boot Into the Linux Mint Live Installation System
On the computer where you want to install Linux Mint, insert the USB drive you just made, turn on the computer, and set the machine to boot from the USB device. If you’re unsure of how to make your computer boot from USB, a quick web search for the manufacturer and model followed by the words “boot usb drive” will usually bring up instructions.
On most PCs and laptops, you’ll access the boot menu by pressing or repeatedly pressing a specific key when you first turn the power on, before the boot process starts. It is usually one of the function keys, the Esc key, or the Delete key.
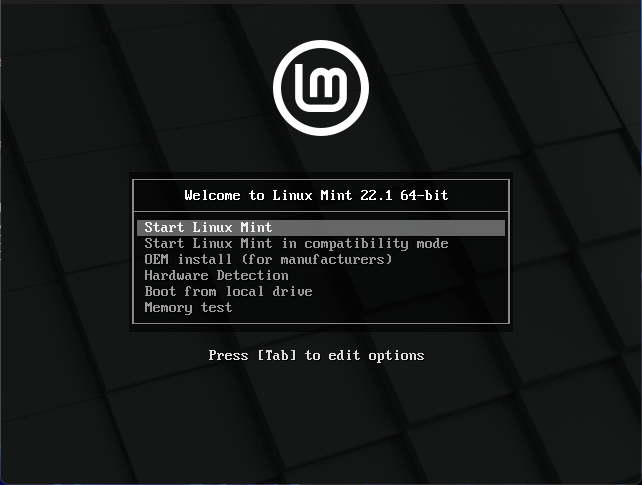
When the system boots you will see the screen above. If you don’t touch any keys, after a few seconds, it will automatically load the Linux Mint live system and take you to the desktop.
Starting the Installation Process
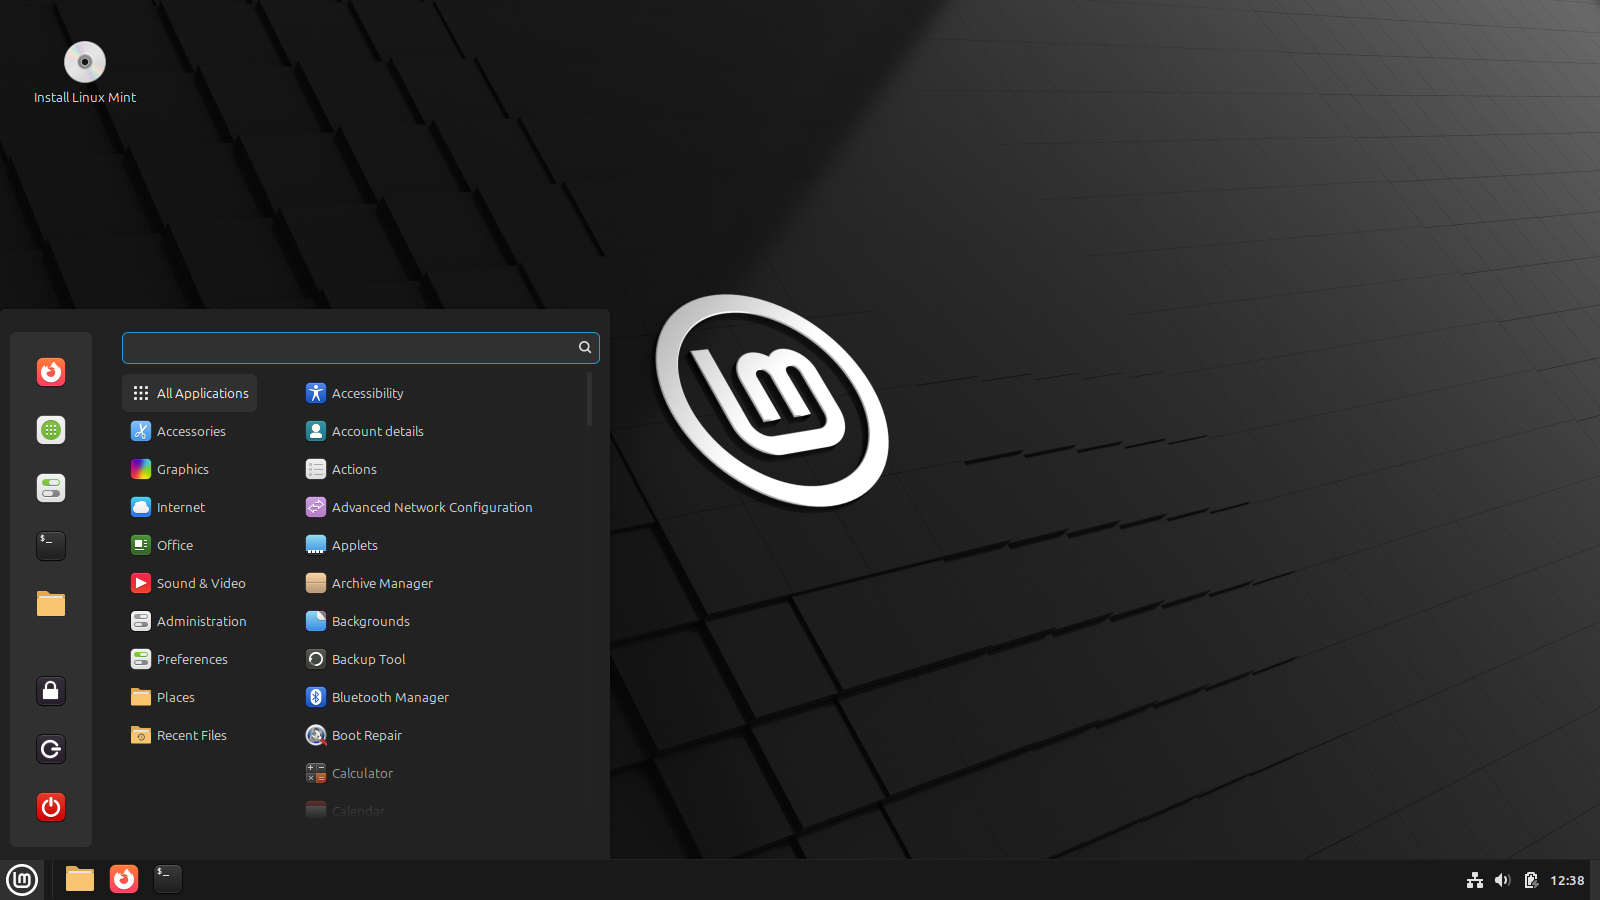
The live system gives you a fully functional Linux Mint desktop. You can explore, experiment, and test the system without making any changes to your hard drive. You can install from the live system offline, but if you connect to your home network so it can access the internet it will download some updates as it installs and save you a bit of post-install time. You can access the network settings by clicking the small icon on the right of the bottom panel next to the clock.
When you’re ready to start the installation process, just double click on the “Install Linux Mint” icon in the top-left corner of the desktop. The installation application will launch and ask you some preliminary questions.
Pre-Installation Questions
Before the actual installation begins, Mint will ask you a few questions (about ten) to make sure that everything gets set up the way you want. This should only take a few minutes to complete, and then the installer will take care of the rest.
Select Your Language
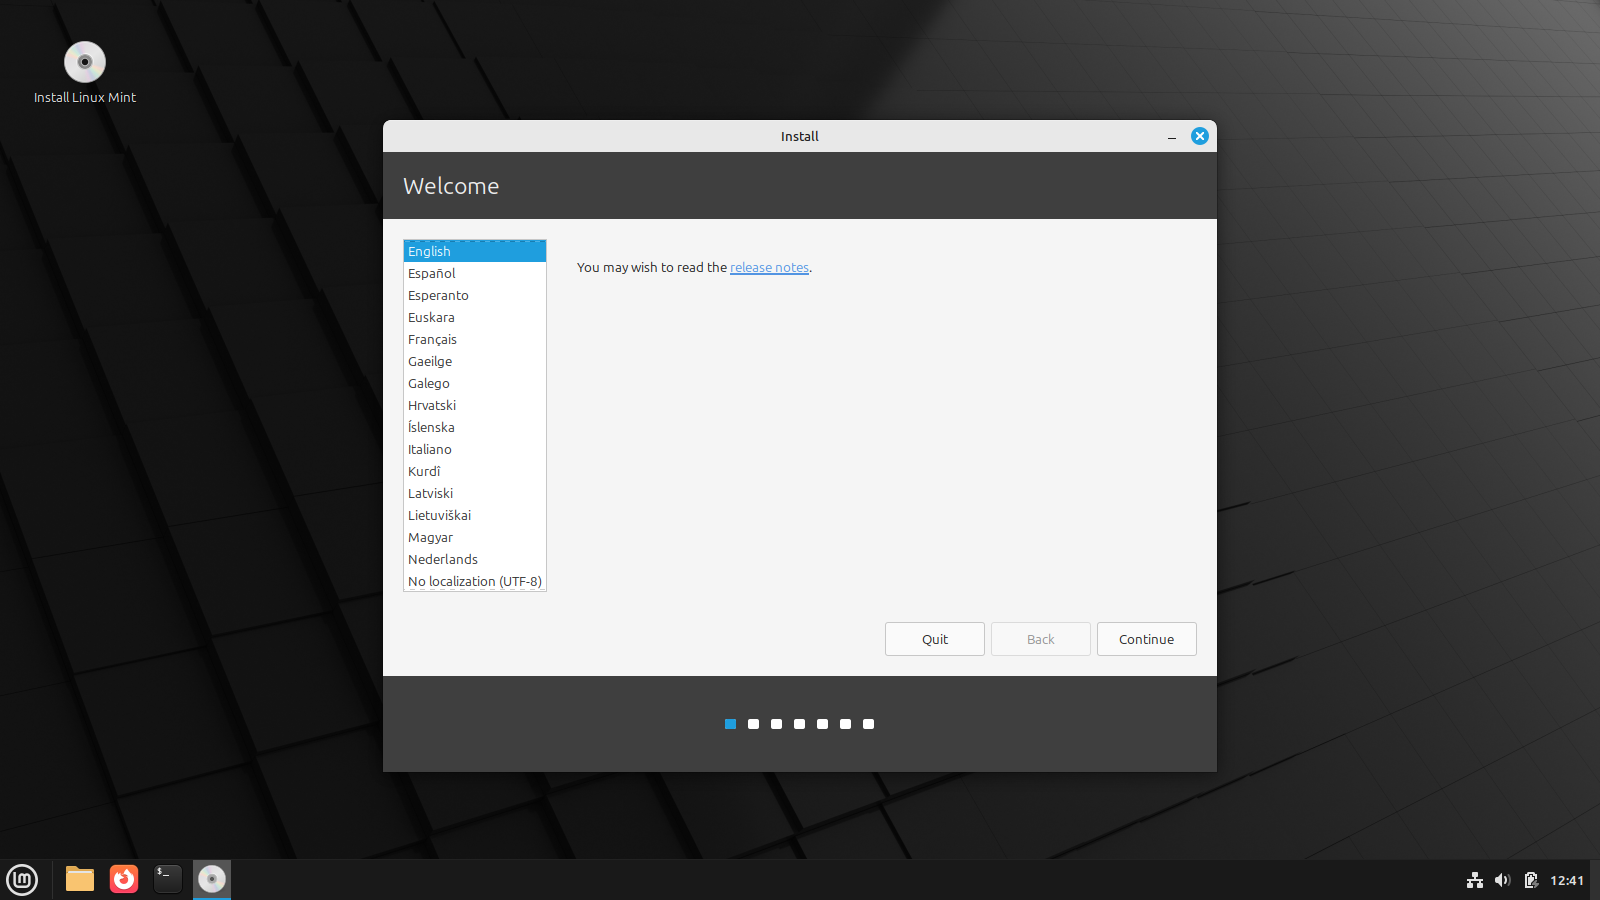
You will first be asked what language you want your system to use. Simply pick from the list on the left and click continue when you’ve made your choice.
Select Your Keyboard Layout
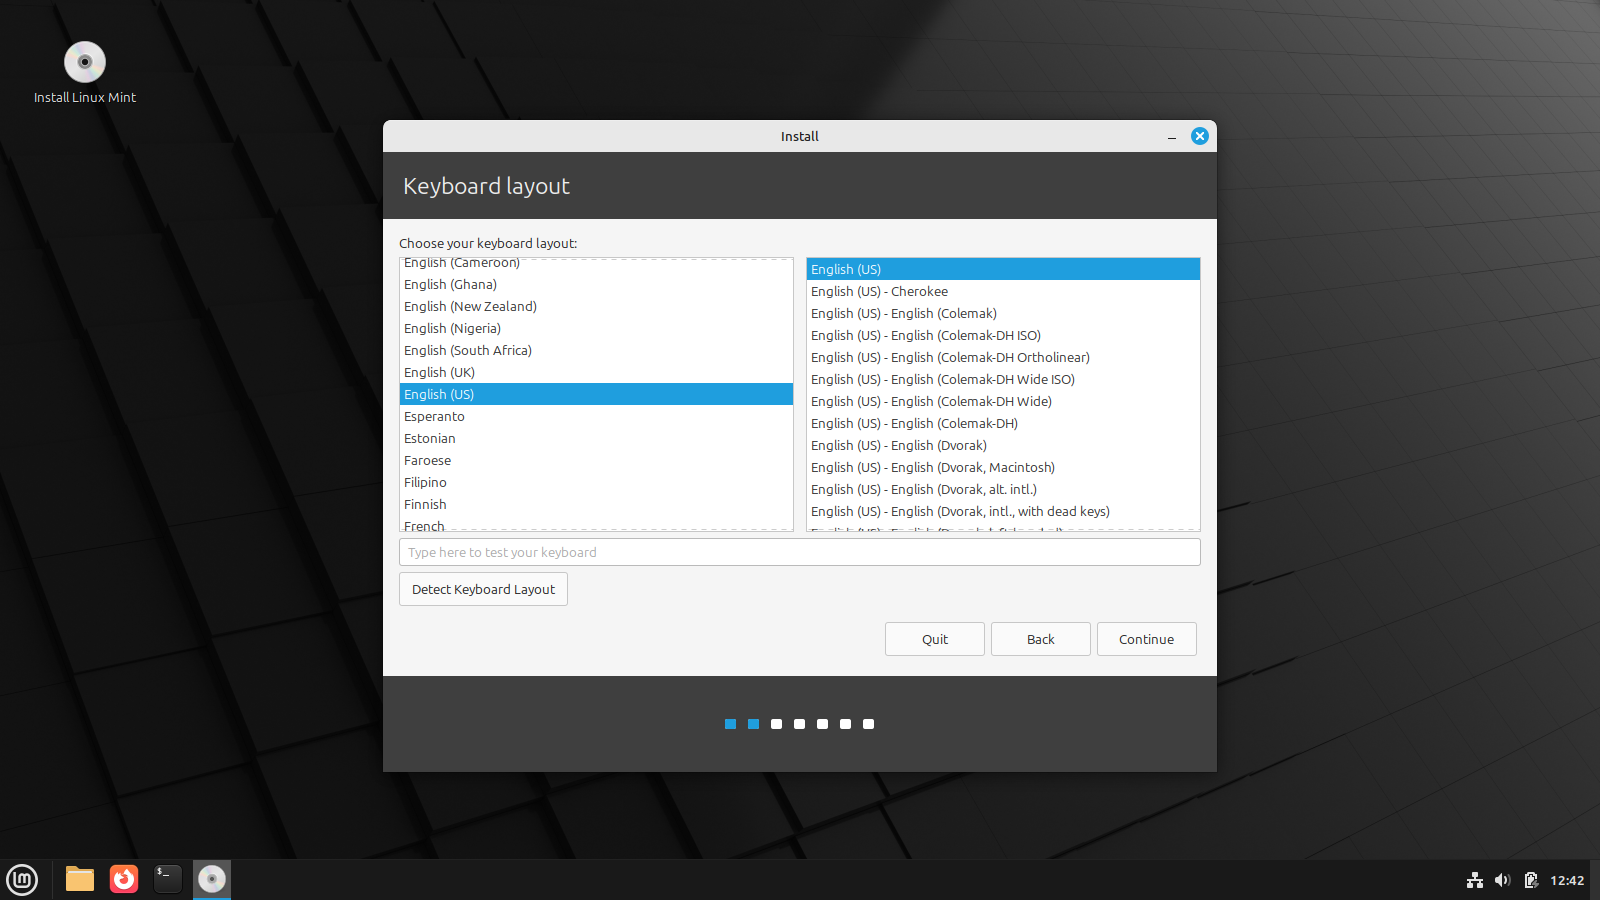
Next you’ll be asked to choose your keyboard layout. The main languages available are listed on the left and keyboard variations for each language are on the right. You can make the selection yourself or use the “Detect Keyboard Layout” button to let Mint try to set this for you. Again, click on continue when you’ve made your choice.
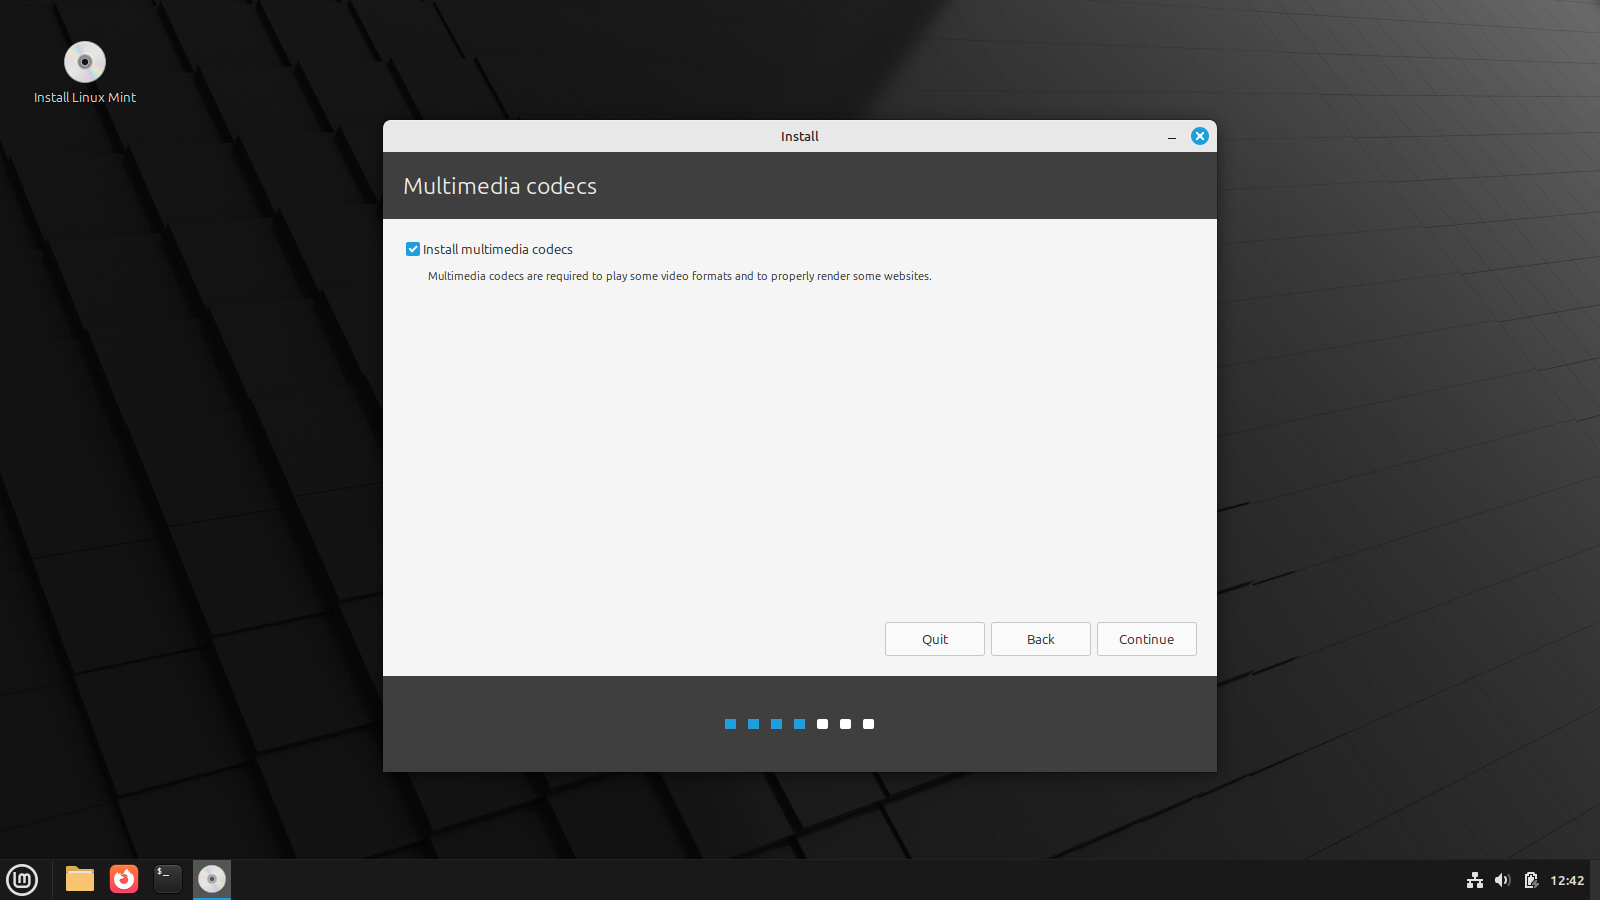
Install Multimedia Codecs
The next prompt will ask you if you want to install extra multimedia codecs. Codecs are used by various video and audio applications to read different multimedia formats. If you don’t have the codec for a particular type of video file, for example, you won’t be able to play that video on your system. Unless you have some specific reason not to, you should check the box and let it install the codecs.
Installation Type and Advanced Features
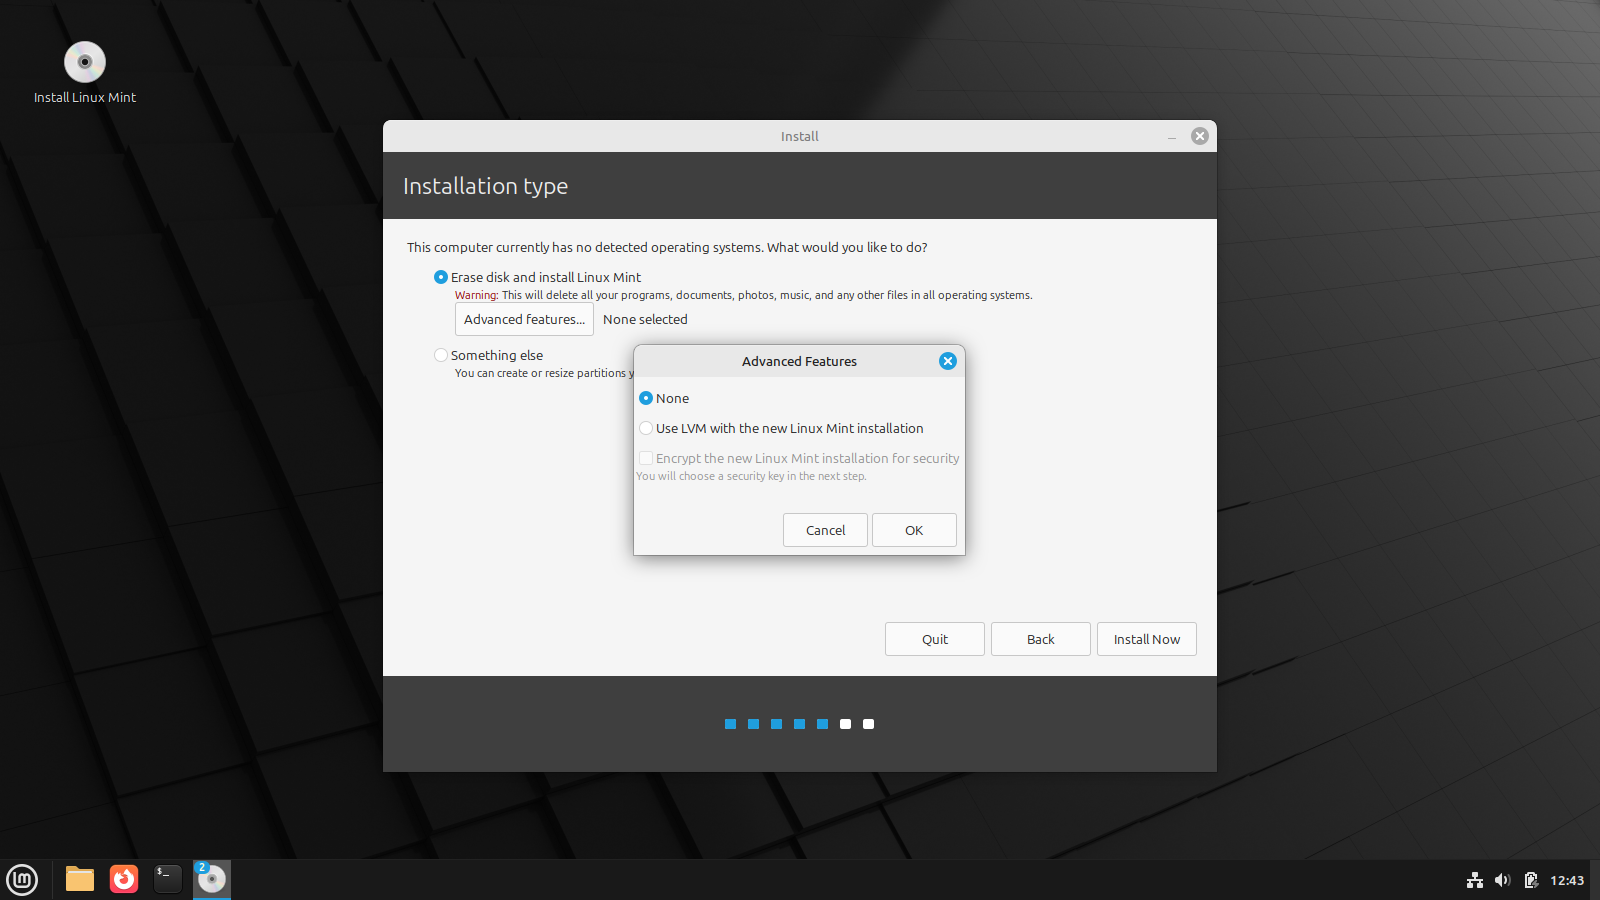
Next you’ll be asked how you want the system installed. If you’re using a hard drive dedicated to Linux Mint (you will only run Mint and no other operating system on this drive), you should select “Erase disk and install Linux Mint”.
If you are sharing the hard drive with another operating system (dual booting), you should select “something else” and follow the prompts to split the drive between both operating systems. Of course, make backups of anything on the drive before you attempt to do this.
Advanced Features (Disk Encryption)
If you click on the “Advanced Features” button, you’ll be given the option to set up disk encryption. Disk encryption will keep everything on your drive private if you lose your computer or drive, but you will have to enter a password each time the computer boots to enable reading of the encrypted disk. If you forget the password, your system will be inaccessible and the only solution is to wipe the drive and re-install.
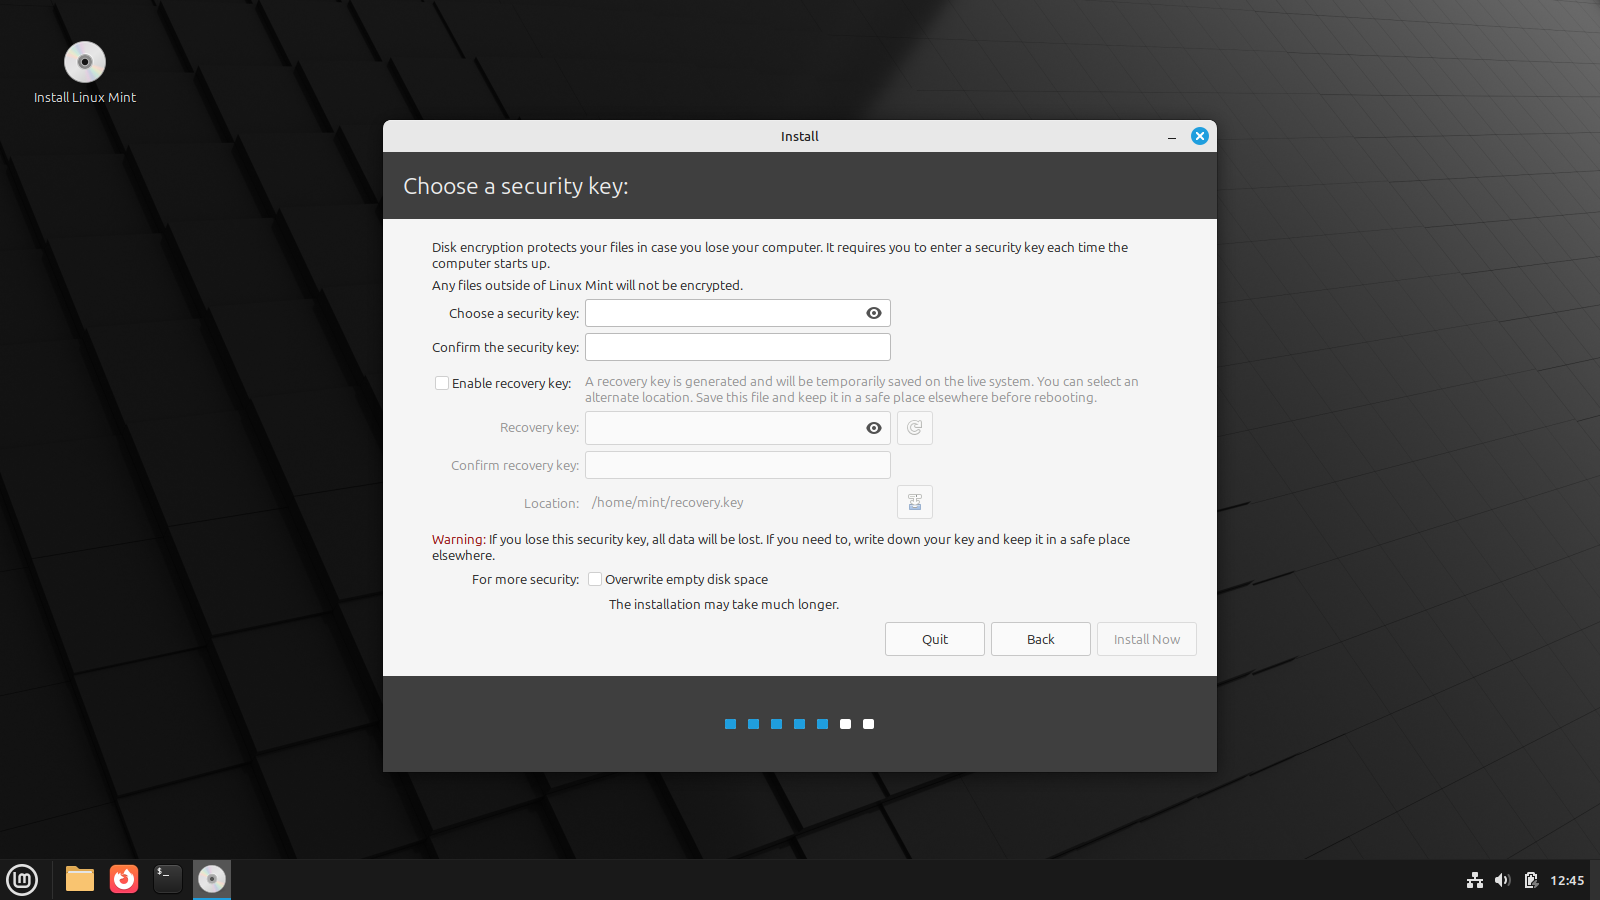
If you chose to enable encryption on the previous screen, you will now be asked to set up the security keys. Your security key can be a word, phrase, or random string of characters. You will need to enter it each time your computer boots in order to access the drive.
You can also create a recovery key (recommended), which is a small file that acts as a backup to allow you to recover the encrypted data if you forget your security key. Once the live system shuts down the key will be gone. Make sure you save it somewhere else before you reboot the computer at the end of the installation. There is no way to generate another one.
When you’ve set up your security key(s), click on continue.
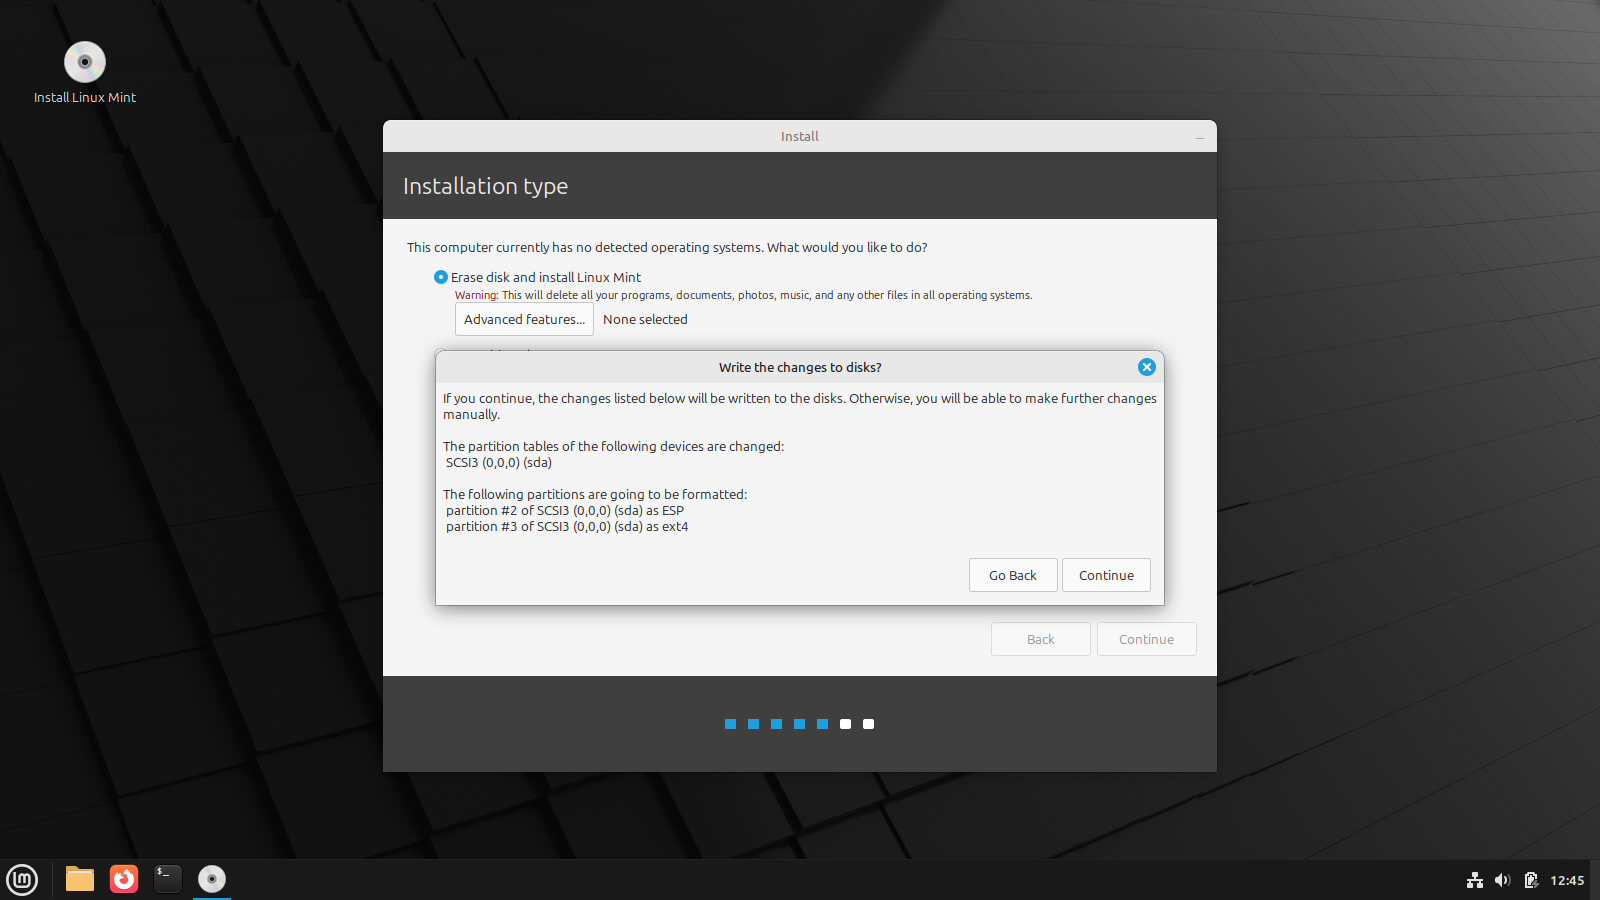
Confirm Drive Partitions
At this point, the installer will show you what it intends to do with your hard drive when the process begins. If you’re installing Mint on a dedicated drive, it should be fine to just click continue. If you are setting up a shared drive, verify that none of the proposed changes will overwrite anything from the second operating system before continuing.
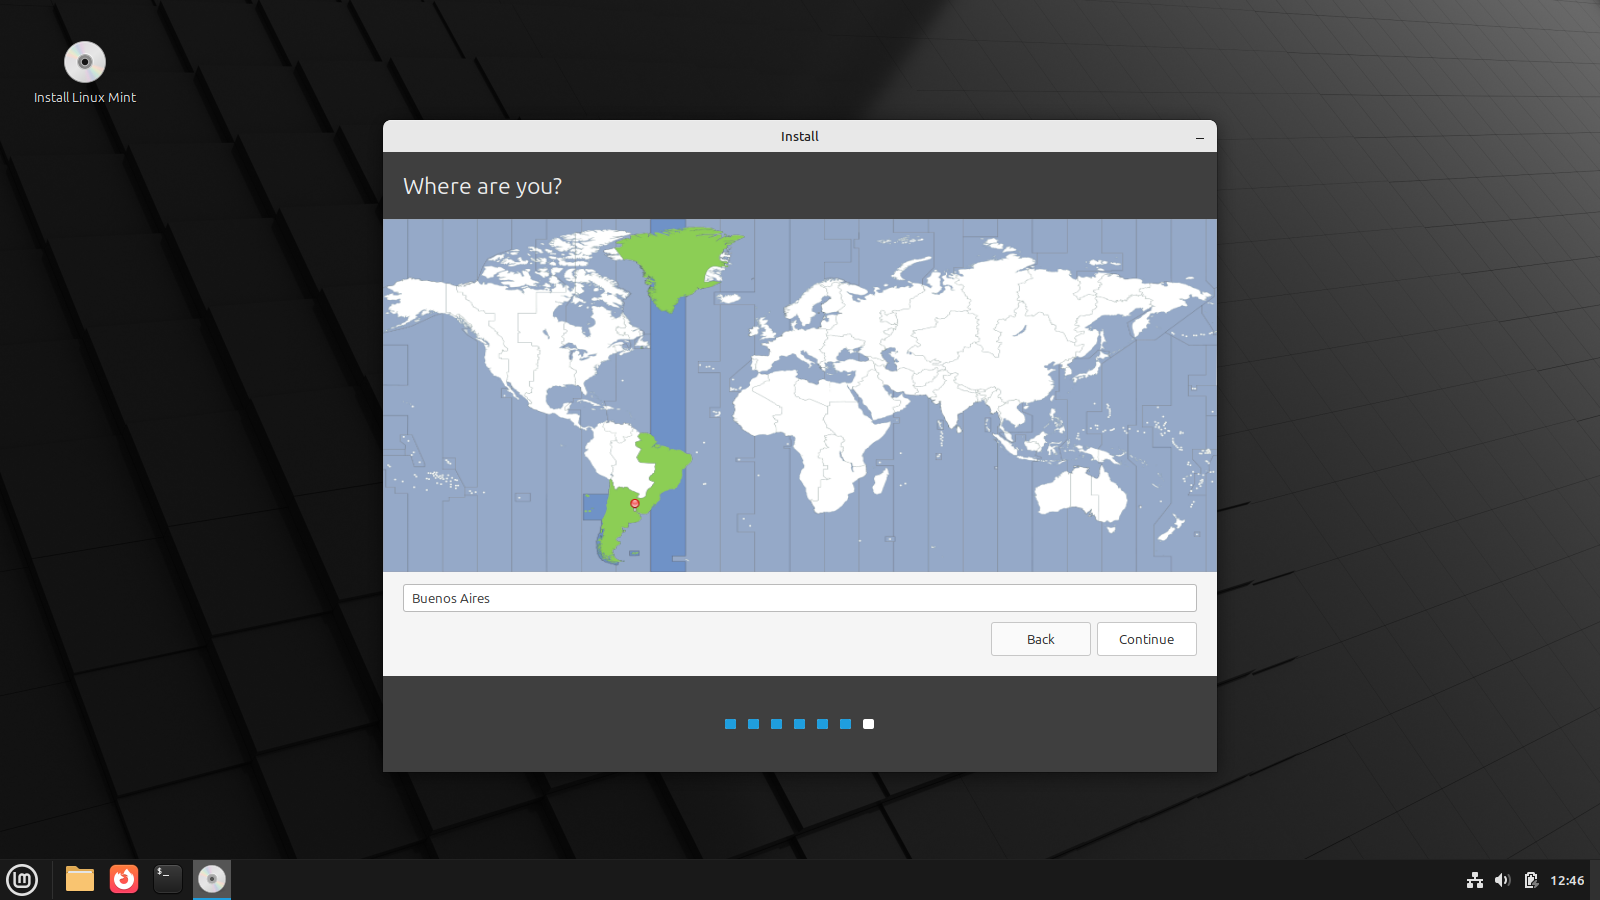
Set Your Time Zone
If you set up an internet connection before starting the installer, it should do a pretty good job of determining where you are and setting the correct time zone. You should, however, verify that it is correct. It’s possible that it might be off by one zone to the east or west.
If you aren’t connected to a network, you can set the time zone manually either by clicking on the map or searching for a large city that’s in your time zone.
Again, click continue to move on.
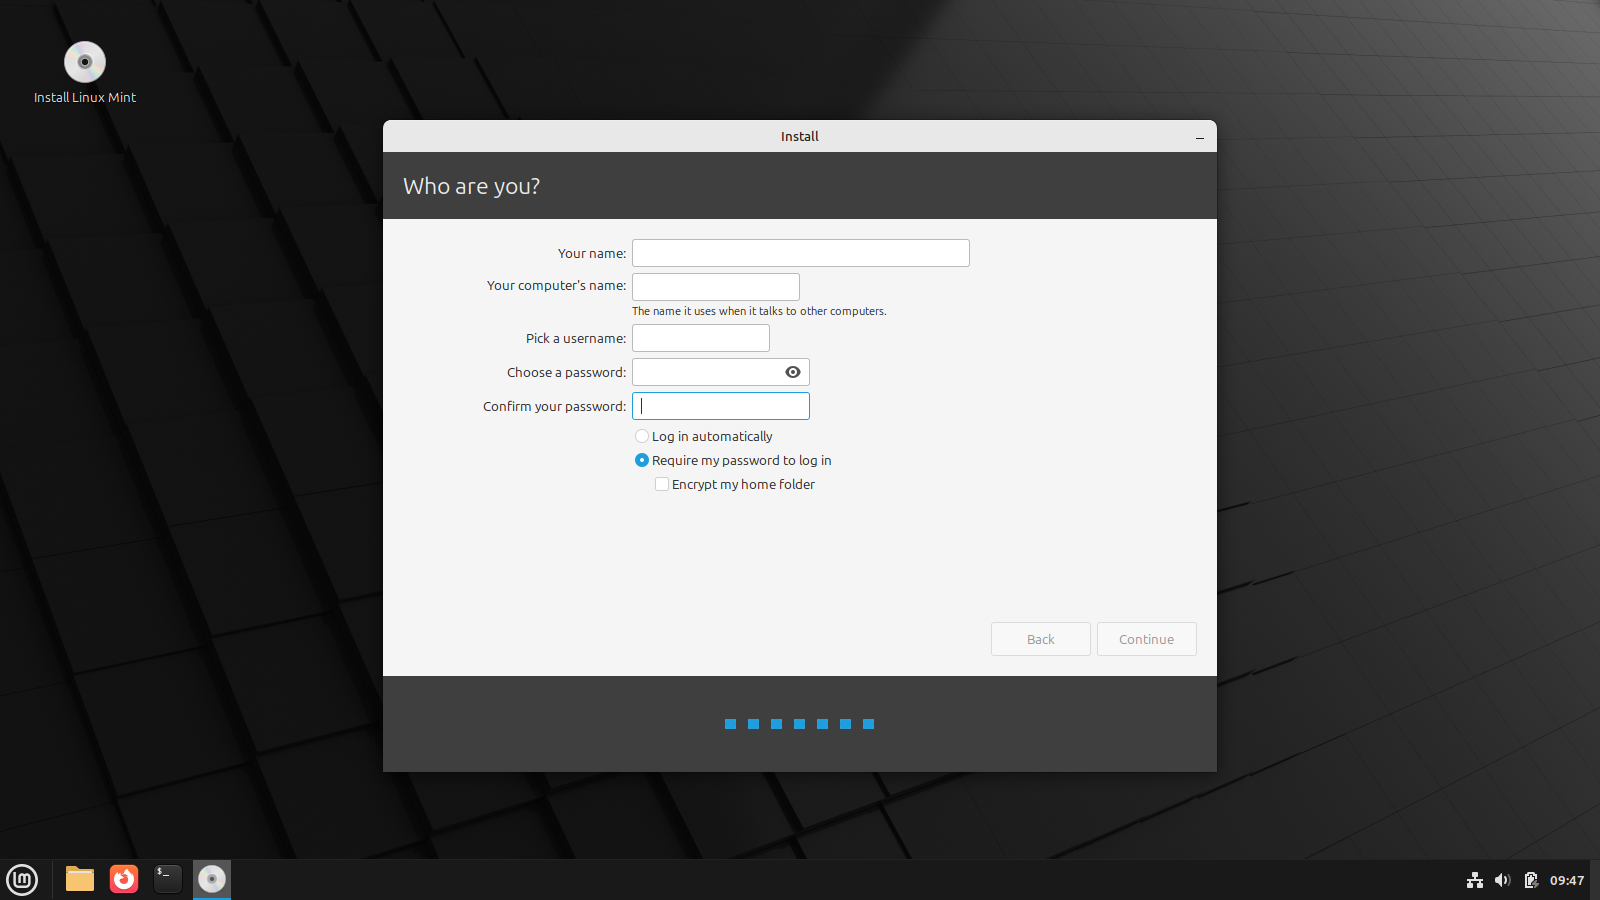
User Account Information
The final pre-installation screen will allow you to set up your user account. All fields should be filled out, but you don’t need to enter your real name if you don’t want to. You should set the computer’s name to something that will be easily recognizable on your network if you plan on sharing files and/or using other network services.
You are also given the option to have the system log you in automatically or require a password each time it boots. If set to automatic, the system will load straight to the desktop, using your user account, without requiring a password. You will, however, still need to enter your password to perform certain administrative functions from time to time, so don’t forget it.
If set to prompt for a password, the computer will always boot to a login screen and only go to the desktop after you enter the password. With this option set, you can also choose to encrypt your home directory if you like. This works in a similar fashion as disk encryption, but it only encrypts the files stored in your specific home directory and not the entire disk.
Clicking continue here will finally start the actual installation process.
Linux Mint System Installation
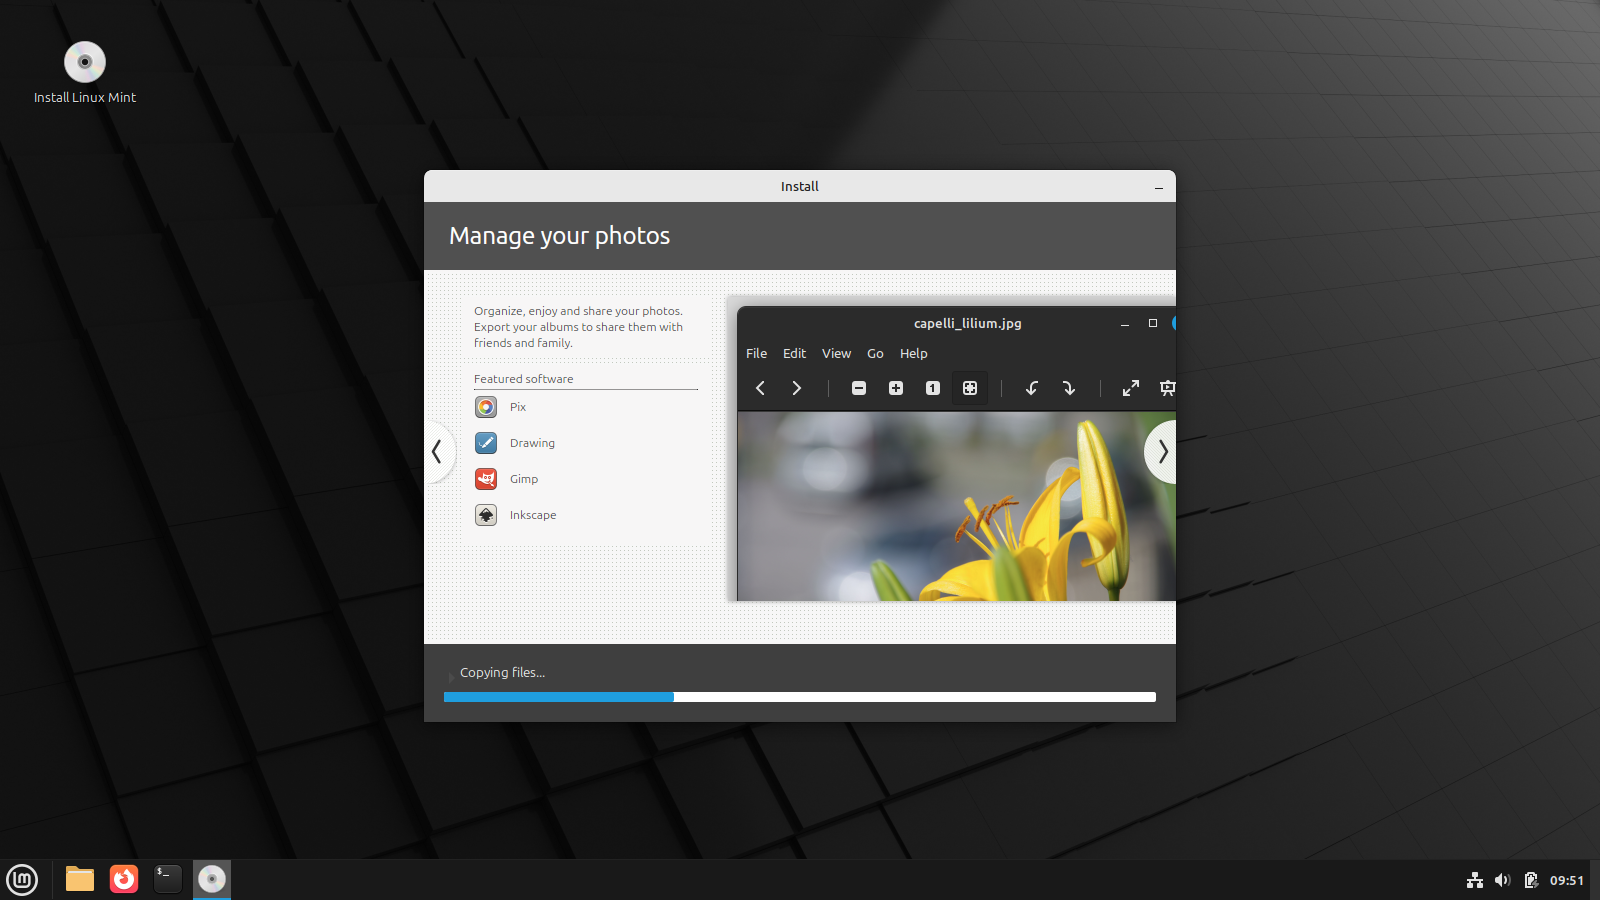
At this point, the installer will take over and all you need to do is sit back and let it do its work. You’ll see a progress bar at the bottom of the installation app and several different pages will flip back and forth to give you a basic idea of what’s included with the system. Depending on your computer hardware, the process can take anywhere from a few minutes up to about a half-hour or so.
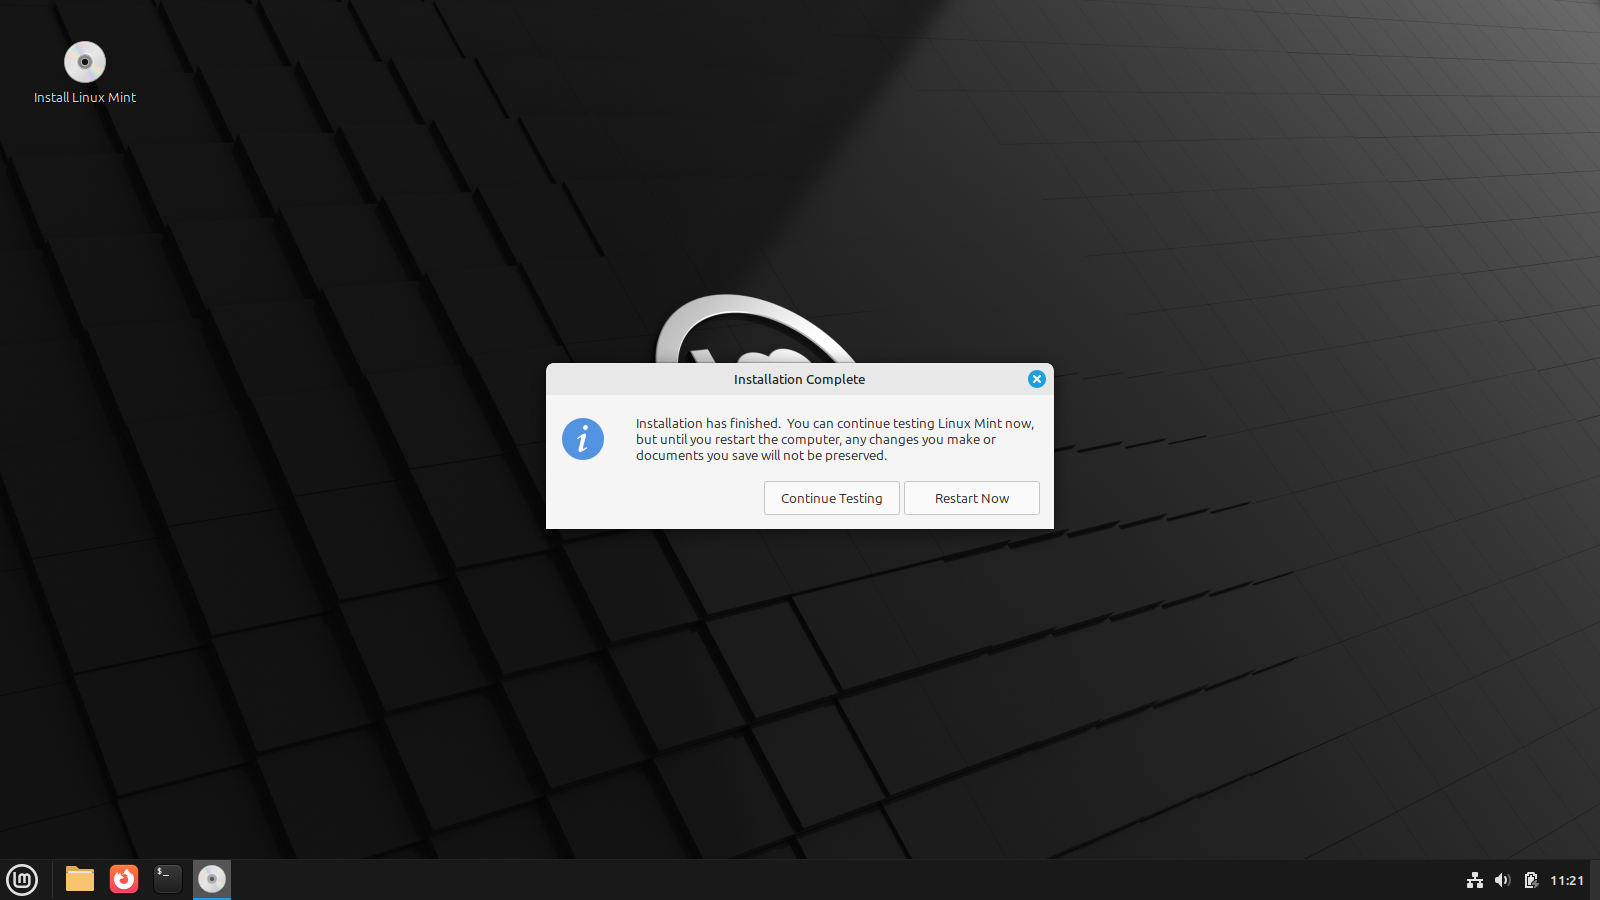
When finished, you’ll see a small dialog informing you that the installation has completed, giving you the option of staying on the live system or rebooting. If you chose to use whole-disk encryption, now would be a good time to make sure you backed up that recovery key.
With that, basic system installation is complete. Congratulations! Click on “Reboot Now” to reset your system and boot into your shiny new Linux Mint environment.
First Run of Your New Linux Mint System
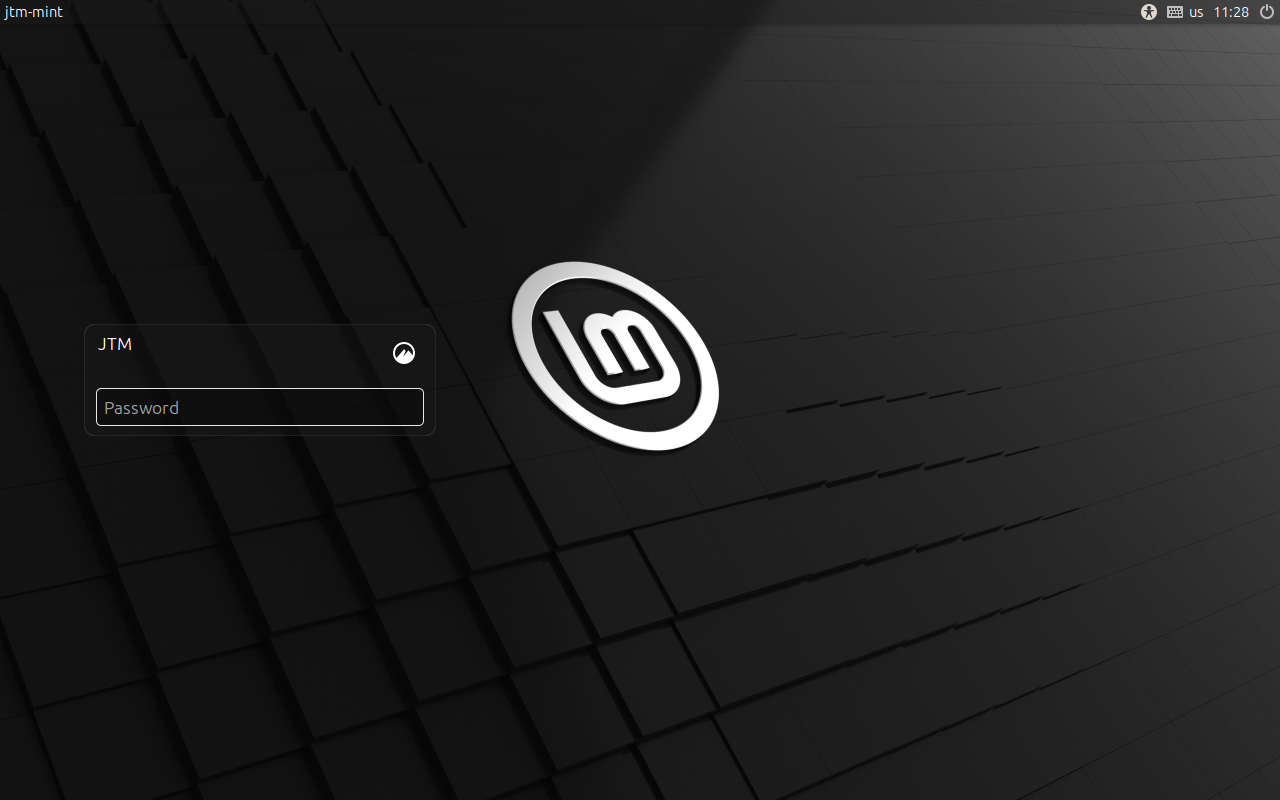
When your computer reboots, it should load right into Linux Mint. If you set the system to ask for your password on login, you’ll be greeted with the login screen.
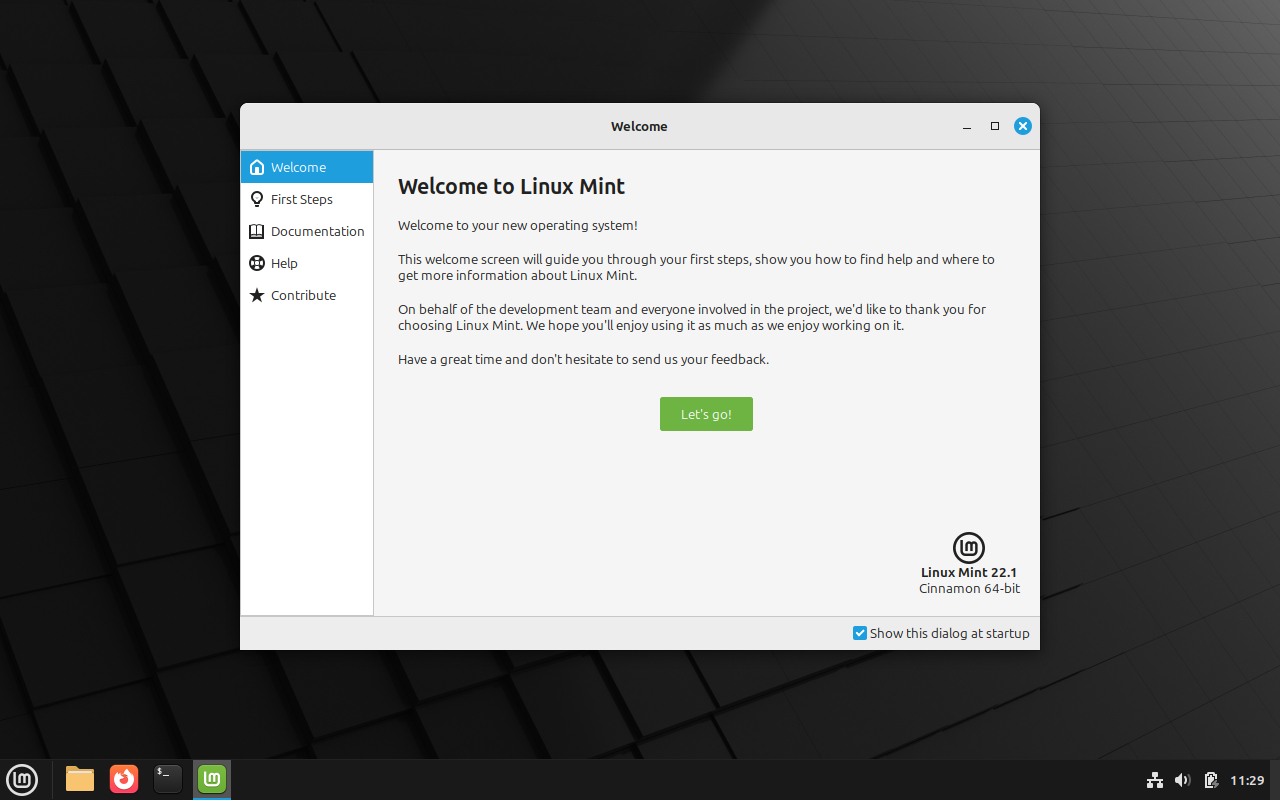
When you log in, or if you chose automatic login during setup, you’ll be taken straight to the desktop and shown the Linux Mint Welcome application.
The welcome app will give you some quick tips to help you get started and explore what you can do with Linux Mint. You’ll see a check box at the bottom-right corner labeled “Show This Dialog at Startup”. When you’re finished, just uncheck that box and you’ll no longer see this when the system starts.
Update Your New Linux Mint System
One last thing to do before we can consider your setup complete. You should run a software update to bring everything from the original installation up to date with the latest apps, security updates, and system packages.
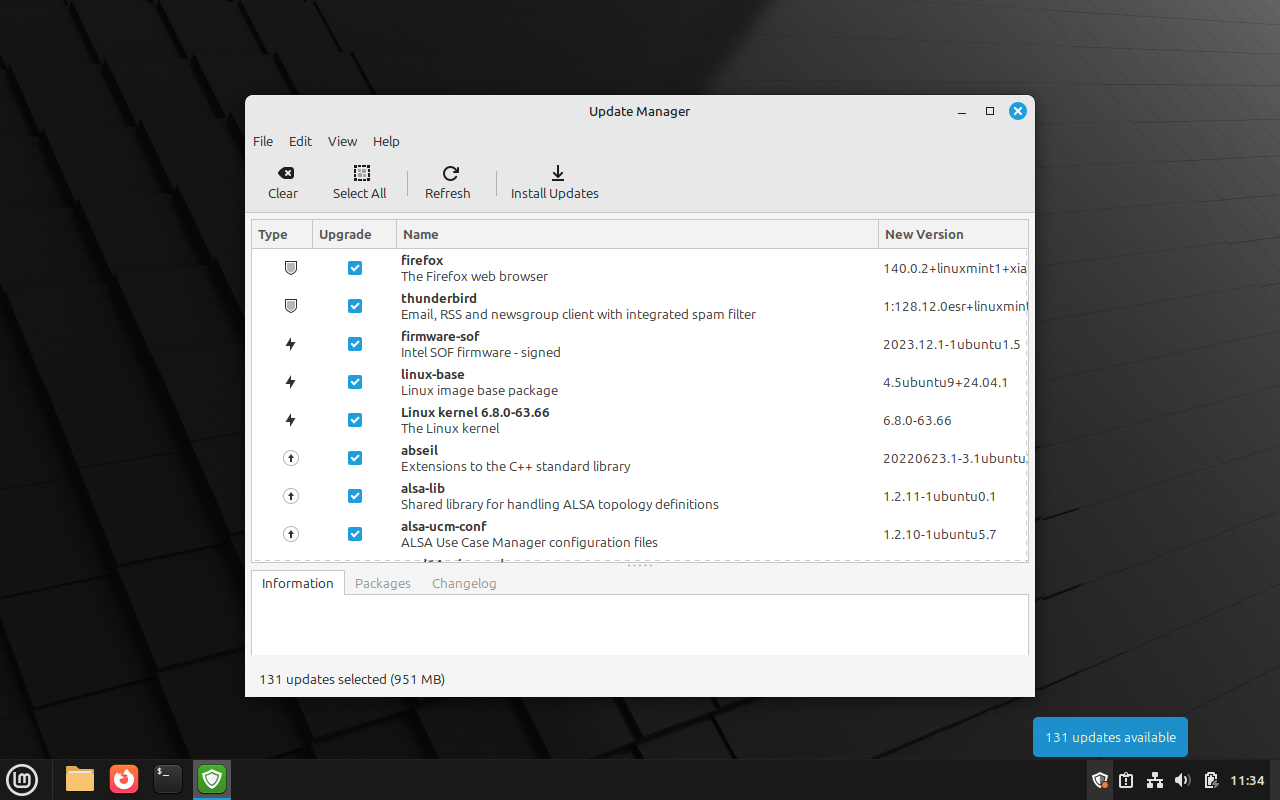
On the right side of the bottom panel you’ll most likely see an icon that looks like a small shield. If you hover your cursor over this icon it will tell you how many updates are available for your system. Clicking on the icon will open the update manager.
The update manager will show you a full list of everything that can be updated. All you need to do is first click on “Select All” and then “Install Updates”. The time needed to update will vary based on how many updates there are and the speed of your hardware, but you can expect it to take at least a few minutes. The update manager will let you know when everything is done, and most likely ask you to reboot your system.
Linux Mint Installation Is Complete
Congratulations! You now have a fully functional Linux Mint system. You’ve taken a great first step forward into the world of Linux. Enjoy your new operating system and the new experience of freedom and choice over what you can do with your own computer.
