Summary
- LibreOffice Writer can create fillable PDFs from scratch with built-in tools.
- Start by opening a blank document and adding form fields using the Form Controls and Form Design toolbars.
- To export as an editable PDF, ensure to toggle off Designer mode before going to File > Export As > Export as PDF.
LibreOffice Writer can build fillable PDFs from scratch. You don’t need a template or a plugin. You just start with a blank document, place form fields by hand, and export it the right way. The tools are already built in, just hard to find.
Open a Blank Writer Document
Launch LibreOffice Writer and start a new file. This is the form. Everything you build will sit on this page: labels, fields, layout, spacing. You can type freely to set up the structure. If your form needs a heading, section titles, or inline text, write them directly. Add spacing where fields should go.
This part behaves like any other document. The fillable bits come later.
Alternatively, you can start with a Libreoffice Writer template and go from there.
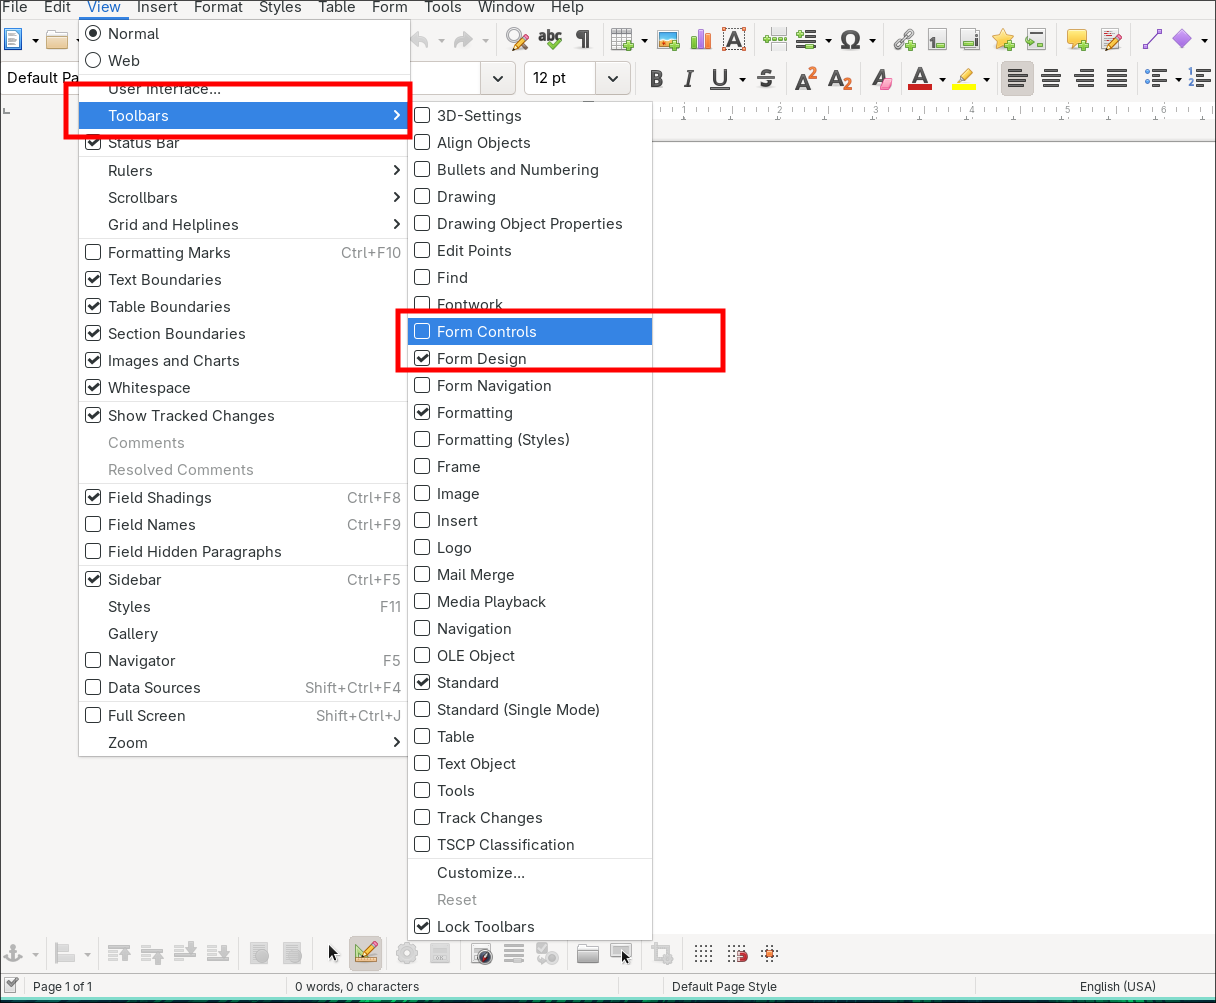
From the top menu, open View, then Toolbars, and enable two things: Form Controls and Form Design.
These bring up floating toolbars. One has all the field types. The other has layout and configuration tools. If they open on top of your page, just drag them aside. You’ll use both throughout.
Leave Design Mode turned on. It should be active by default. That’s what allows you to move and edit the fields instead of activating them.
Place a Text Field
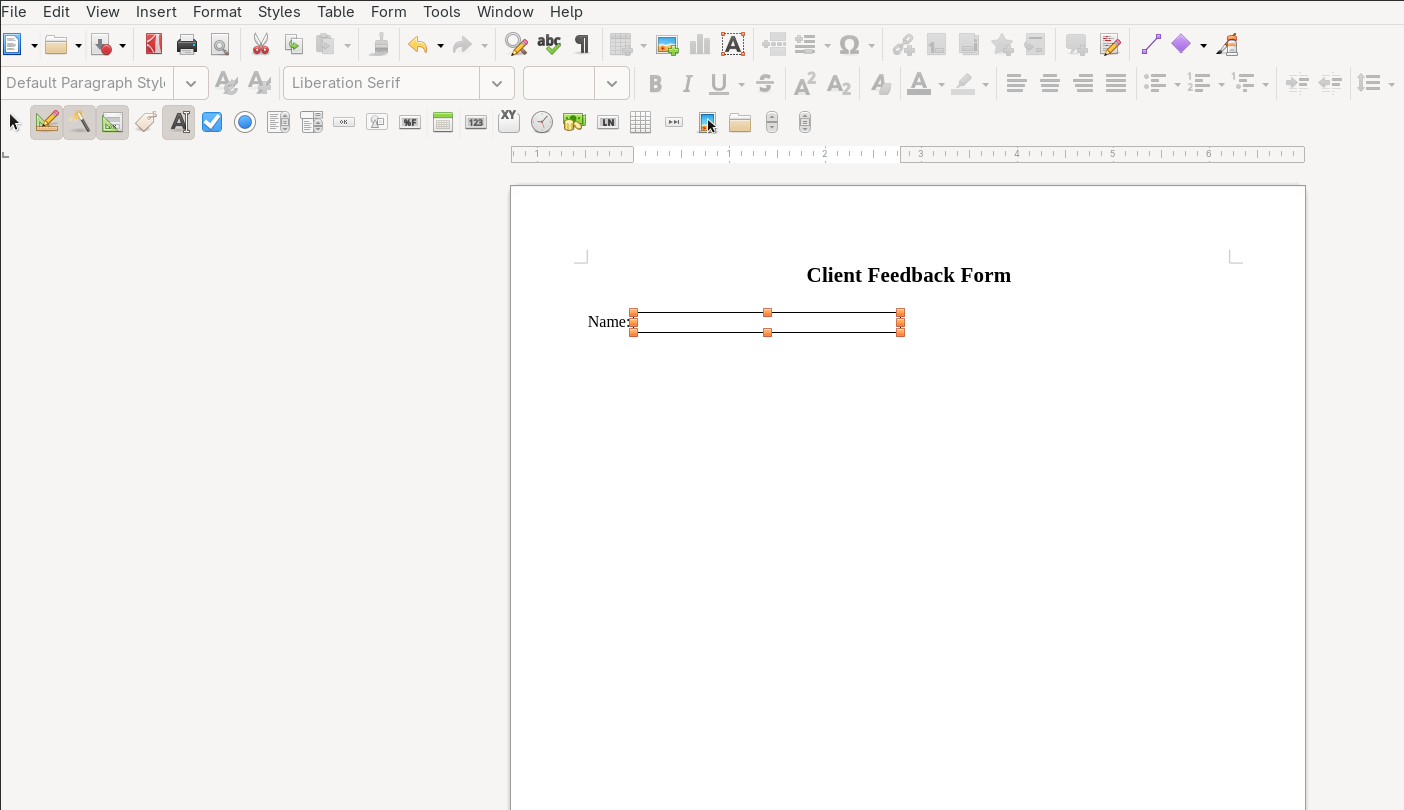
Click the Text Box icon in the Form Controls bar. Your mouse becomes a crosshair. Click and drag to draw the box where the input should go. This creates an empty field that someone can type into when the PDF is exported.
To label it, type the label yourself next to or above the field. LibreOffice doesn’t link labels to fields, so layout is manual.
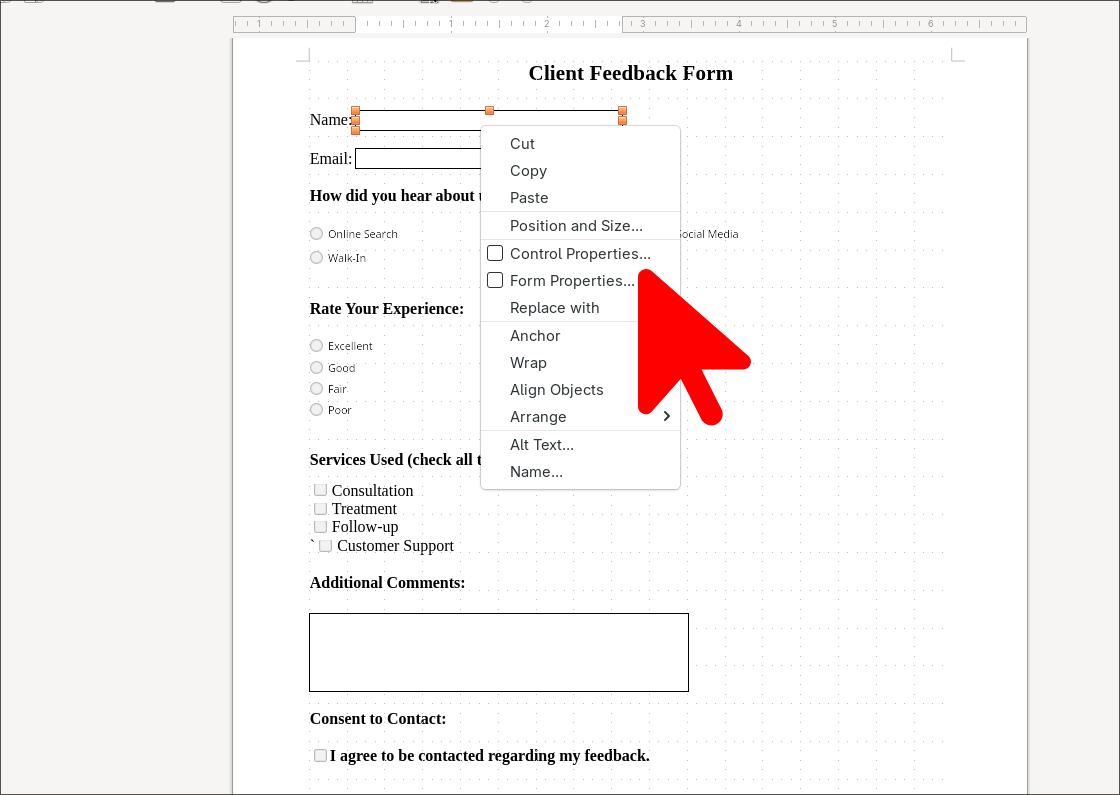
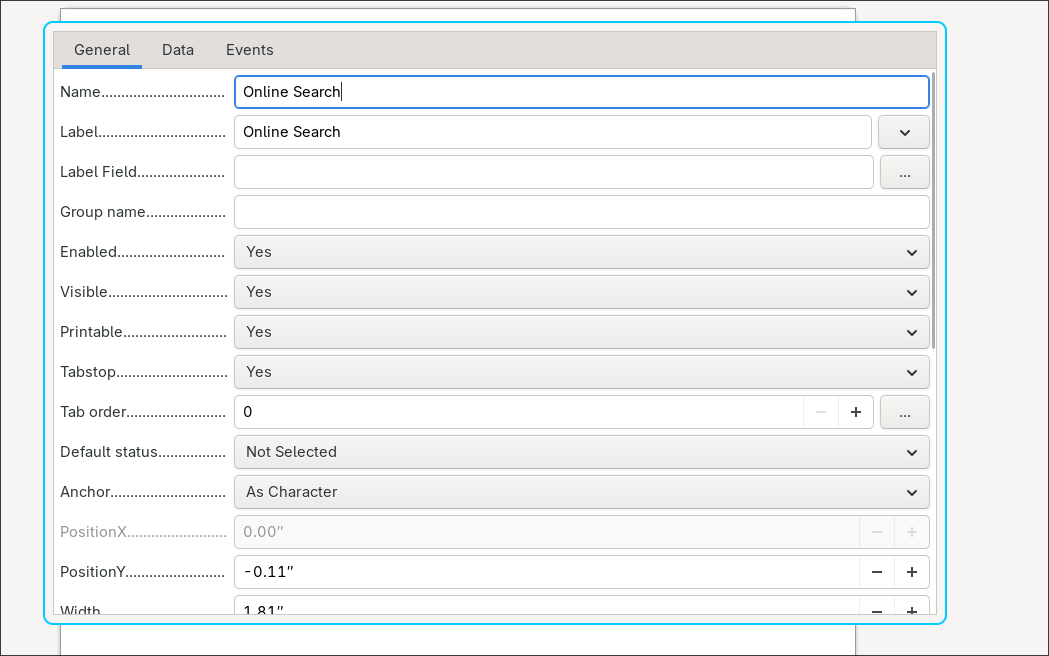
Right-click the field and choose Control Properties. That opens a small panel where you can customize how the field behaves. You can set placeholder text, adjust the font size, or allow multiple lines. There’s a checkbox for “Multi-line.” Leave the rest alone unless you need something specific.
Each field sits directly on the document. If you want to move it, drag it. If you want to resize it, grab the edges. LibreOffice doesn’t do smart alignment here, it just puts things where you tell it.
Add Selection Fields
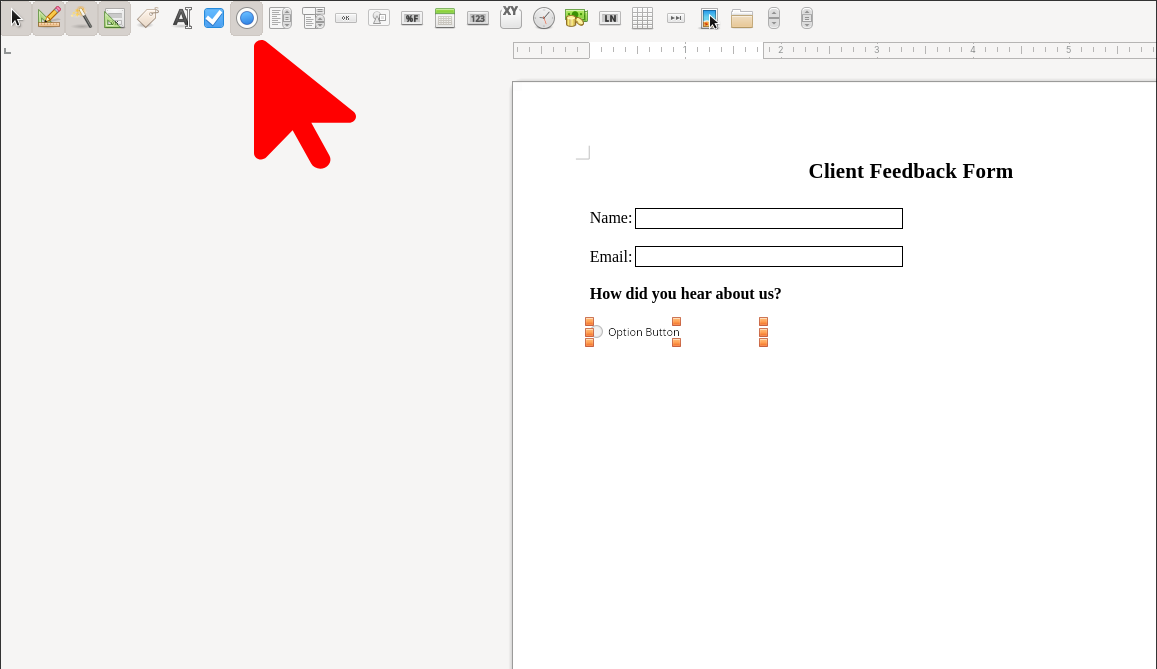
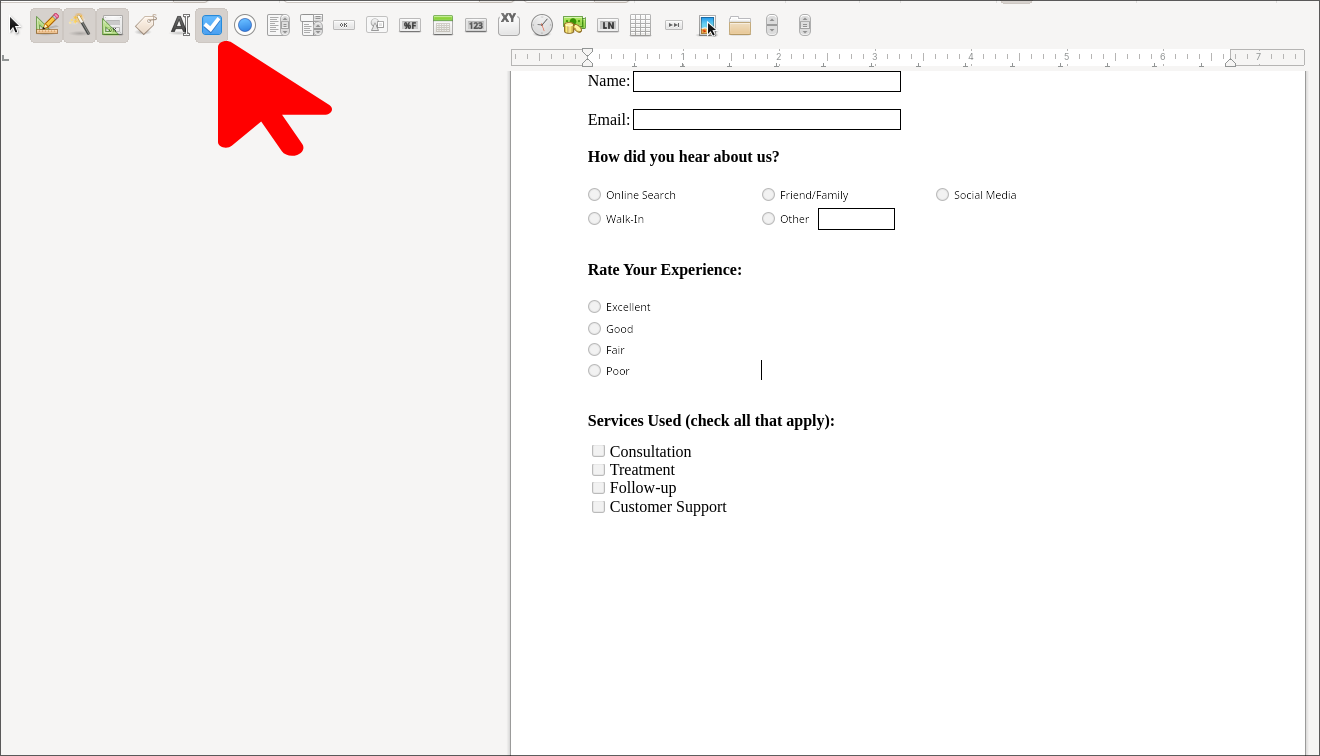
Checkboxes and radio buttons live next to each other on the toolbar. They behave similarly, but they’re not exactly the same.
A checkbox can be clicked independently. You can check one, all, or none. A radio button belongs to a group. If you select one, the others turn off. Place them the same way you did the text field. Click the icon, then draw the box where you want it.
It’ll come with a placeholder text. Double-click that to change the label. You can type labels next to each box directly on the page. LibreOffice doesn’t link labels to controls: you have to align things manually.
To group radio buttons together, you’ll need to give them the same group name. Open Control Properties, find the field labeled Group Name, and type something consistent. If you skip this step, they won’t behave as a set.
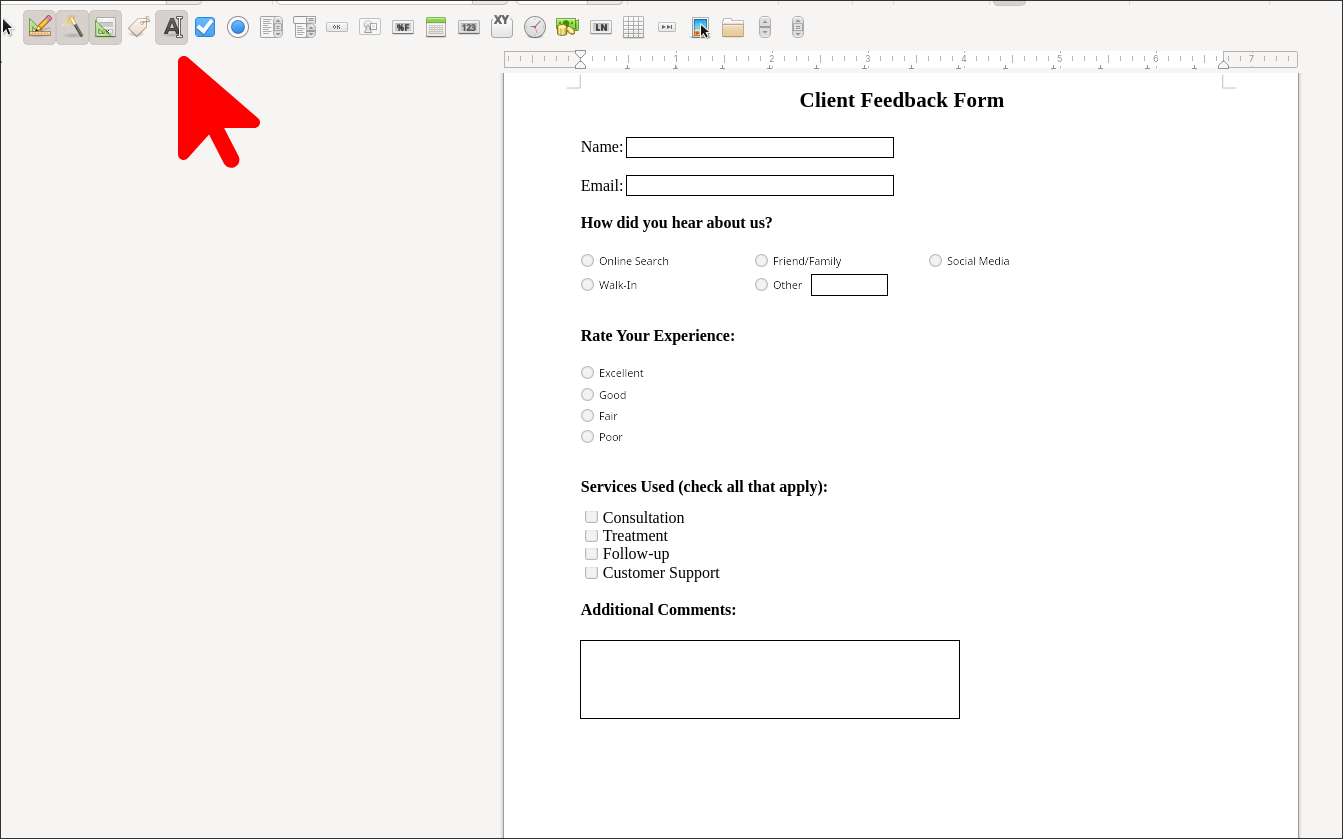
Add an Extended Text Box
You can also add extended text boxes for comments or suggestion boxes. Instead of clicking and dragging a horizontal line, you can drag it across with the text box tool selected to create a bigger text window.
Tidy Up the Layout
Everything you’ve placed so far sits freely on the page. It looks fine in the editor, but unless you align it, the exported PDF might feel off. This is where you clean up the text.
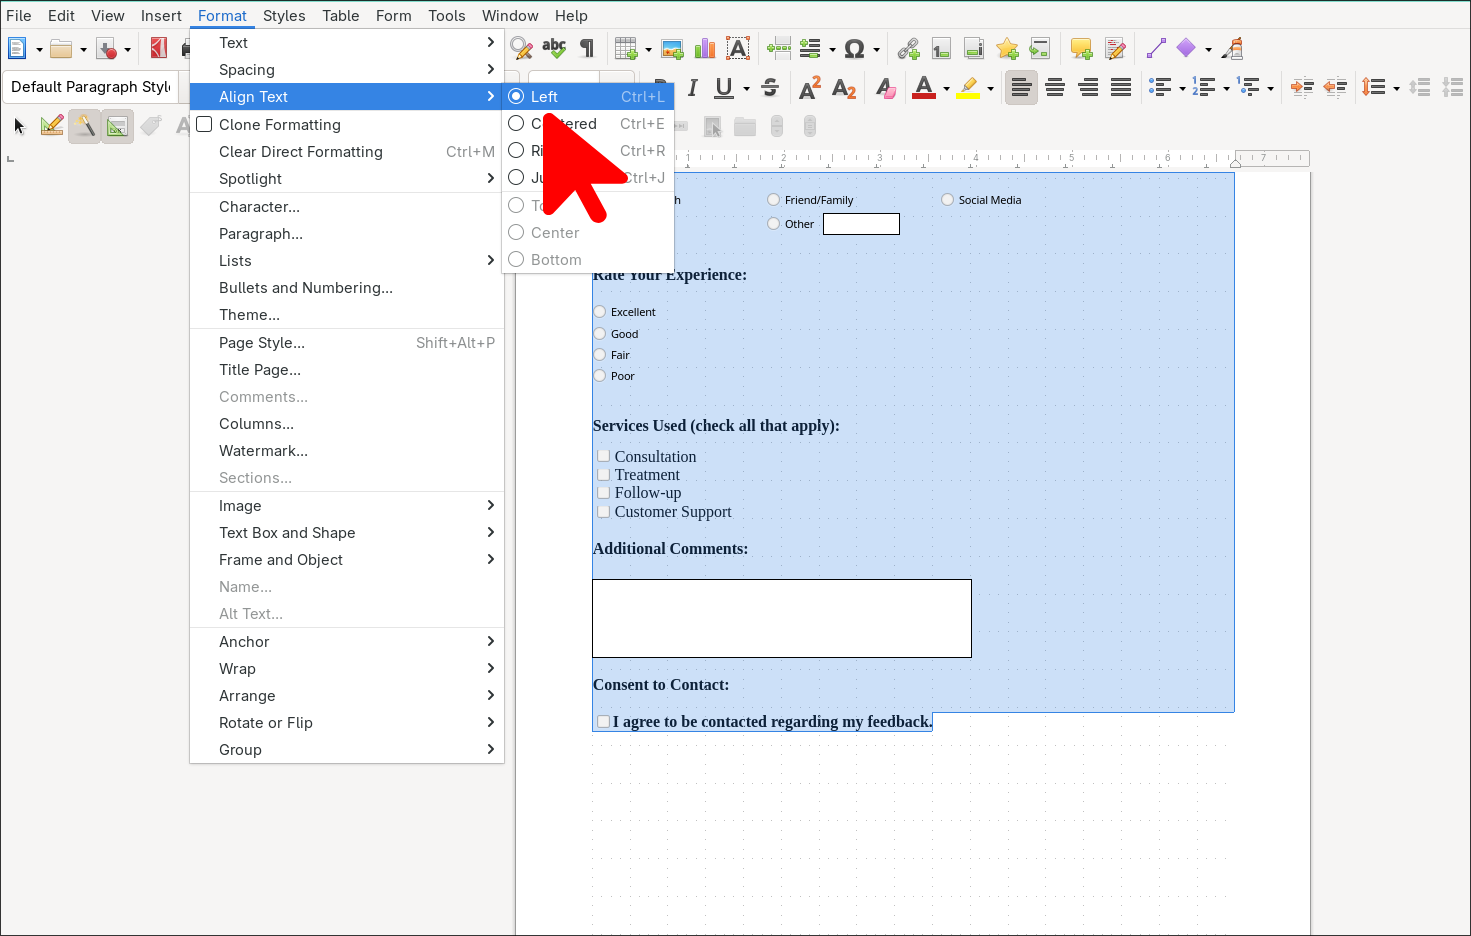
Open the Form Design toolbar and look for the alignment icons. They let you align objects left, center, right, top, or distribute them evenly.
Before using them, hold Shift and click each field you want to group. Then click the alignment option.
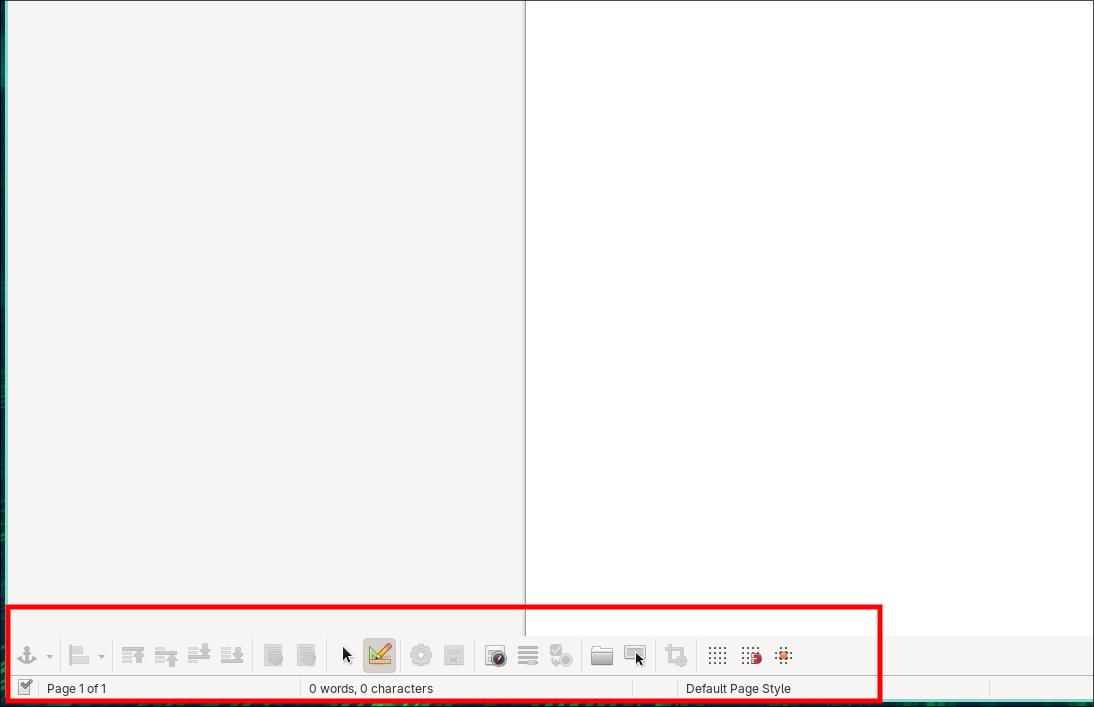
You can also nudge things using the arrow keys for finer control. If you want snapping, turn on Grid and Snap to Grid from the View menu or the Designer toolbar. It’s not perfect, but it helps. There’s also a button to set up a dotted overlay grid for your form (it’s simply a guide and won’t show up in the final result).
There’s no auto-layout. If something looks wrong, it’s because it is, and you’ll have to fix it manually.
Export the Fillable PDF
Before exporting your work, you need to toggle Designer mode off. This is critical. You can do so either through the View menu or by toggling the little Designer icon on the bottom panel. Once that’s done, your PDF can be exported as an editable document.
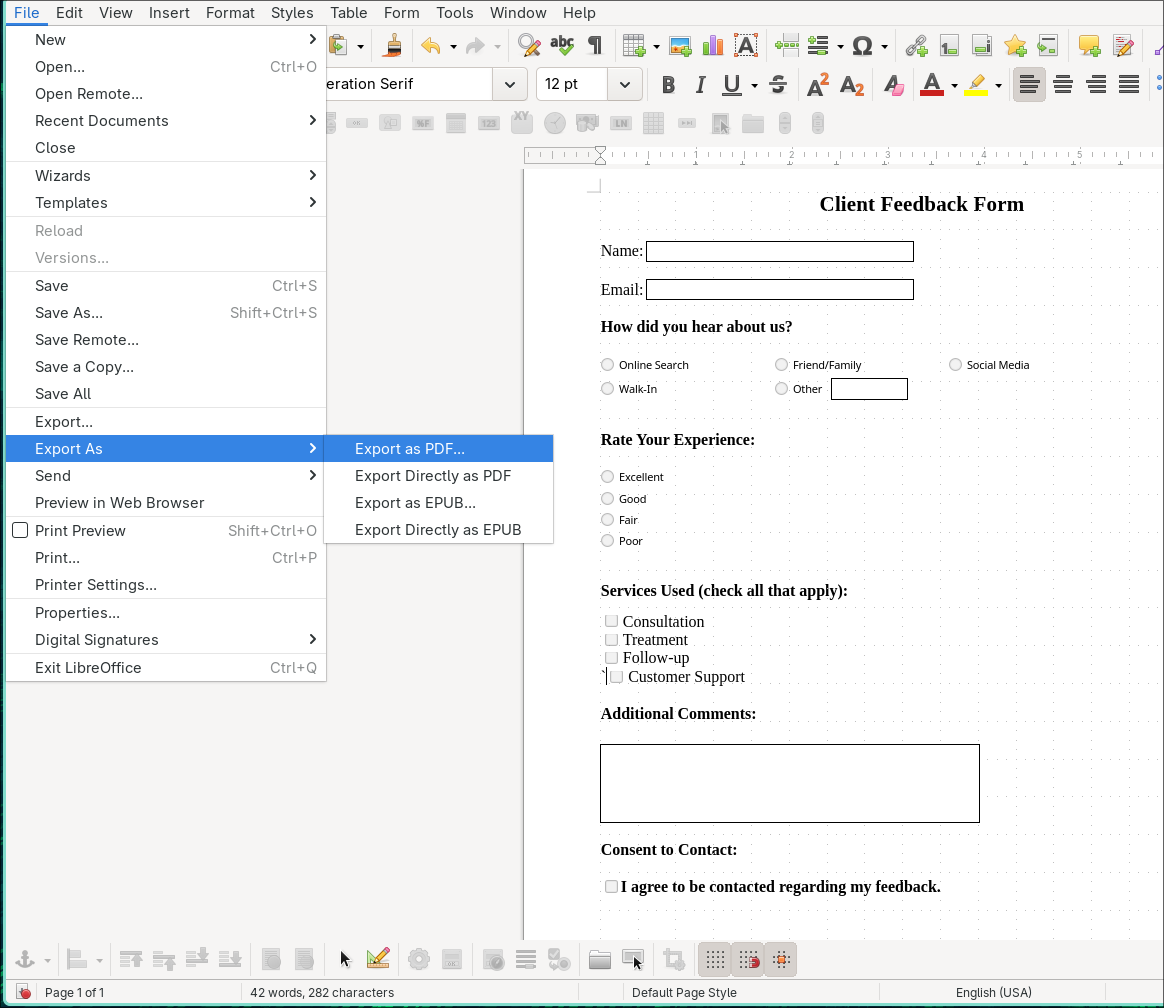
When everything is placed and working, go to:
File > Export As > Export as PDF
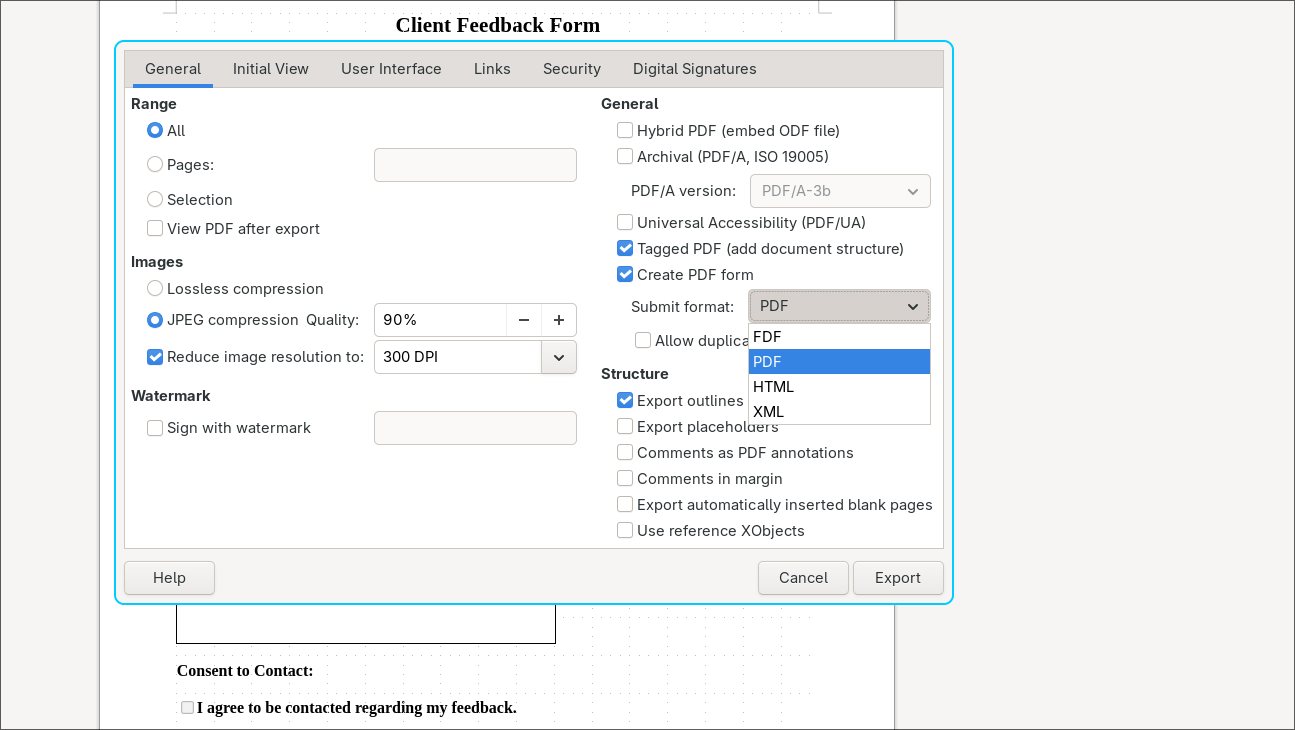
This opens a dialog with a wall of options. Scroll until you see Create PDF Form and make sure it’s checked. If you skip this step, your form won’t be interactive.
Click Export and save the file. That’s it.
Do not use Save As. That’ll save a regular ODT document, not a fillable PDF.
Test the Result
Open the exported PDF file in any PDF reader. Firefox, Chrome, and Adobe Reader all work.
Click into a text field. Type something. Try the checkboxes. Try the dropdown. If the cursor doesn’t show up, or the checkboxes don’t toggle, something went wrong.
You can always go back to Writer. Re-enable Design Mode. Fix what’s broken.
You can do a lot more than just boring data entry forms with these tools. Someone made an interactive PDF where you can play Doom and Tetris.
LibreOffice Writer builds fillable PDFs just fine, if you know where they hide the buttons.
