Summary
- I use Outlook Web’s Schedule Send feature to schedule emails to be sent in the future at the specified time and date.
- To schedule an email, open Outlook Web, sign in to your account, click “New Mail,” compose the email, click the down-arrow icon next to Send, and choose “Schedule Send.”
- To review or change scheduled emails, open Outlook Web, and access the “Drafts” folder.
The emails I now send arrive in my recipients’ inboxes at 9 AM sharp. Not because I’ve started waking up early, but because I’ve learned to use the Schedule Send feature in Outlook Web.
How Outlook Web’s Schedule Send Feature Ensured My Emails Arrived On Time
Up until recently, my emails went out at random hours. Sometimes, I’d be writing and sending emails at 3 AM. Other times, it would be 11 AM. Notice something? Yes, inconsistency.
Luckily, I found the Schedule Send feature in Outlook Web. This feature would allow me to write an email whenever I want, but it would only send that email on the date and time that I chose. This way, my emails became more organized and seemed more professional. It also helped me with a few other situations, as discussed in the use-cases section below.
How to Schedule an Email in Outlook Web
To schedule an email to be sent later in Outlook Web, you don’t need access to any third-party tools. The feature to schedule emails is built right into the web app itself; all ready for you to use.
To access it, launch Outlook Web and sign in to your account. Then, in the site’s top-left corner, click the “New Mail” button to compose a new email.

You’ll see the usual new email window where you can compose your email. Here, fill in the usual fields, like To, Subject, and email body. Feel free to specify the CC and BCC fields as well.
After writing the email, next to the Send button at the top, click the down-arrow icon and choose “Schedule Send.” Make sure not to click Send, or Outlook Web will send your email immediately.

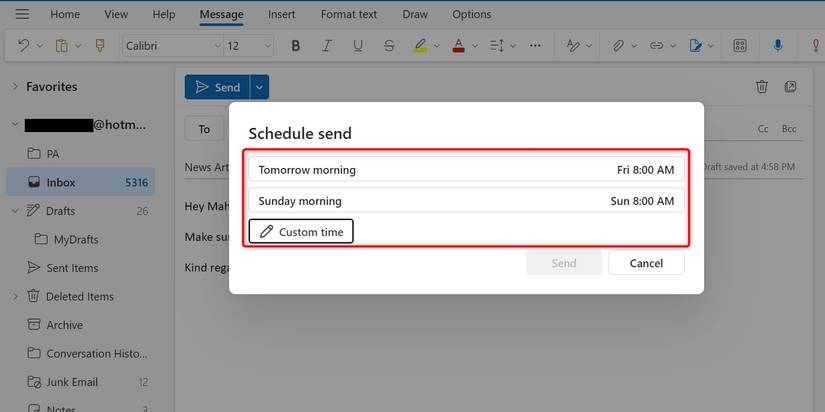
You’ll see the Schedule Send window with a couple of pre-filled timings. You can choose one of these options or specify your own by clicking “Custom Time.”
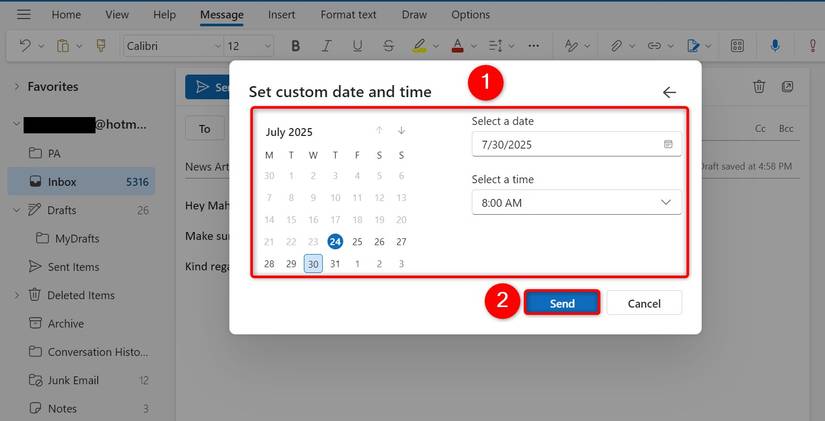
If you clicked Custom Time, you’ll see the Set Custom Date and Time window. Here, select the date and the time when you want Outlook to send your email. Then, click the “Send” button.
Outlook will now send your pre-composed email on your chosen date and time. You don’t have to be logged in to your account or even Outlook Web opened on your computer; Outlook will just send your email anyway.
How to Review and Modify Scheduled Emails in Outlook Web
If you want to take a look at the emails you’ve scheduled or you want to modify the scheduled emails before Outlook sends them, follow these steps.
Access Outlook Web and sign in to your account. In the folder list, beneath Inbox, click “Drafts.” You’ll now see all your scheduled as well as drafted emails.

If you want to modify a scheduled email, click that email on the list. You’ll see the usual email compose window where you can modify the contents of the email. After you’ve made any changes, click the “Send” button at the top. (Don’t worry, clicking Send won’t send the email; it’ll just save the changes you’ve made to your email.)
If you want to change a scheduled email’s date and time, next to Send, click the down-arrow icon and choose “Schedule Send.”

If you don’t wish to send a scheduled email anymore and you want to cancel the task, in the Drafts folder, hover over that email and click the trash can icon. Outlook will delete this email.

Use Cases Include Sending Reminders and Spacing Out Batch Emails
If you happen to be slightly different from me, which is to say you aren’t late sending emails, there are other use cases of Outlook’s Schedule Send feature.
One use is to send reminders or follow-ups the next morning. You can remind people about their tasks or follow up on their queries by scheduling your emails in advance. If you happen to send batch emails, you can space out those emails using the scheduling feature. This way, your emails are sent at the specified interval.
You can also use this feature to wish people on their birthdays. You can schedule all the birthday emails at once, and let Outlook Web take care of ensuring your messages are sent at the right time. This applies to celebrating people on their anniversaries as well as other similar events as well. Note that you can attach files as well to your emails if you’d like to send along an online card or something.
And that’s how I ensured my emails arrived in the recipients’ inboxes at the exact time I wanted. This helped me keep things organized on my end. Enjoy!