Editing your own writing is hard enough, but doing it quickly feels impossible. These built‑in Word features changed how I proofread. Proofreading is still not hands-free, but it’s less tedious.
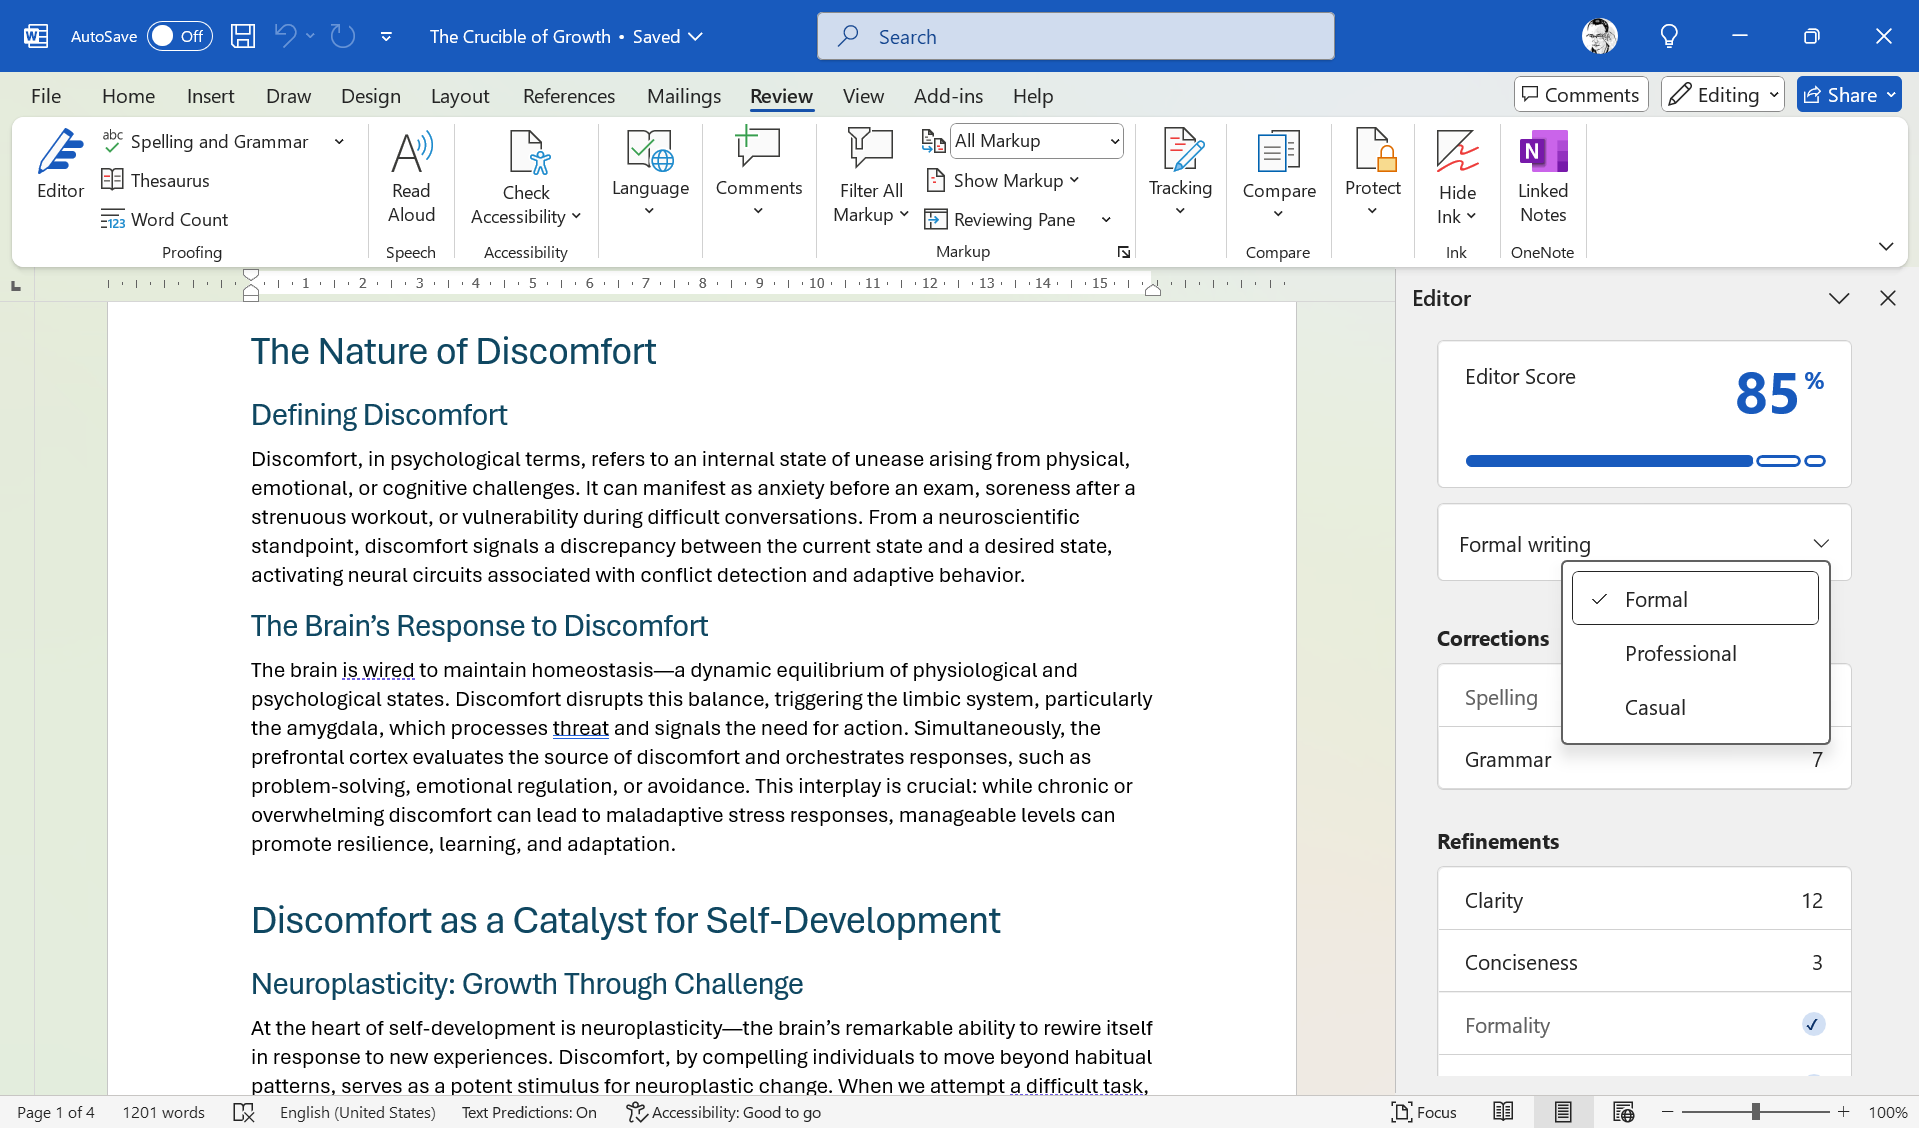
Word’s Editor pane is the quickest way to catch low-hanging mistakes. You can access it with a Microsoft 365 subscription, and it is a good alternative to Grammarly.
- Press F7 (or choose Home > Review > Editor).
- Work through the list in order—red spelling, blue grammar, then purple style tips.
- Click a suggestion to accept it or the arrow to ignore it.
For better results, I pick one among Formal writing, Professional, or Casual styles to prime Word for relevant edits. It’s also always wise to do a plagiarism check with Similarity before changing the text.
2
Make the Editor Work for You
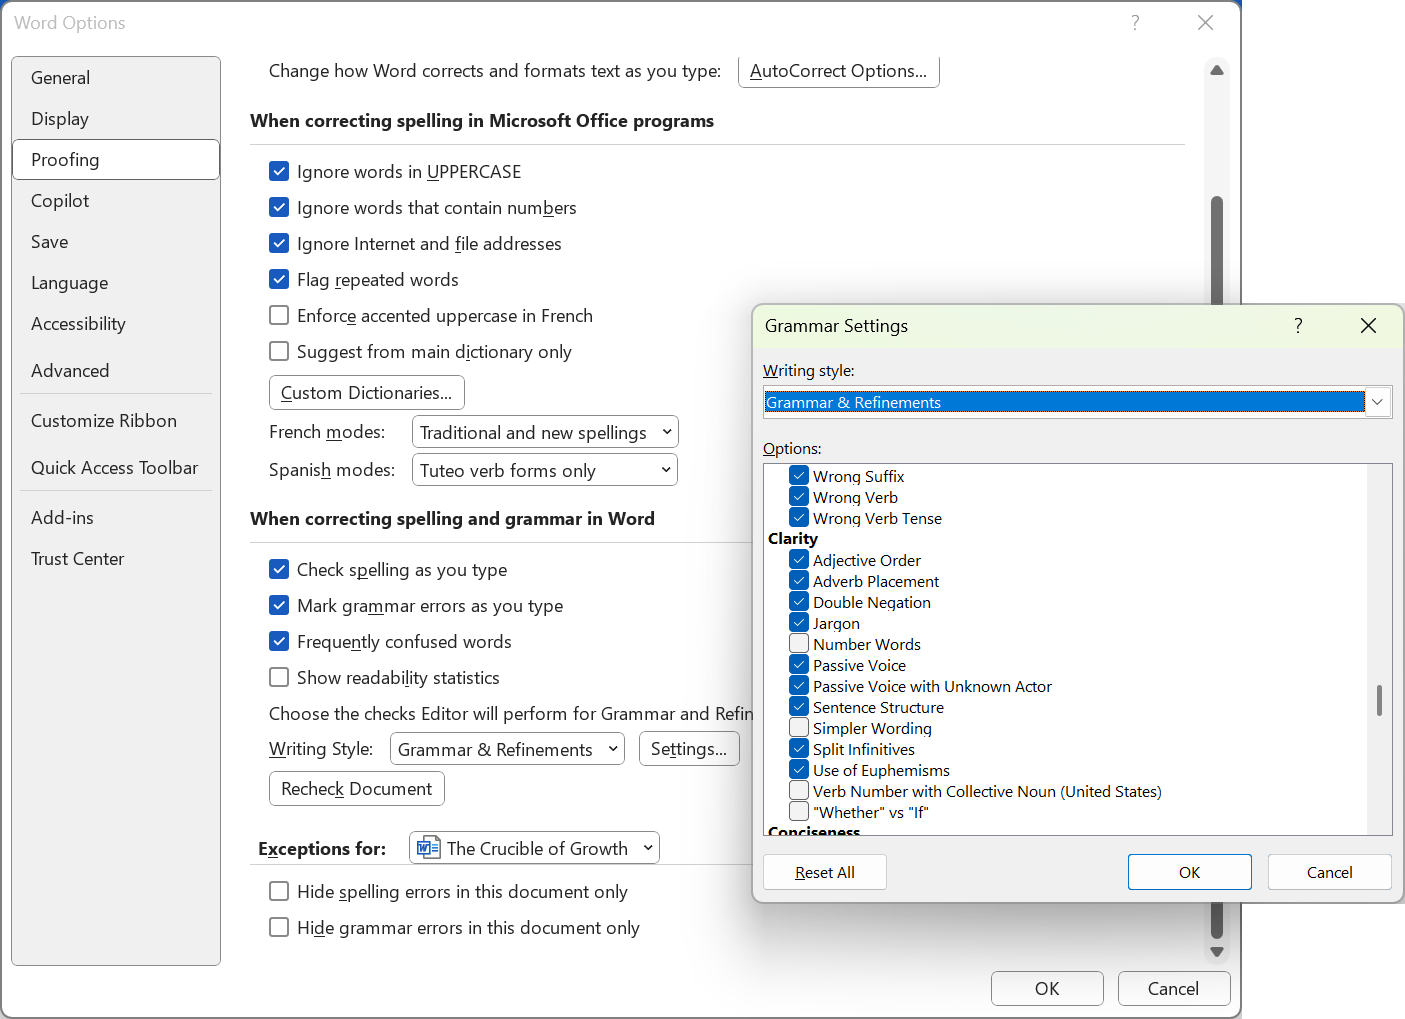
Navigate to File > Options > Proofing. Under Writing Style, pick Grammar & Refinements and hit Settings. Turn on checks you need (such as Conciseness or Passive Voice) and turn off ones you don’t.
As the Editor wipes out easy errors first, every later pass is lighter and faster.
Add chronic typos like “teh” to AutoCorrect (same Proofing dialog). The Editor never has to flag them again.
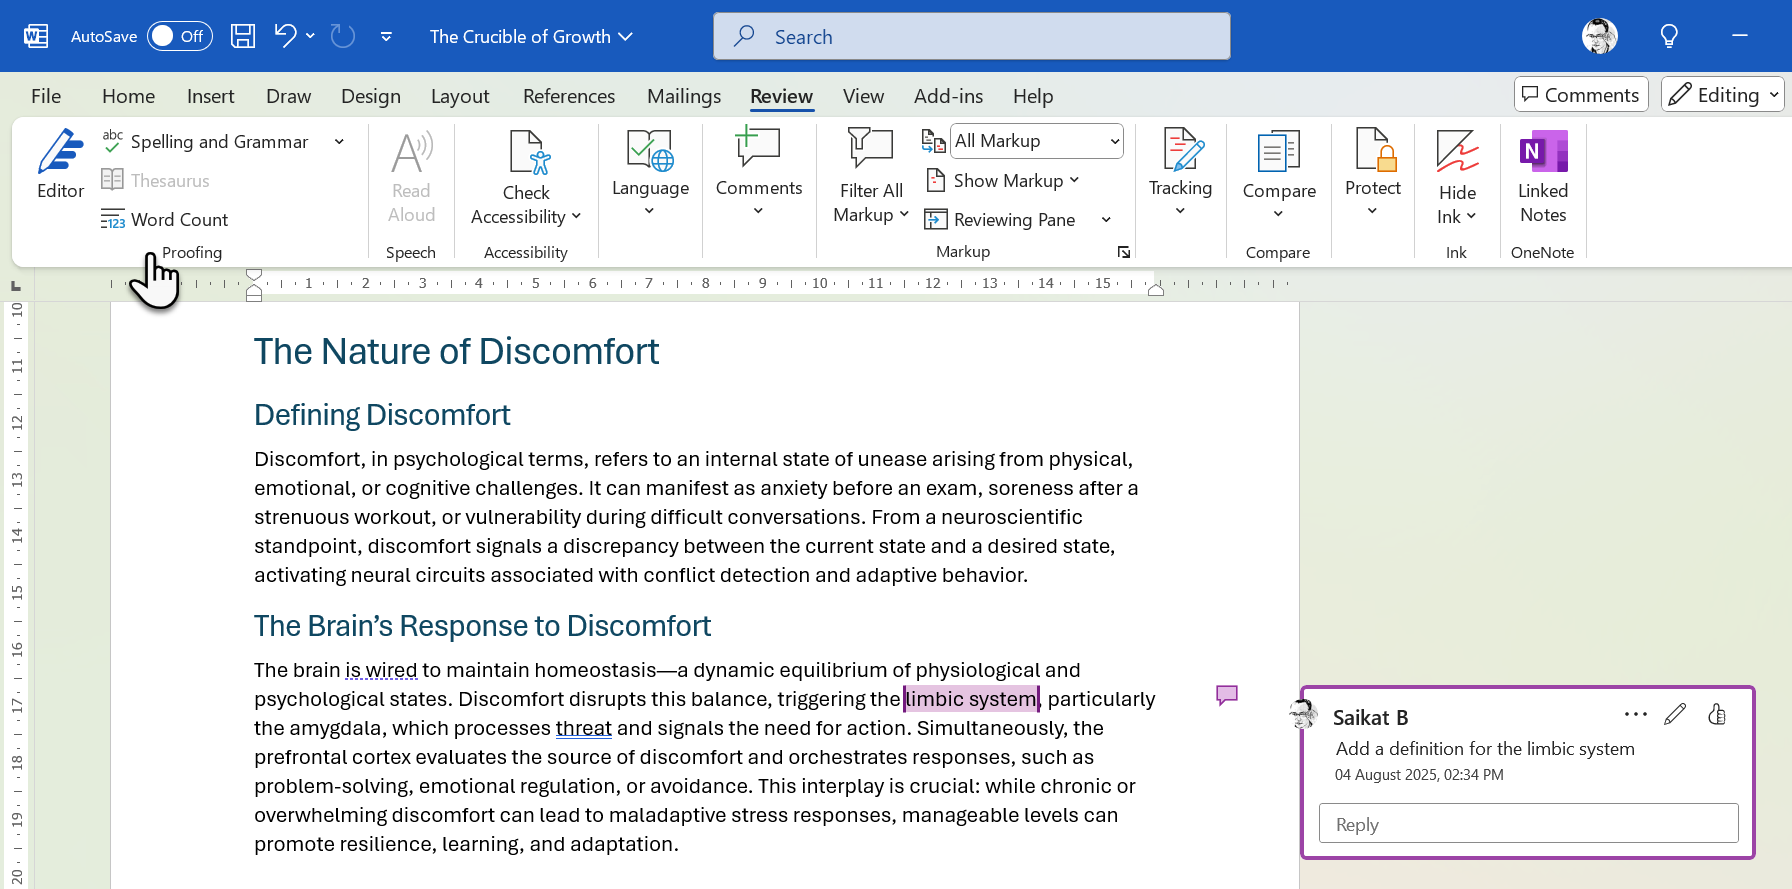
The Review tab is a proofreader’s control panel. Three tools save me minutes on every draft.
Thesaurus: Highlight a word, click Thesaurus, and find better alternatives to enhance clarity or variety.
Word Count: Check it under Review > Word Count to ensure you meet length goals without counting manually.
Comments: Select text, click New Comment, and add notes for yourself or collaborators.
While drafting a report, I highlight confusing sentences and drop quick comments like “clarify” or “add source.” During the final proof, I jump straight to each note instead of rereading the whole document. Marking sections for additional review later also helps avoid mid-proofread distractions.
4
Compare Documents and Combine
Handling multiple drafts? Use Review > Compare. Choose the original and revised versions. Then, click OK. Word creates a third file showing every change. You can also combine and save the changes in either of the two existing documents.
Inserted text appears underlined; deletions show as strikethrough. I run Compare whenever a team member sends edits. It spots differences in seconds, so I don’t have to hunt around for the changes. Comparing Word documents is critical for collaborative editing, but it’s also quite handy when you are working with your drafts.
5
Check Readability Statistics
Clear writing beats fancy writing. Turn on readability scores once and let Word grade every draft. Enable it via File > Options > Proofing. Check Show readability statistics. Then run Spelling & Grammar on the finished draft.
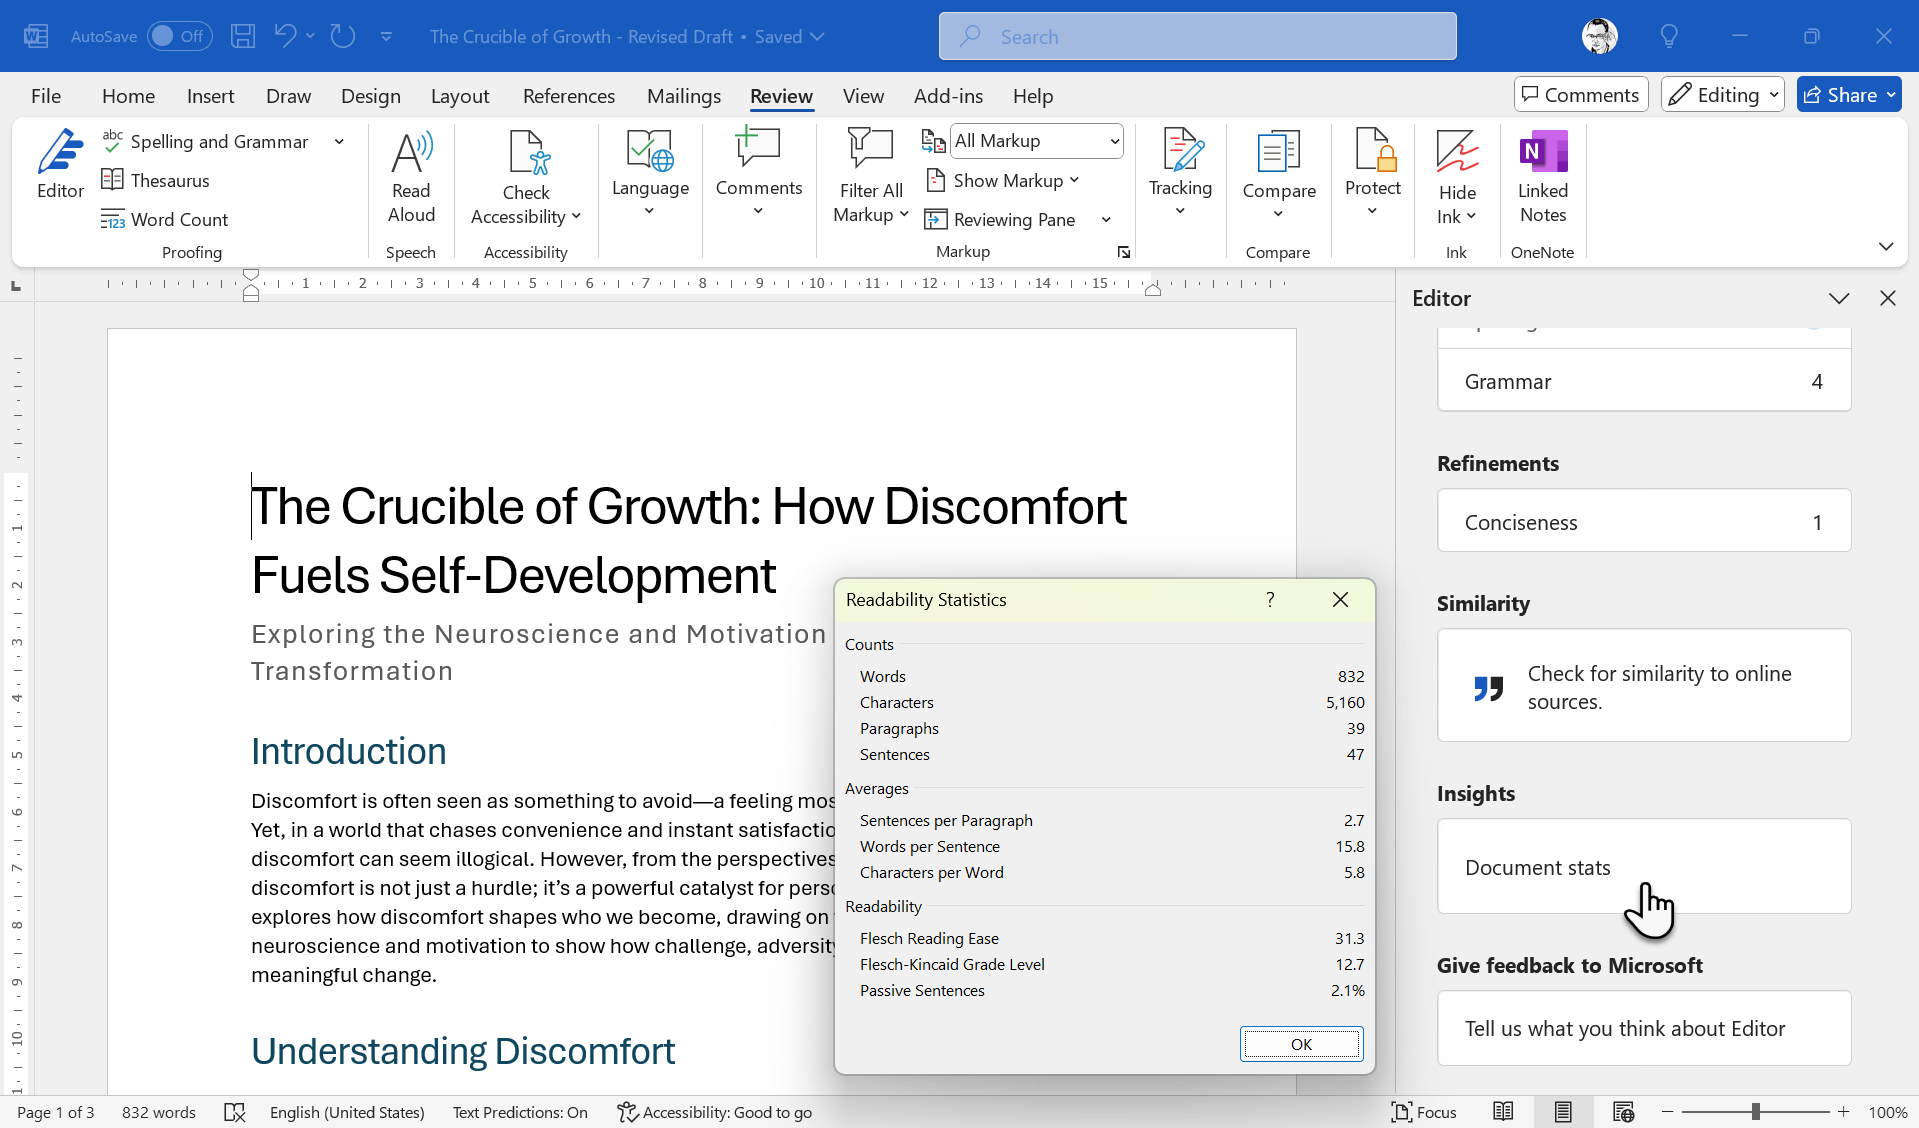
On the Editor pane, click on Document stats to display a dialog with the readability metrics.
You’ll see the Flesch Reading Ease and Flesch-Kincaid Grade Level. For general readers, shoot for a grade level around 7–8. If it’s higher, split long sentences and swap jargon for plain words. Look at the report that pops up with stats like average words per sentence to help you figure it out.
6
Leverage Track Changes for Collaborative Proofreading
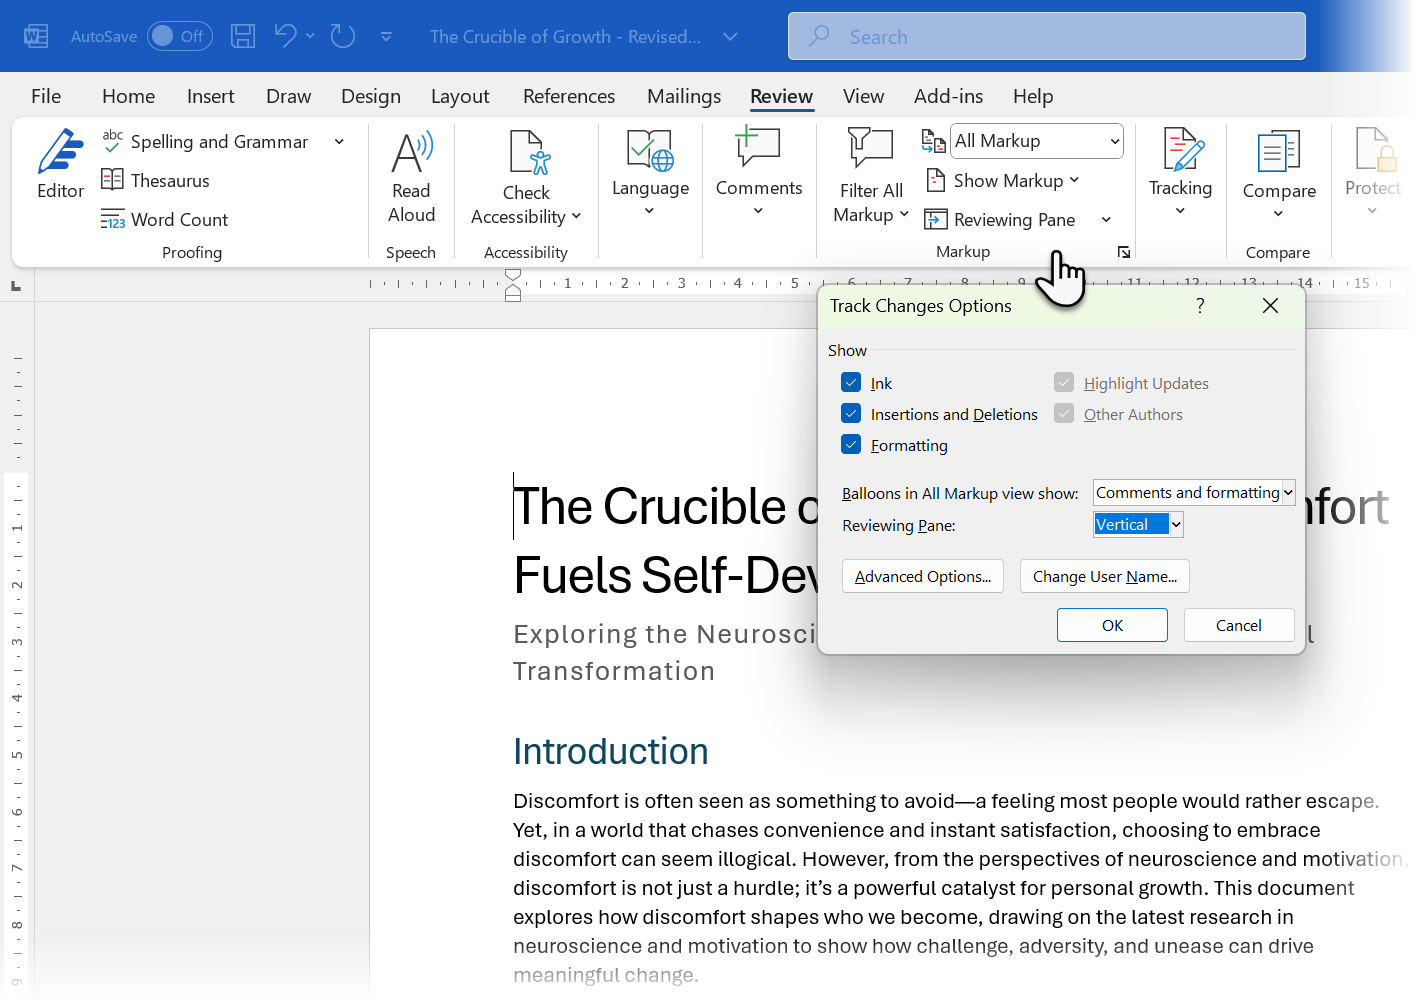
Press Ctrl + Shift + E and go to Review > Markup to record every tweak.
- Simple Markup keeps the doc readable; All Markup shows every insertion and deletion.
- Use Accept or Reject in the Review tab to approve edits quickly.
- Add inline questions with Ctrl + Alt + M.
For team editing, Track Changes is a must. Turn it on under Review > Track Changes, and every edit—deletions, additions, formatting—gets marked with who made it. Review changes by clicking Accept or Reject in the same tab.
Even when I’m the only editor, Track Changes lets me revisit my revisions without losing the original sentences.
7
Use Find & Replace for Rapid Fixes
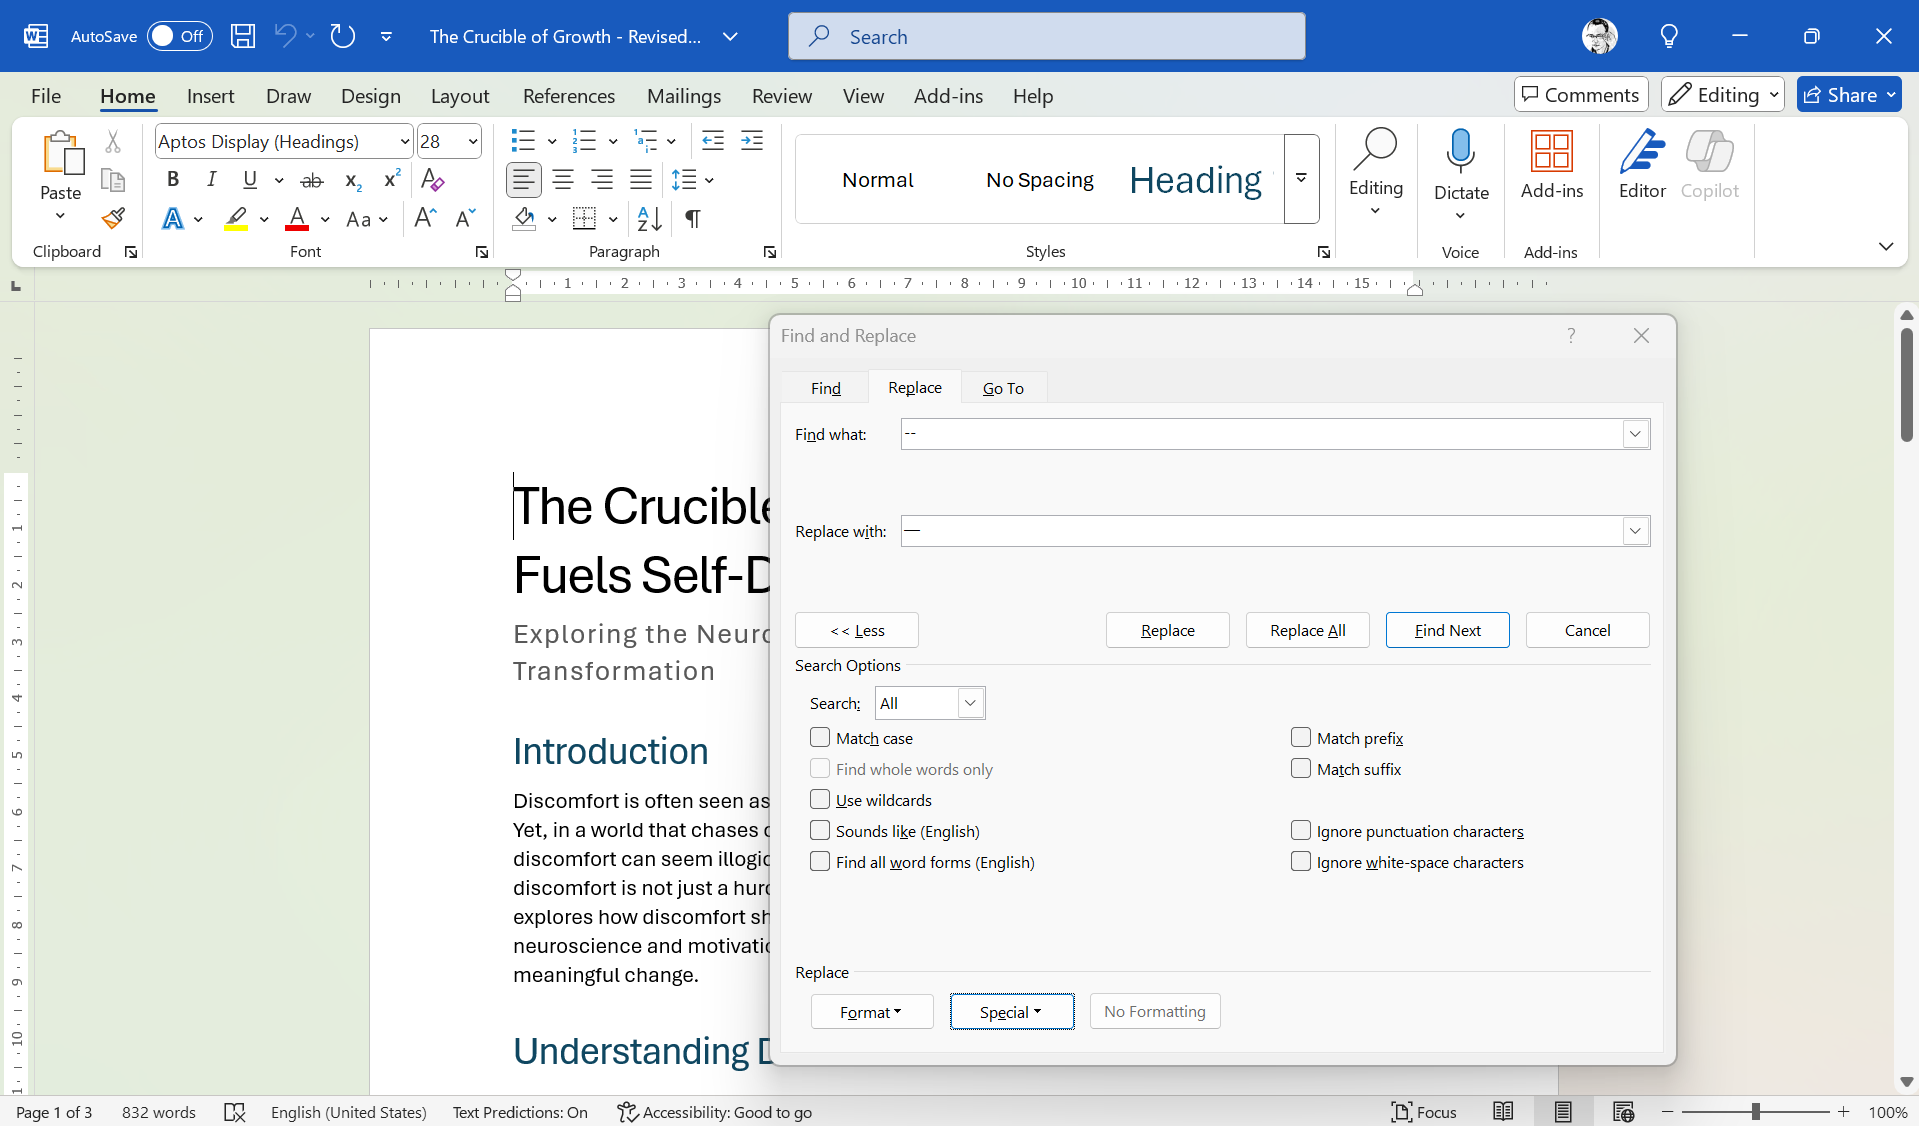
Find and Replace is one of the most underrated editing tools in Word. Press Ctrl + H and use the dialog to search through the document. Some common errors and typos you can look for include:
- Double spaces: Tap the space bar twice in the Find field. Tap the spacebar once in the Replace field.
- Year updates: Replace “2024” with “2025” in two clicks. Be mindful, especially around the turn of the year.
- Punctuation upgrade: There’s a lot of difference between the “em” dash and the “en” dash. Swap accordingly with the Find and Replace dialog.
Click More for options like Match case or Use wildcards when you need surgical precision. You can do a lot more with the options hidden under Format and Special, like search for specific formatting or special characters.
8
Listen With Read Aloud
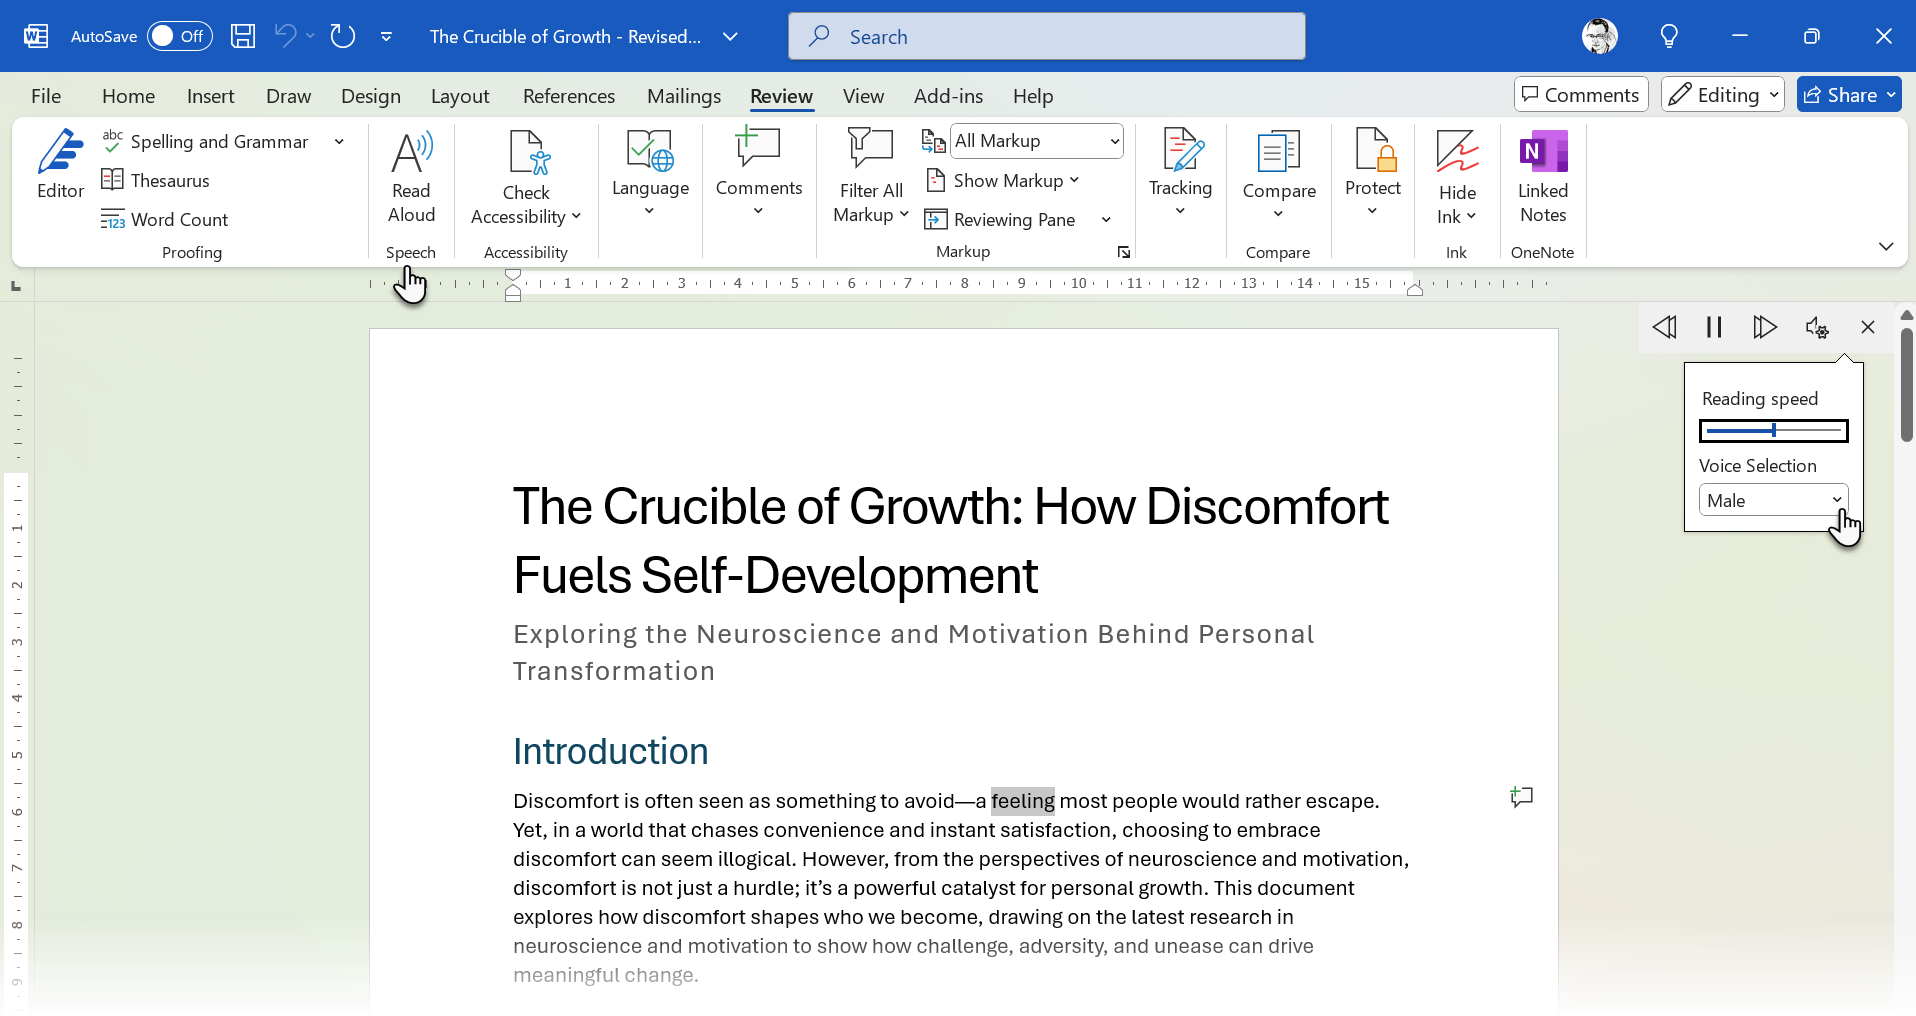
Our ears catch what your eyes skip. Select any text and press Ctrl + Alt + Space (or choose Review > Read Aloud). Word highlights each word as it speaks.
Remember these keyword shortcuts to use it more efficiently.
- Alt + Right Arrow speeds up; Alt + Left Arrow slows down.
- Ctrl + Space pauses or resumes.
I close my eyes while listening. It also allows you to pause or skip sections as needed for focus.
I use Read Aloud as a second proofreader. It’s great for spotting subtle mistakes like odd phrasing, missing words, and doubled words after a long editing session. I think it’s an underrated feature in Word that we could use more often.
9
Change Views for a Fresh Perspective
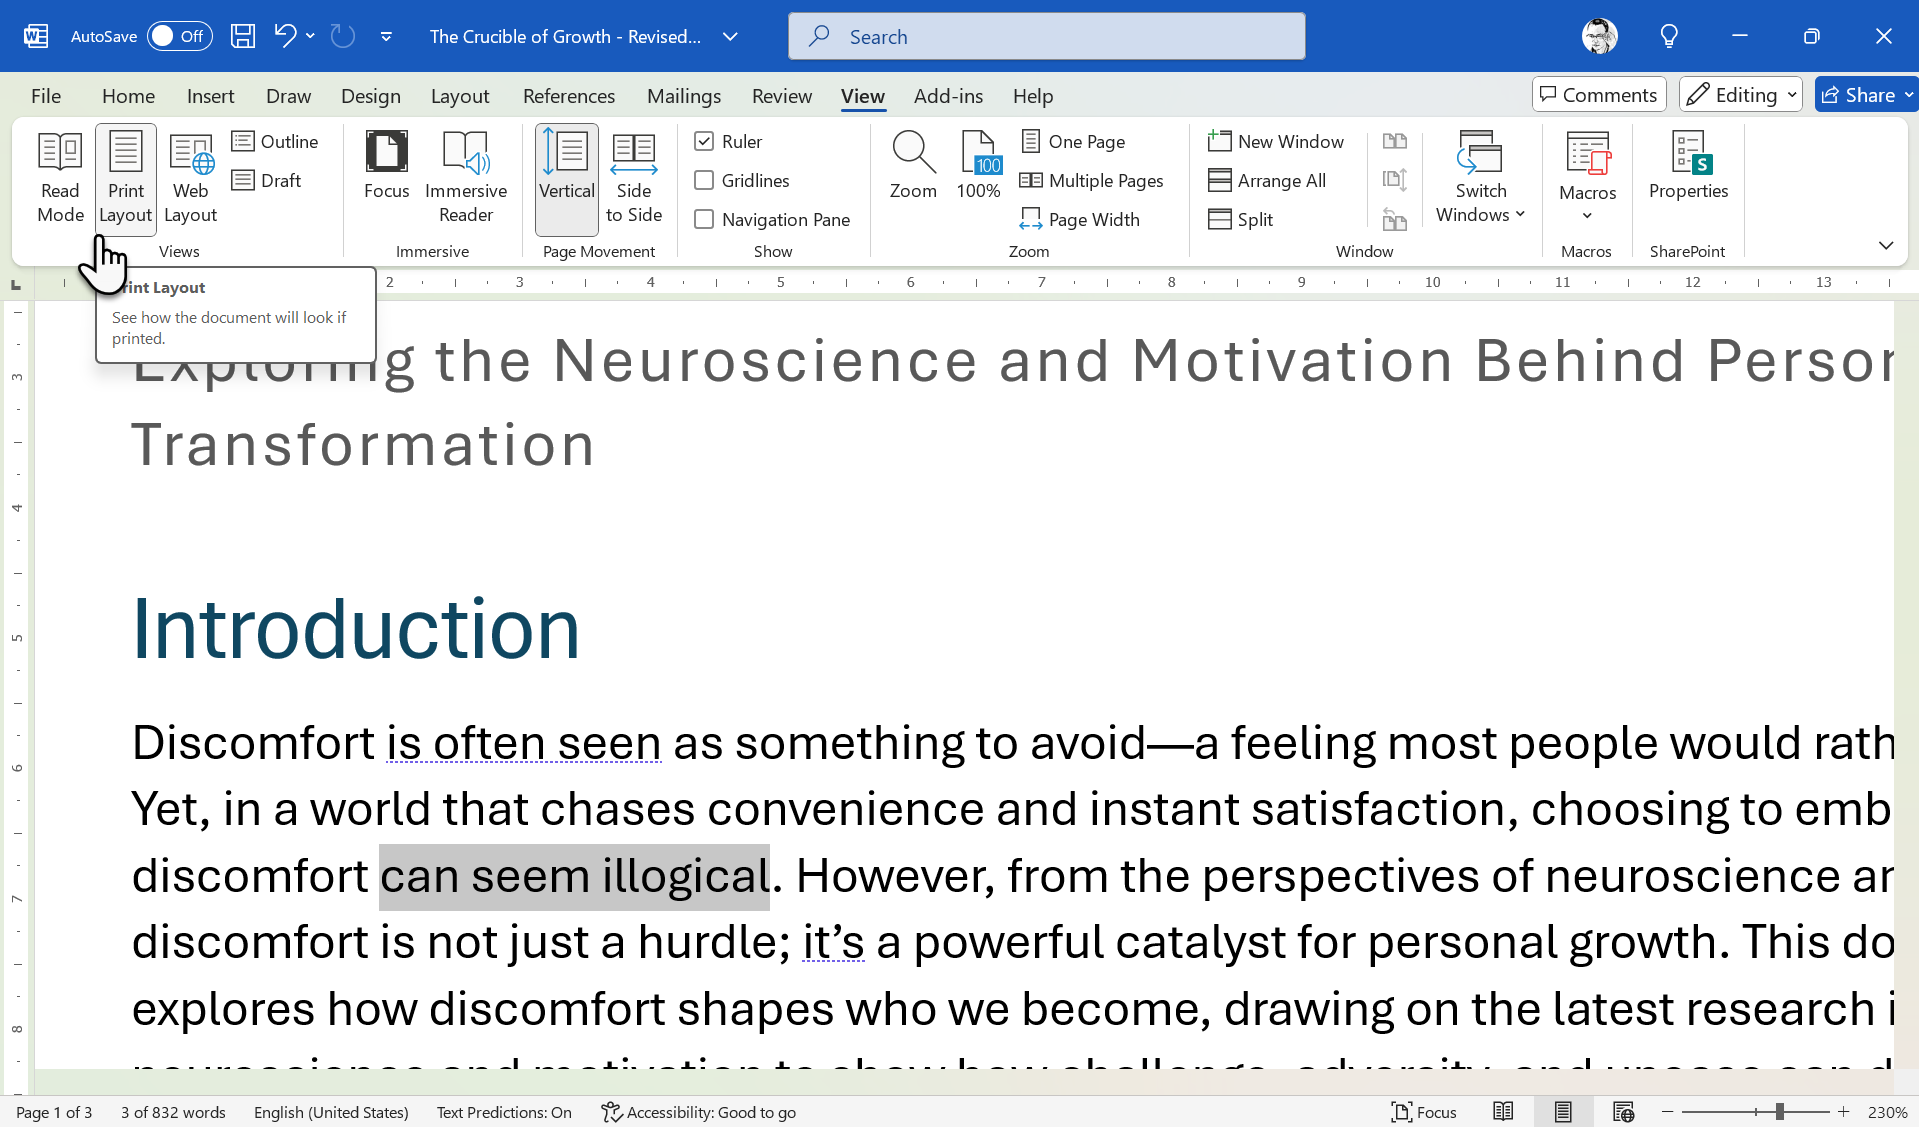
After a while, the same layout numbs your attention. Break the pattern by switching views from the View tab.
- Web Layout: See your document as a flowing webpage to check the overall structure and spacing.
- Outline View: Focus on headings and hierarchy to ensure logical flow. In Outline View, notice a section out of order? Drag it to fix the structure without digging through the text.
- Read Mode: This mode isn’t suitable for editing as it hides the Ribbon. It’s made for comfortable reading with its distraction-free view.
These shifts break visual fatigue, helping you spot formatting or organizational errors missed in Print Layout. It’s a simple trick for a thorough review.
I have also tried the Immersive Reader with its options like Line Focus and Page Color. While it helps to break the monotony, it hasn’t helped me proofread twice as fast.
Select all (Ctrl + A) and switch to a quirky font like Courier. A new typeface forces the brain to slow down and see each letter. Hit Ctrl + Z and revert the font when you finish. Temporarily change the zoom level (e.g., zooming out to 75%) to see the document differently and catch formatting slips.
10
Master Essential Shortcuts
You don’t need a hundred shortcuts; just a dozen that slash friction. Also, pressing Alt turns on Key Tips, showing letters on the ribbon and Quick Access Toolbar that match commands. Then, pressing Alt plus these letters lets you use shortcuts without the mouse.
|
Action |
Windows |
macOS |
|---|---|---|
|
Run Editor |
F7 |
Cmd + Option + L |
|
Jump to next error |
Alt + F7 |
Option + F7 |
|
Toggle Track Changes |
Ctrl + Shift + E |
Cmd + Shift + E |
|
New comment |
Ctrl + Alt + M |
Cmd + Option + A |
|
Find |
Ctrl + F |
Cmd + F |
|
Replace |
Ctrl + H |
Cmd + Shift + H |
|
Read Aloud |
Ctrl + Alt + Space |
Option + Esc |
|
Show formatting marks |
Ctrl + Shift + 8 |
Cmd + 8 |
Pick two a week until they’re muscle memory.
