A few weeks ago, my Windows 11 PC started lagging badly. Upon checking, I found that OneDrive had occupied a huge amount of storage on my PC. Luckily, I made all my OneDrive files cloud-only, and here’s how you can do that, too.
What Is OneDrive’s “Files On-Demand” Feature?
OneDrive offers a feature called Files On-Demand. With this feature, you can see all the files that you’ve stored with OneDrive on your PC, but those files stay on the cloud (not on your local storage).
As the feature name implies, when you demand to see a file, OneDrive downloads that specific file from the cloud and serves it to you. At all other times, the file icon remains visible in File Explorer, but the file isn’t actually stored on the local storage. It stays on OneDrive’s servers.
This feature allowed me to see all my OneDrive files without filling up my computer’s storage space.
How to Activate OneDrive’s “Files On-Demand” Feature
Turning on OneDrive’s Files On-Demand feature is as easy as toggling on an option. Note that the feature won’t permanently delete any files on your PC; it’ll simply remove the local copies of your files.
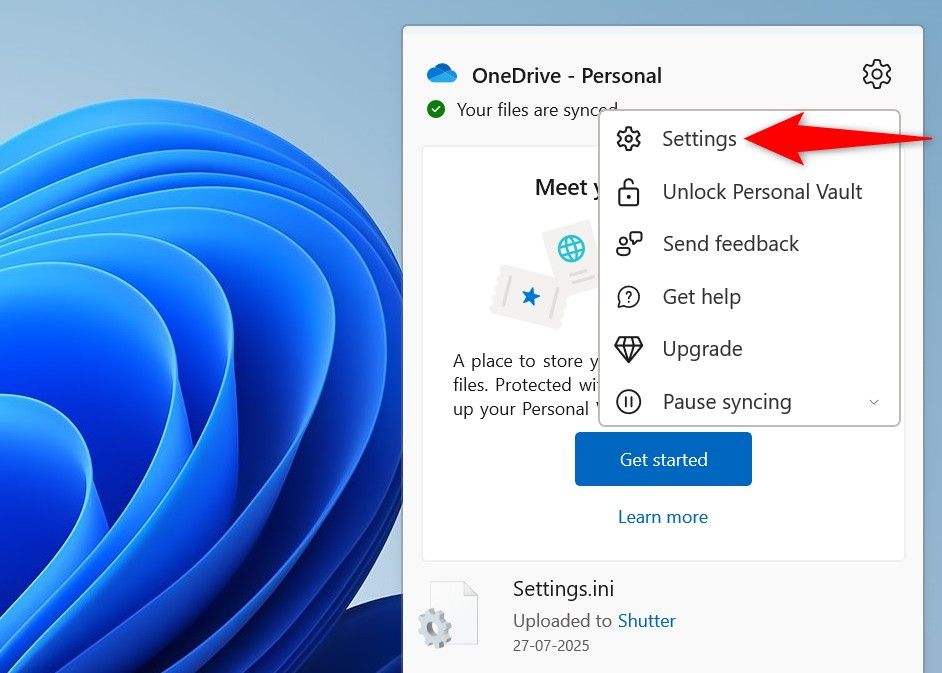
To start, click the OneDrive icon in your PC’s system tray. In the top-right corner, click the gear icon and choose “Settings.”
If you don’t see the OneDrive icon in your system tray, access Windows Search (press Windows+S), type OneDrive, and launch the app.
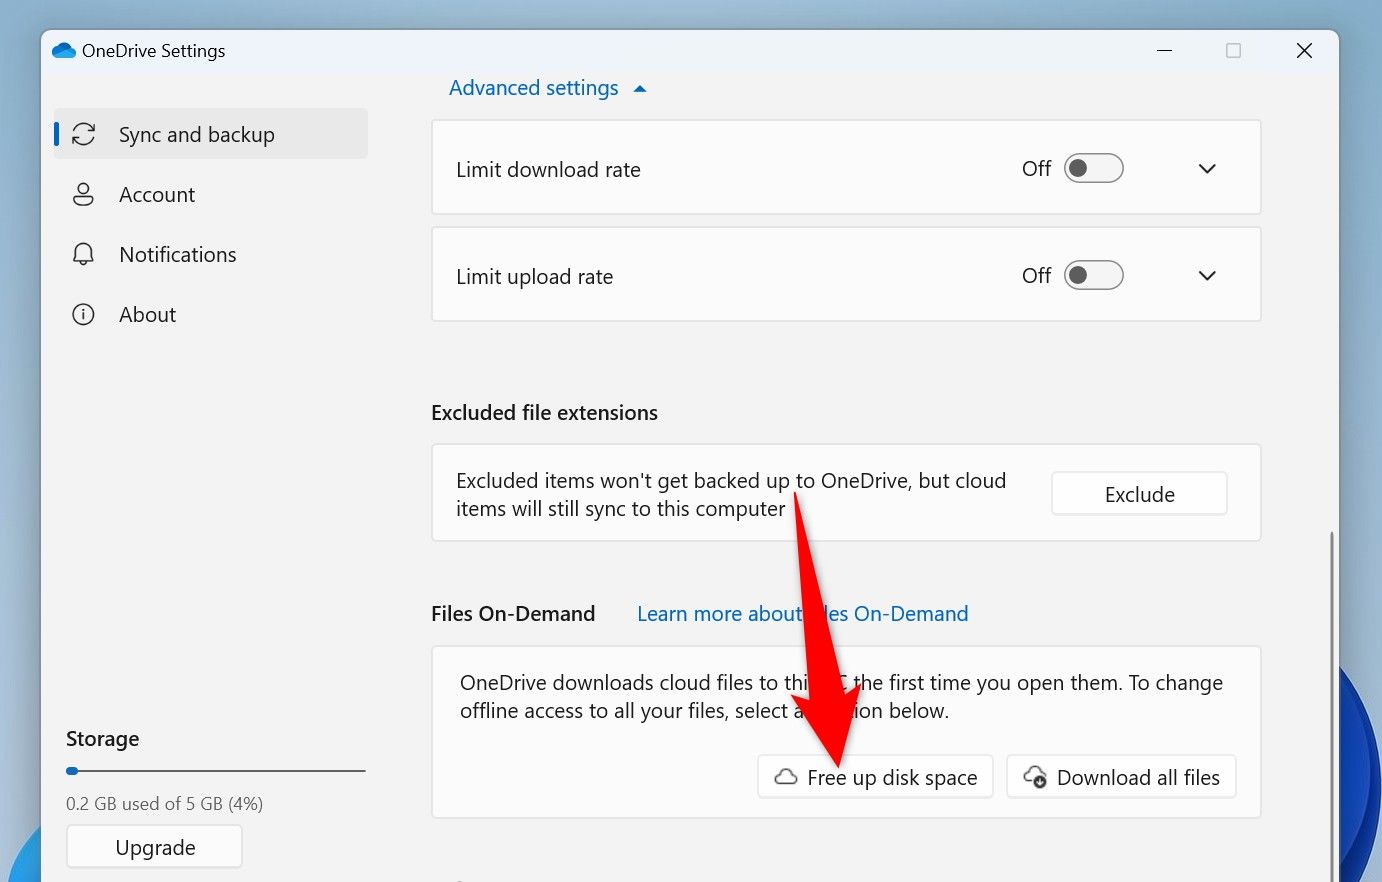
On the OneDrive Settings window, from the left sidebar, select “Sync and Backup.” On the right pane, at the bottom, click “Advanced Settings.” This expands a few more options for you. In the Files On-Demand section, choose “Free Up Disk Space.”
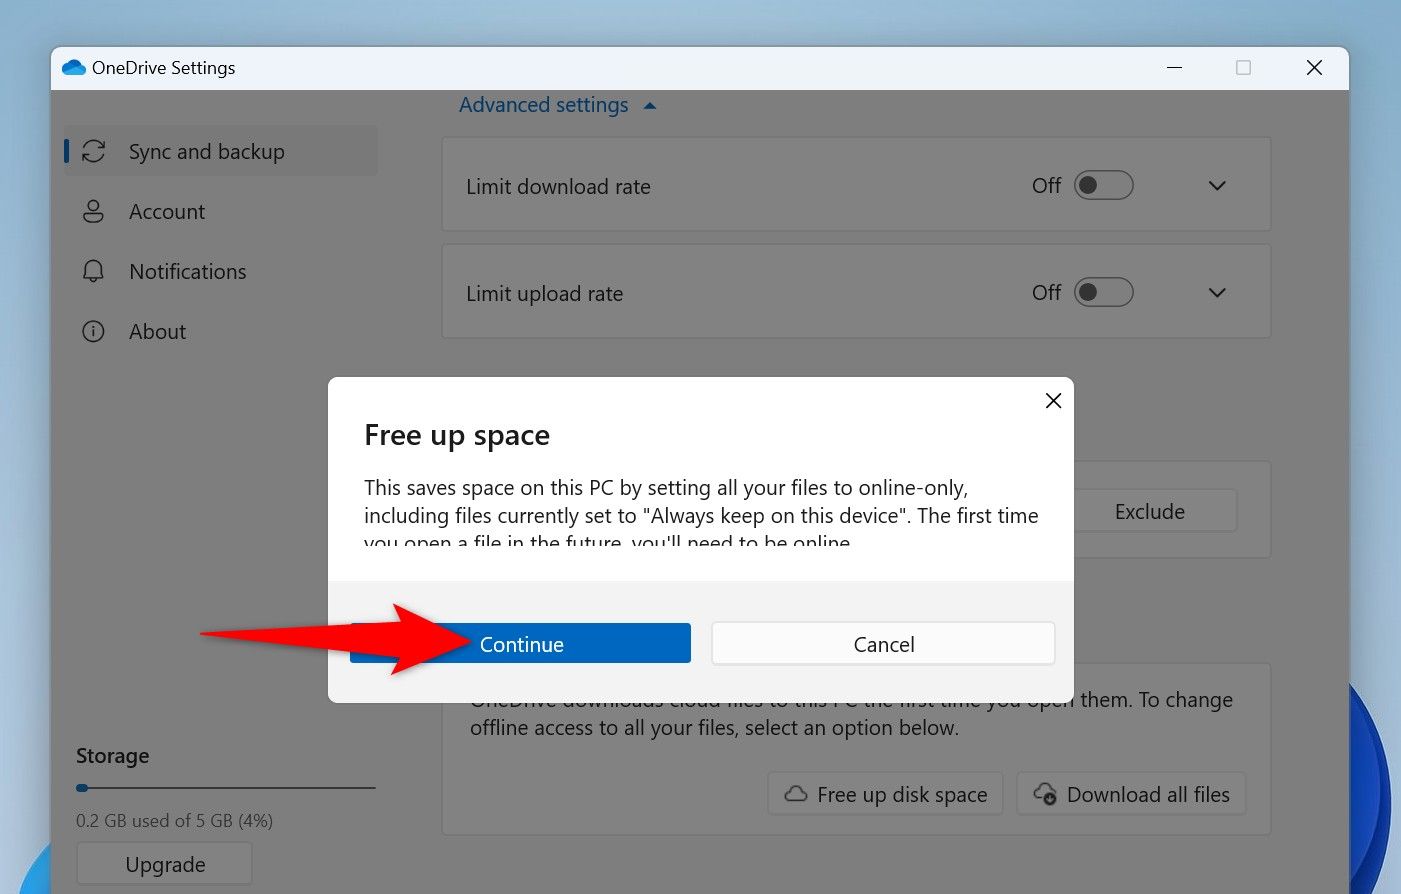
You’ll get a Free Up Space prompt. Here, choose “Continue” to remove local copies of your OneDrive files.
You’re done. The next time you try to access a OneDrive file, the app will download that file for you from the cloud.
You Can Make Specific Files Cloud-Only if You Want
If you don’t want to remove local copies of all your files, you can make chosen files, such as large audio and video files, cloud-only. This way the files you access frequently are always available offline and the ones you access seldomly are only served when demanded.
To do that, click the OneDrive icon in your system tray and choose “Open Folder.” You’ll see your OneDrive files in a File Explorer window.
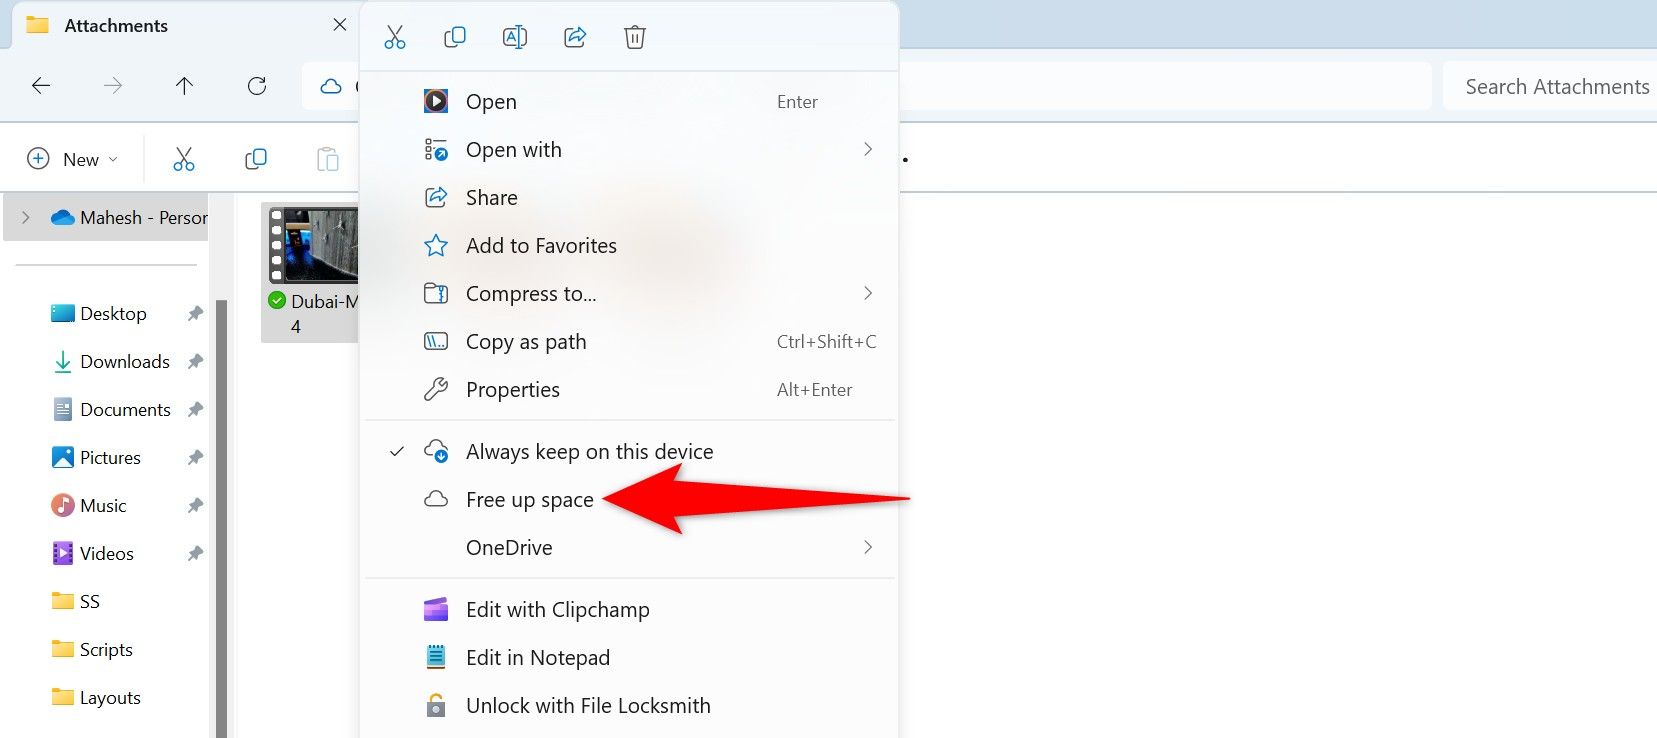
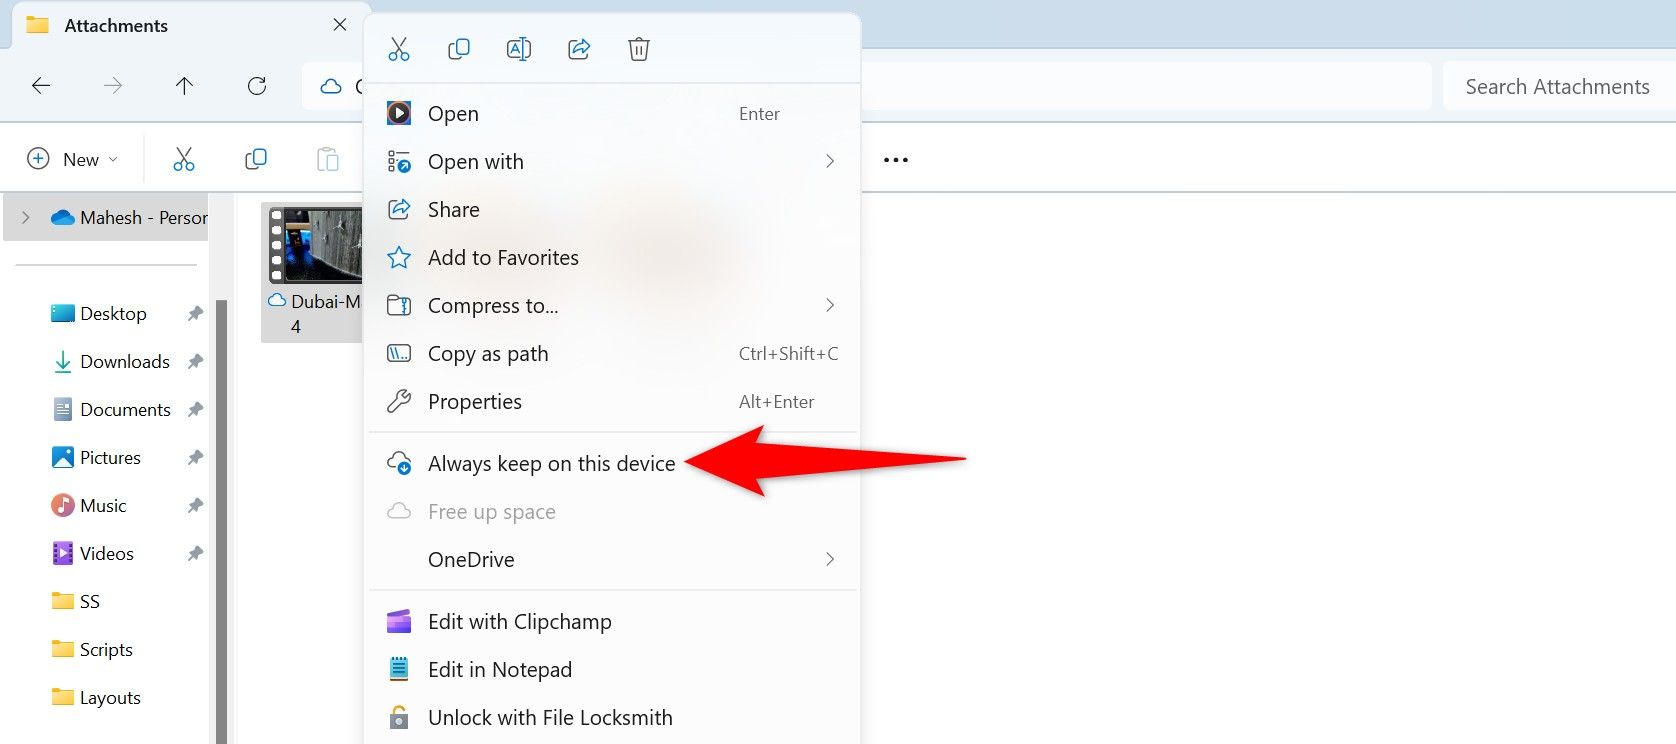
Find the file you want to remove from your local storage and only keep on the cloud. Right-click that file and choose “Free Up Space.” OneDrive will remove this file from your PC.
If you want to make a file always available offline on your PC, right-click that file and choose “Always Keep On This Device.” This way, OneDrive won’t make this file cloud-only.
Here’s How You Know Which File Is Local and Which One Is Cloud-Only
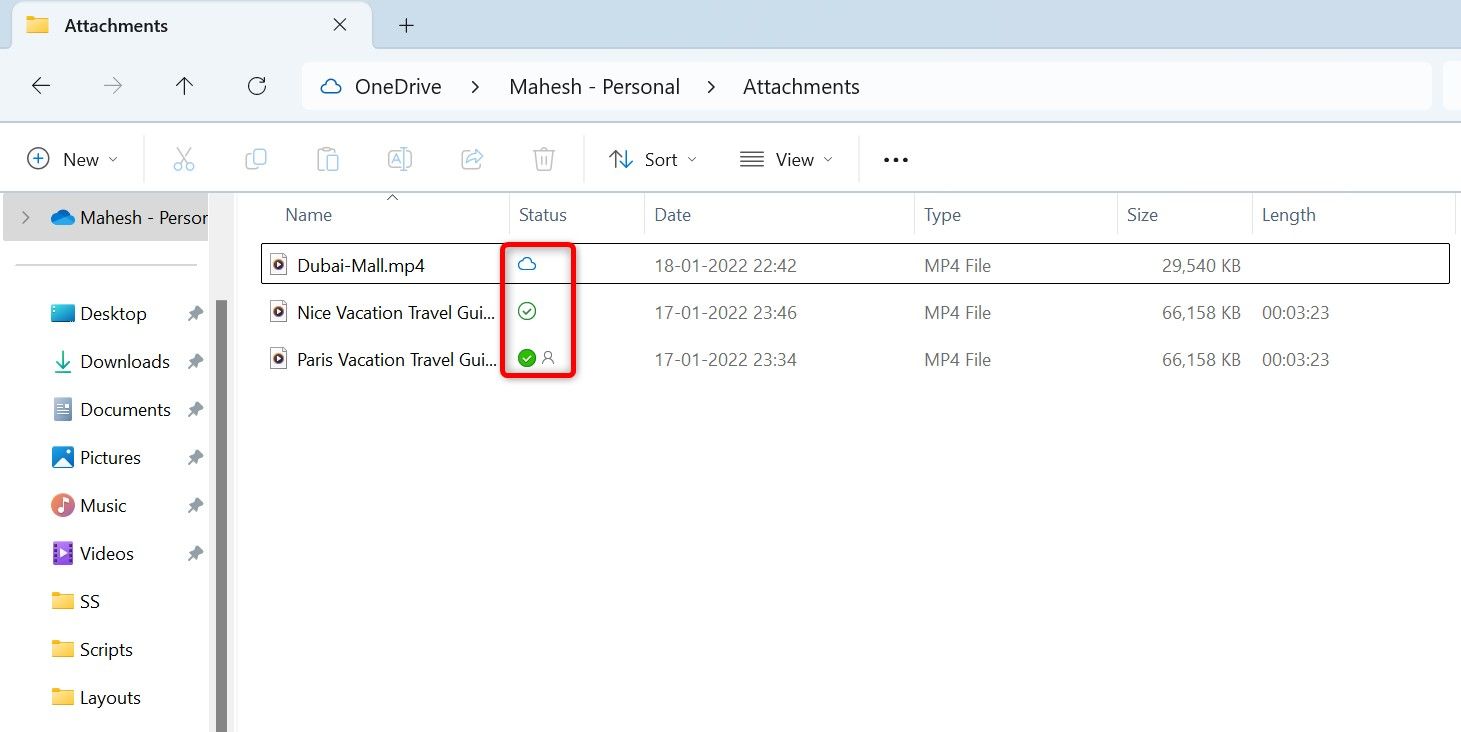
There’s actually a way to check whether a file is local or cloud-only in a OneDrive File Explorer window. Next to each file, you’ll see one of three icons. Here’s what each icon means:
- Cloud icon: If you see a cloud icon next to a file, it means the file is cloud-only. This file is not locally stored on your PC. When you try to open this file, OneDrive will first download the file from the cloud. Note that you can’t access this file without internet access.
- Hollow checkmark icon: If you see a hollow checkmark icon next to a file, it means the file is available locally and you can access it. However, OneDrive will make this file cloud-only after some time.
- Solid checkmark icon: If you see a solid checkmark icon next to a file, it means the file is fully available locally on your PC’s storage. You don’t need internet access to access this file.
Review Your Windows 11 PC’s Disk Usage
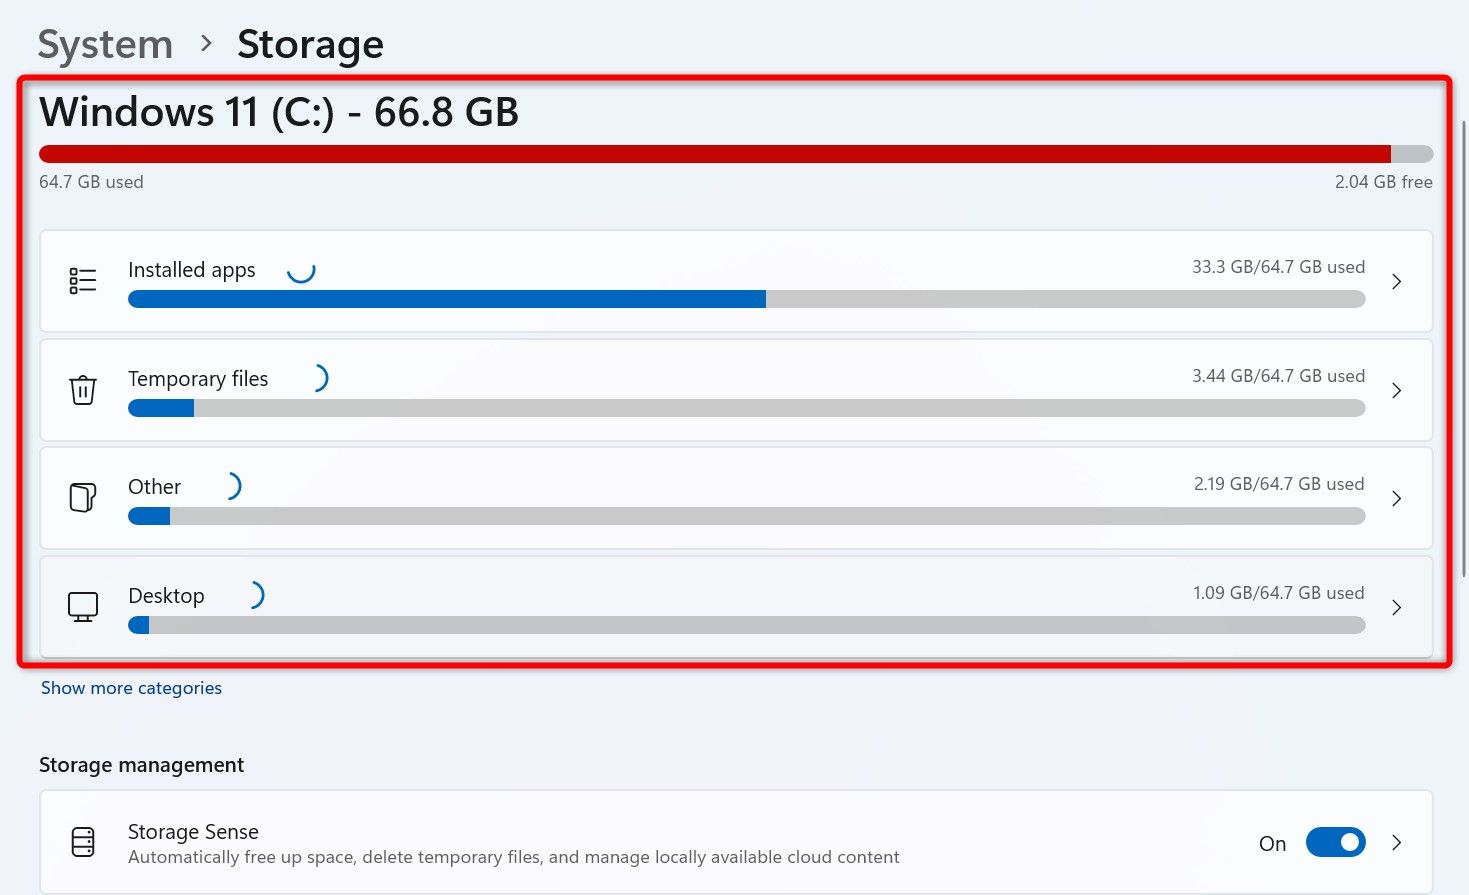
After enabling OneDrive’s Files On-Demand feature, you’ll want to see how much storage space you’ve reclaimed. Here’s how you can do that.
Launch the Settings app by pressing Windows+i. From the left sidebar, choose “System.” On the right pane, select “Storage.” You’ll now see the used as well as the available storage space on your machine.
You can get Windows 11 to automate the cleanup of unwanted files by turning on the “Storage Sense” feature. This option is available on the same page you are on.
And that’s how I reclaimed a huge amount of storage space without deleting any files on my Windows 11 PC. How much space were you able to reclaim? Let me know.
