Clipchamp is the default video editor on Windows 11, but if all you need is a quick trim, a simple split, or to add some music to your clips, the classic editor inside the Photos Legacy app is a far better option.
How to Use the Video Editor in the Photos Legacy App
By default, Windows 11 comes with the revamped Photos app that includes handy features like text recognition, iCloud syncing, and even a generative erase tool. However, the new app doesn’t include the video editor that was part of the older Photos experience.
Instead, Microsoft now pushes Clipchamp for video editing, which is fine if you’re into templates and want online syncing. But if you preferred the simplicity of the old editor, the good news is you can still get it back.
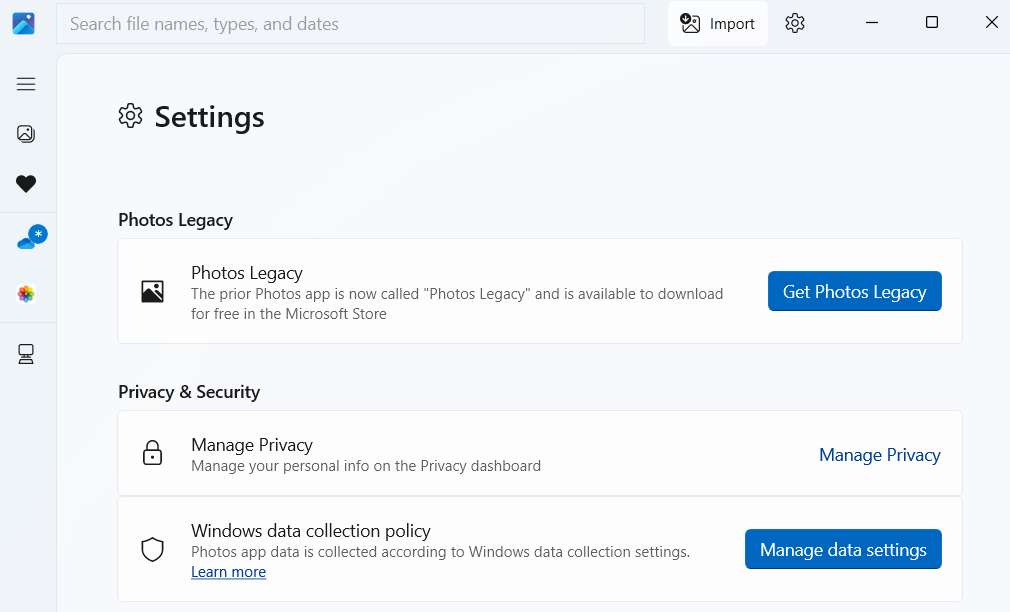
First, open the new Photos app on your Windows 11 PC. Click the gear-shaped icon in the top-right corner to open the Settings menu. Scroll down until you see an option that says Get Photos Legacy. Click it, and it’ll take you straight to the Microsoft Store where you can download the older version of the Photos app.
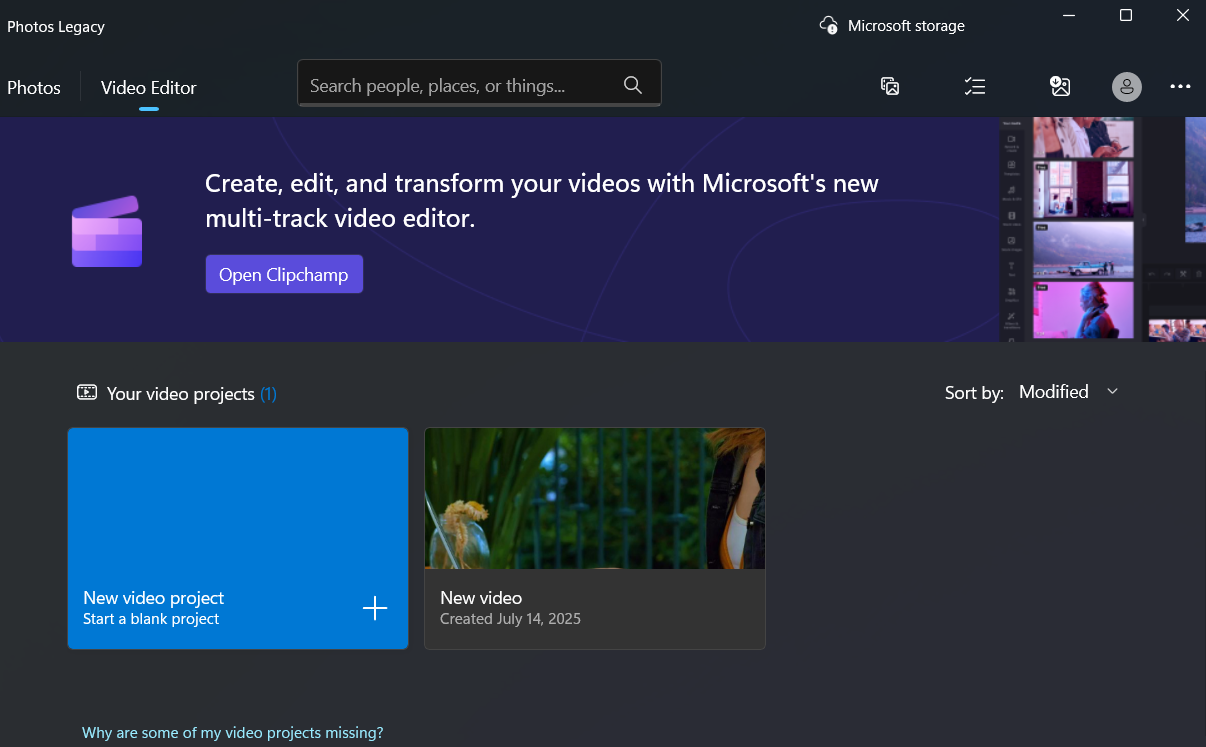
Open the Photos Legacy app and switch to the Video Editor tab. Then click New video project, give your project a name, and hit OK. Once you’re inside the old-school editor, click Add to import the video clips and photos you want to work with.
6
Trim, Split, and Rotate a Video
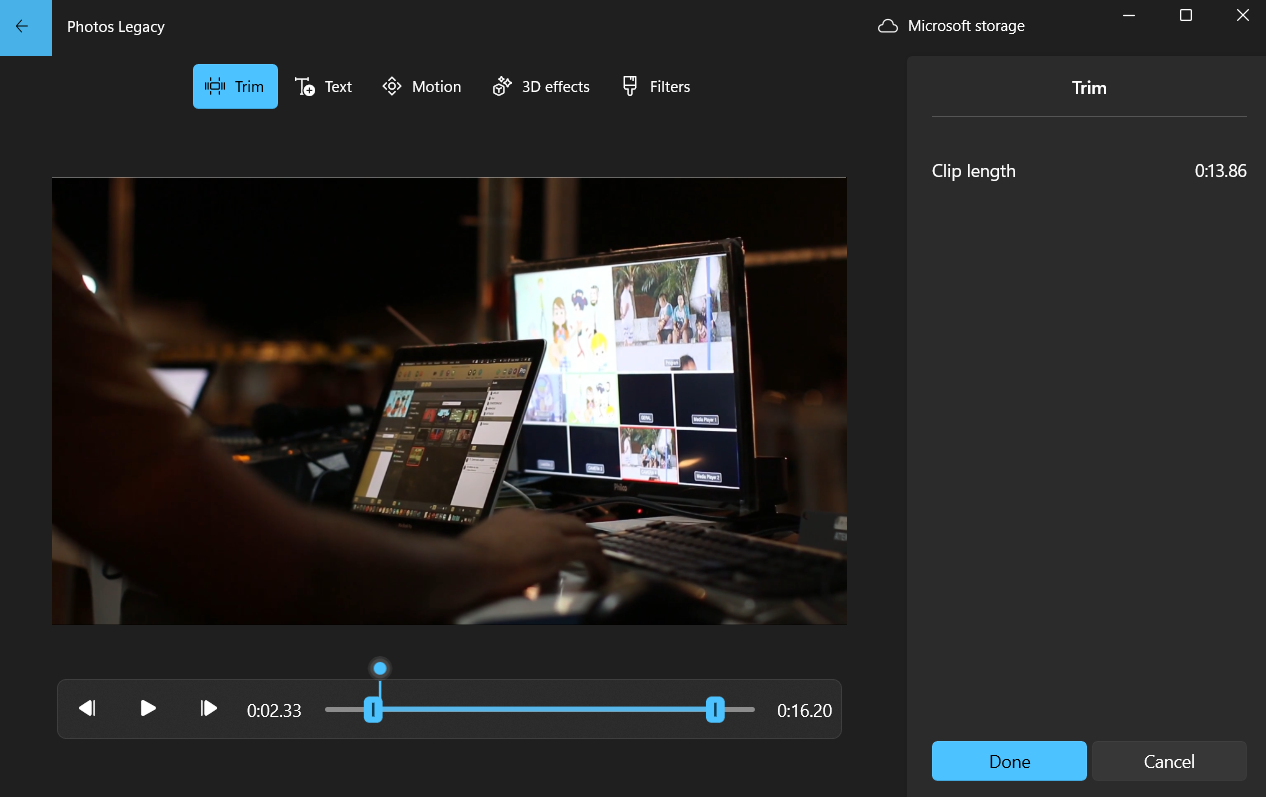
The first thing you’ll likely want to do when editing a video is trim out the parts you don’t need. Once you’ve added your clips to the timeline, select a video, and use the options above to trim, split, and rotate clips.
To trim a clip, use the two sliders at either end of the video timeline. Drag them inward to keep only the part of the video you actually want. Similarly, to split a clip, move the blue playhead to the exact point where you want to make the cut, then click Done.
If your clip is sideways or upside down, you can use the Ctrl + R shortcut to rotate it by 90 degrees. You can press it multiple times to get the right orientation. And if you’re working with clips that have different resolutions, it’s possible to get rid of those ugly black bars. Click the Crop icon to either shrink the video to fit or zoom in and crop out the edges.
Finally, if you want to change the aspect ratio of the entire project, click the three-dot icon in the top right corner and choose your preferred option. Once you’re done with the basic edits, you can drag the clips on the timeline and arrange them in whatever order you like.
5
Add Text in Video
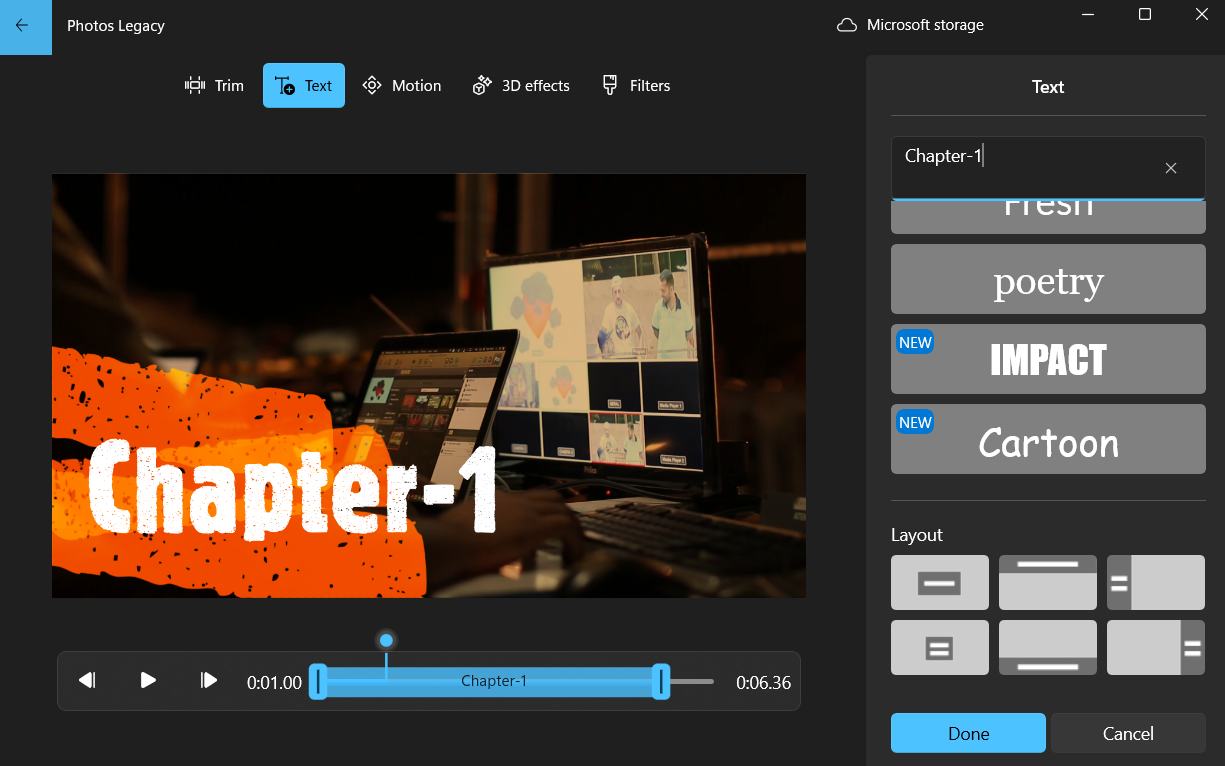
If your video needs some text, like subtitles or some labels for clarity, it’s easy to add. Select the clip where you want your text to appear, then click the Text button in the toolbar.
You get to choose from a range of text styles. There aren’t endless options, but you’ll find a good mix of both minimal and stylish options. Pick one that fits your video’s vibe, then head to the Layout tab to decide where the text should sit.
There’s also a slider on the left that lets you control exactly how long the text stays on screen. Once you’re happy with everything, click Done to save changes.
4
Adjust Playback Speed
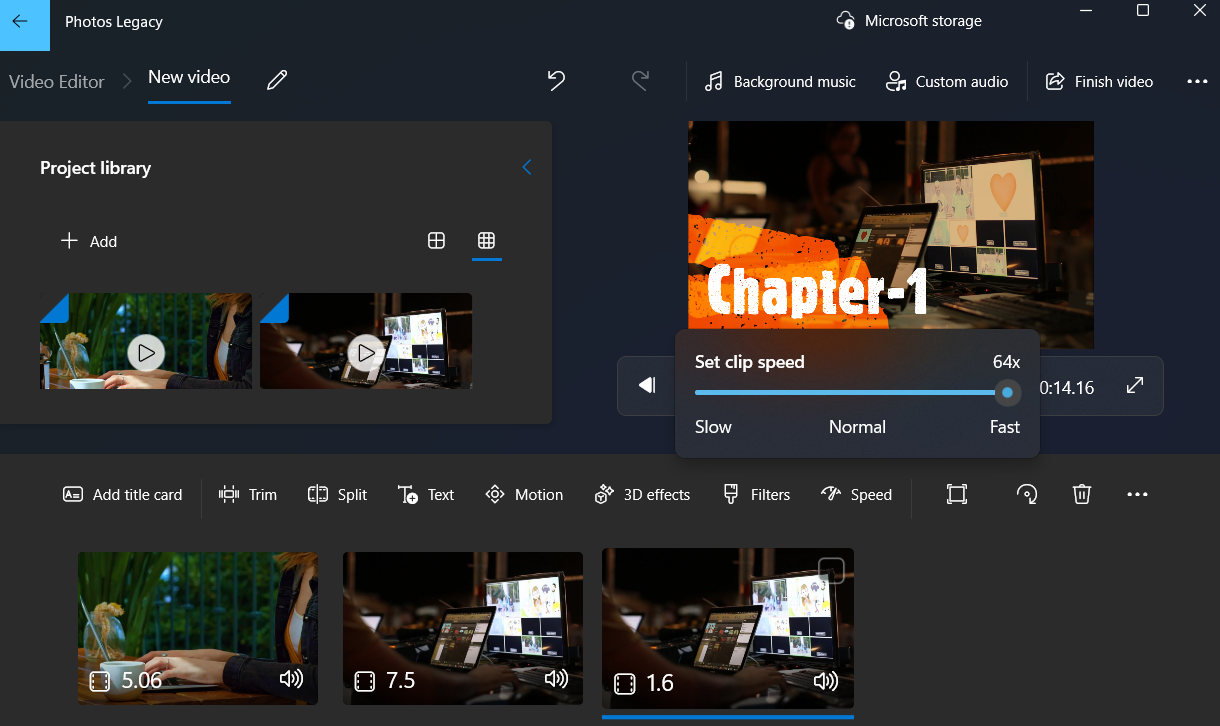
If a part of your video needs to be slowed down or sped up—maybe the action is unfolding too quickly, or it’s dragging and needs a little boost—you can easily adjust the playback speed.
Select the clip you want to adjust in the timeline and click the Speed button in the toolbar above. You can then use the slider that pops up to tweak the pace exactly how you want. You can ramp up the tempo from 1x to 1.25x, 1.5x, and all the way up to a lightning-fast 64x. If you want to slow things down, use the slider to drop the speed to 0.8x, 0.67x, 0.5x, or as slow as 0.02x.
3
Insert Motion, Filters, and 3D Effects
Video editing isn’t just about trimming clips, adding text, and getting the order right. If you want to add a bit more flair, the Photos app video editor includes options for camera motions, filters, and even 3D effects.
Let’s start with Motion. This is especially useful if your video has any static images or want to give video clips a dynamic feel. After selecting a clip, click on Motion, and you’ll see a handful of preset moves like zoom, pan left, tilt up, and more.
Clicking the Filters option gives you a set of Instagram- or TikTok-style presets to quickly change the overall tone and mood of your footage. There’s no option to adjust the filter intensity, though, so what you see is what you get.
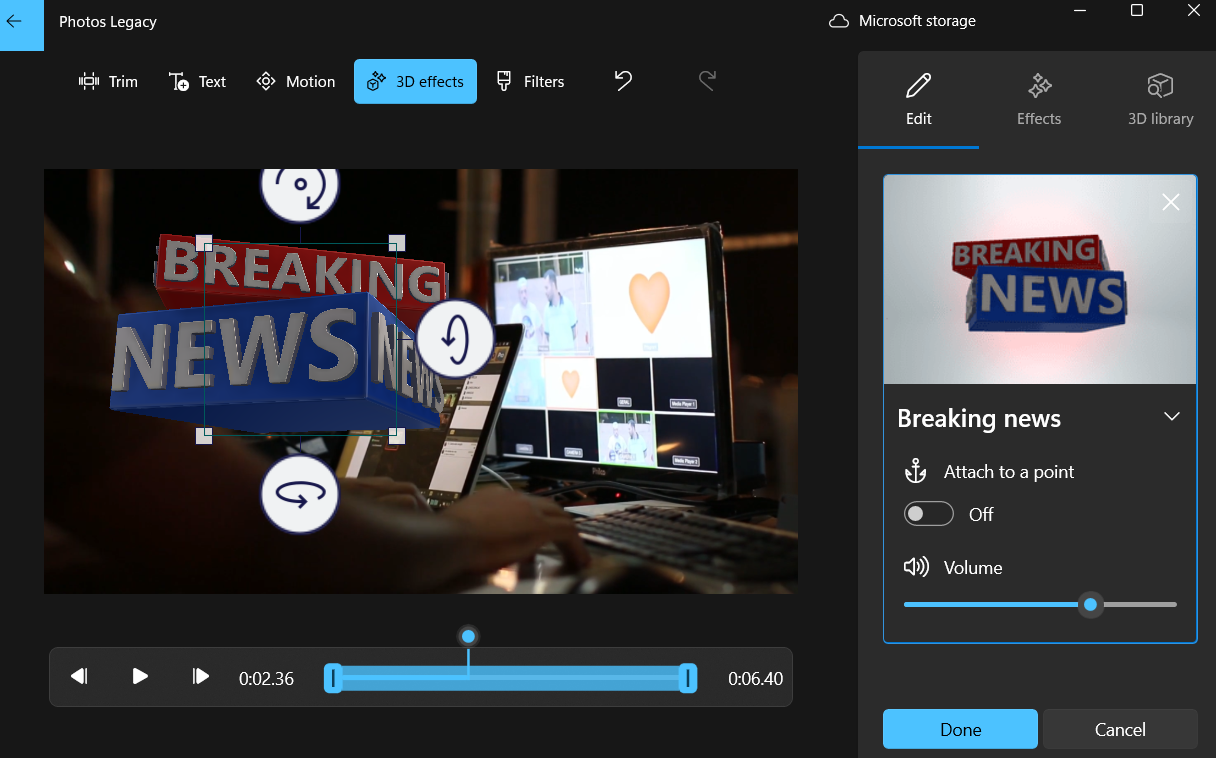
With 3D Effects, you can add fun elements like lightning bolts, explosions, butterflies, floating bubbles, and more. Once you pick an effect, you can drag it around the screen, tilt and rotate it, and use a slider to control how long it stays on screen. These effects also come with their own sound, which adds realism. You can mute those sounds if they interfere with your original audio.
2
Add Background Music
Adding the right background music to your video can make all the difference. Depending on what you’re editing, it might call for a soft instrumental, an upbeat pop track, or even just a simple voiceover.
To add music from the built-in library, click the Background music button at the top of the editor. You’ll see a list of music tracks that you can scroll through. Each one has a little play icon beside it, so you can preview them before adding. Once you find something that fits your video’s mood, set the volume level using the slider, and click Done to apply it.
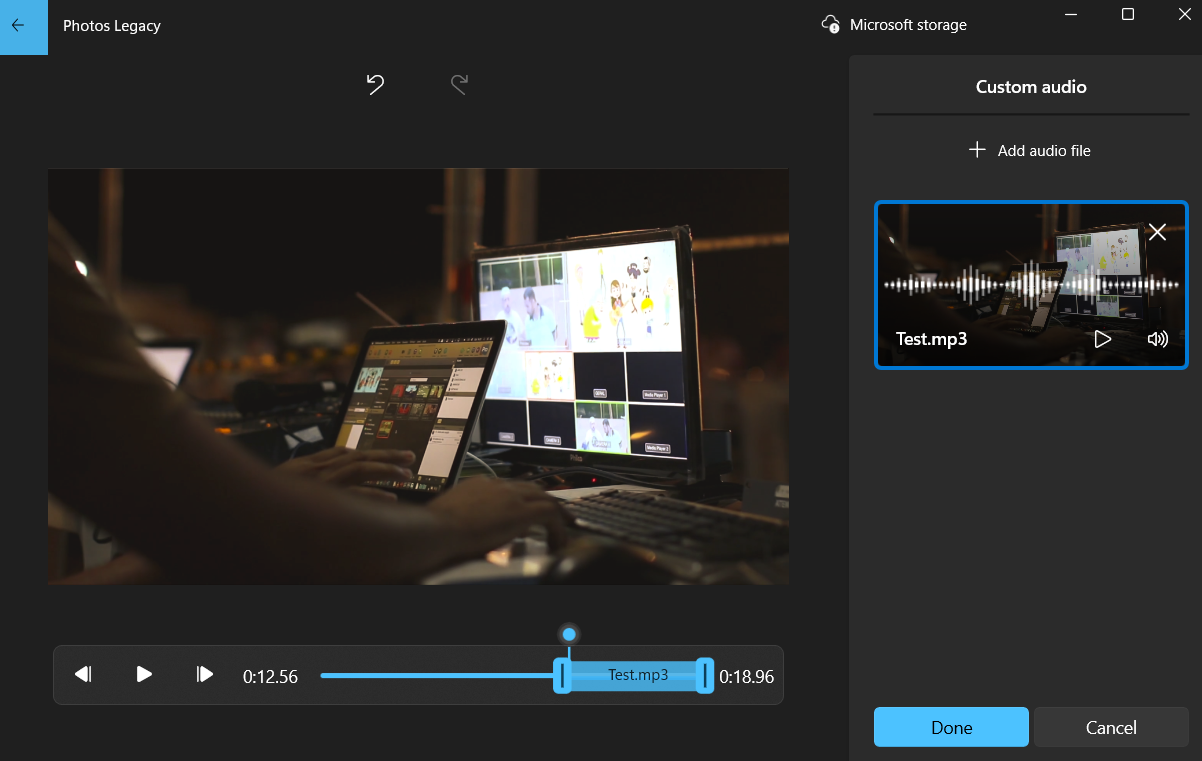
If you already have the audio or song you want to use saved on your PC, click Custom audio at the top instead. Then hit Add audio file, choose your song or sound clip, and it’ll show up in the timeline. You can drag the sliders to choose exactly when you want the audio to start and stop. Once you’re happy with it, click Done.
You can add multiple tracks too, but the process isn’t as seamless as in more advanced video editing apps, so it’s not ideal for layering sound effects or handling more complex audio setups.
1
Adding a Title Card and Exporting the Video
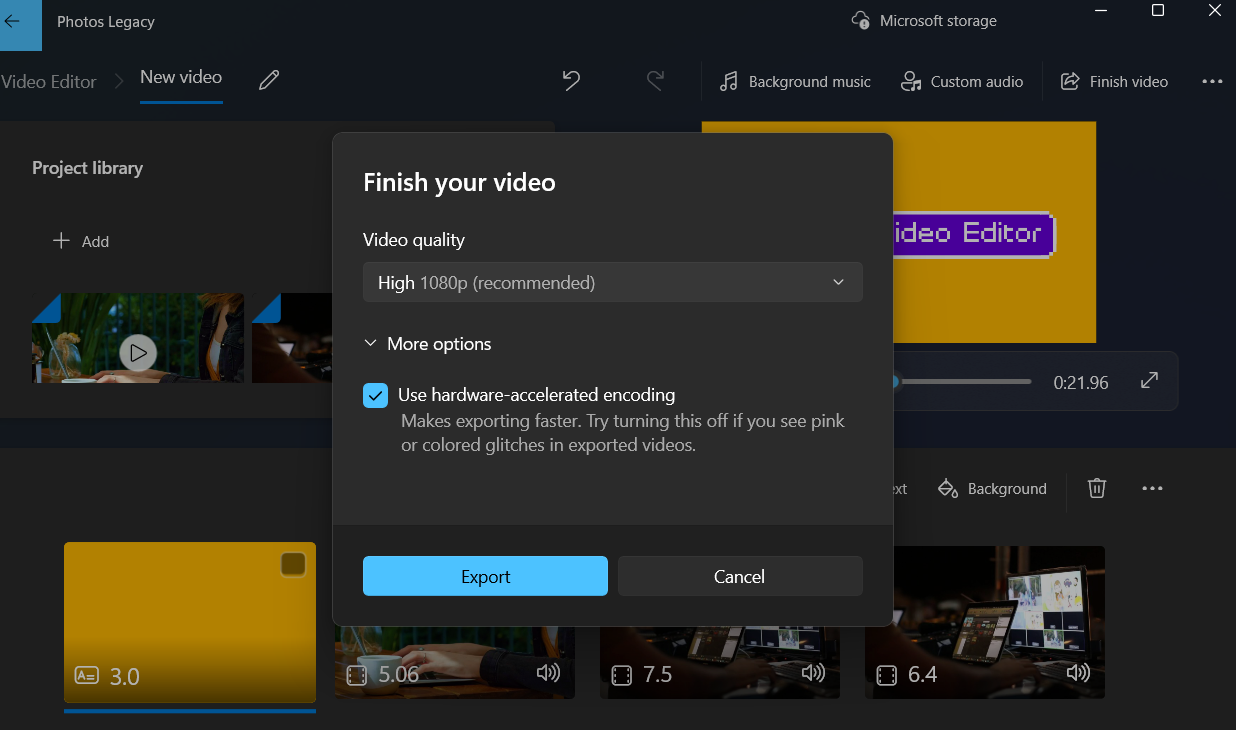
This might not be necessary for every video, but if yours needs an intro, outro, or both, click the Add title card option. You can then customize it with your own text, change the background, and decide exactly how long it stays on screen.
Once everything looks good, and you’ve made all your edits, it’s time to save the video. Click the Finish video button in the top-right corner, choose your video resolution, and hit Export.
There’s no shortage of good video editing apps for Windows, but most are geared toward professionals or overloaded with features the average user rarely needs. If you’re looking for a no-fuss editor that works offline, requires no login, and has virtually no learning curve, the Photos Legacy app is a solid pick. It’s quick, simple, and gets the job done without overwhelming you.
